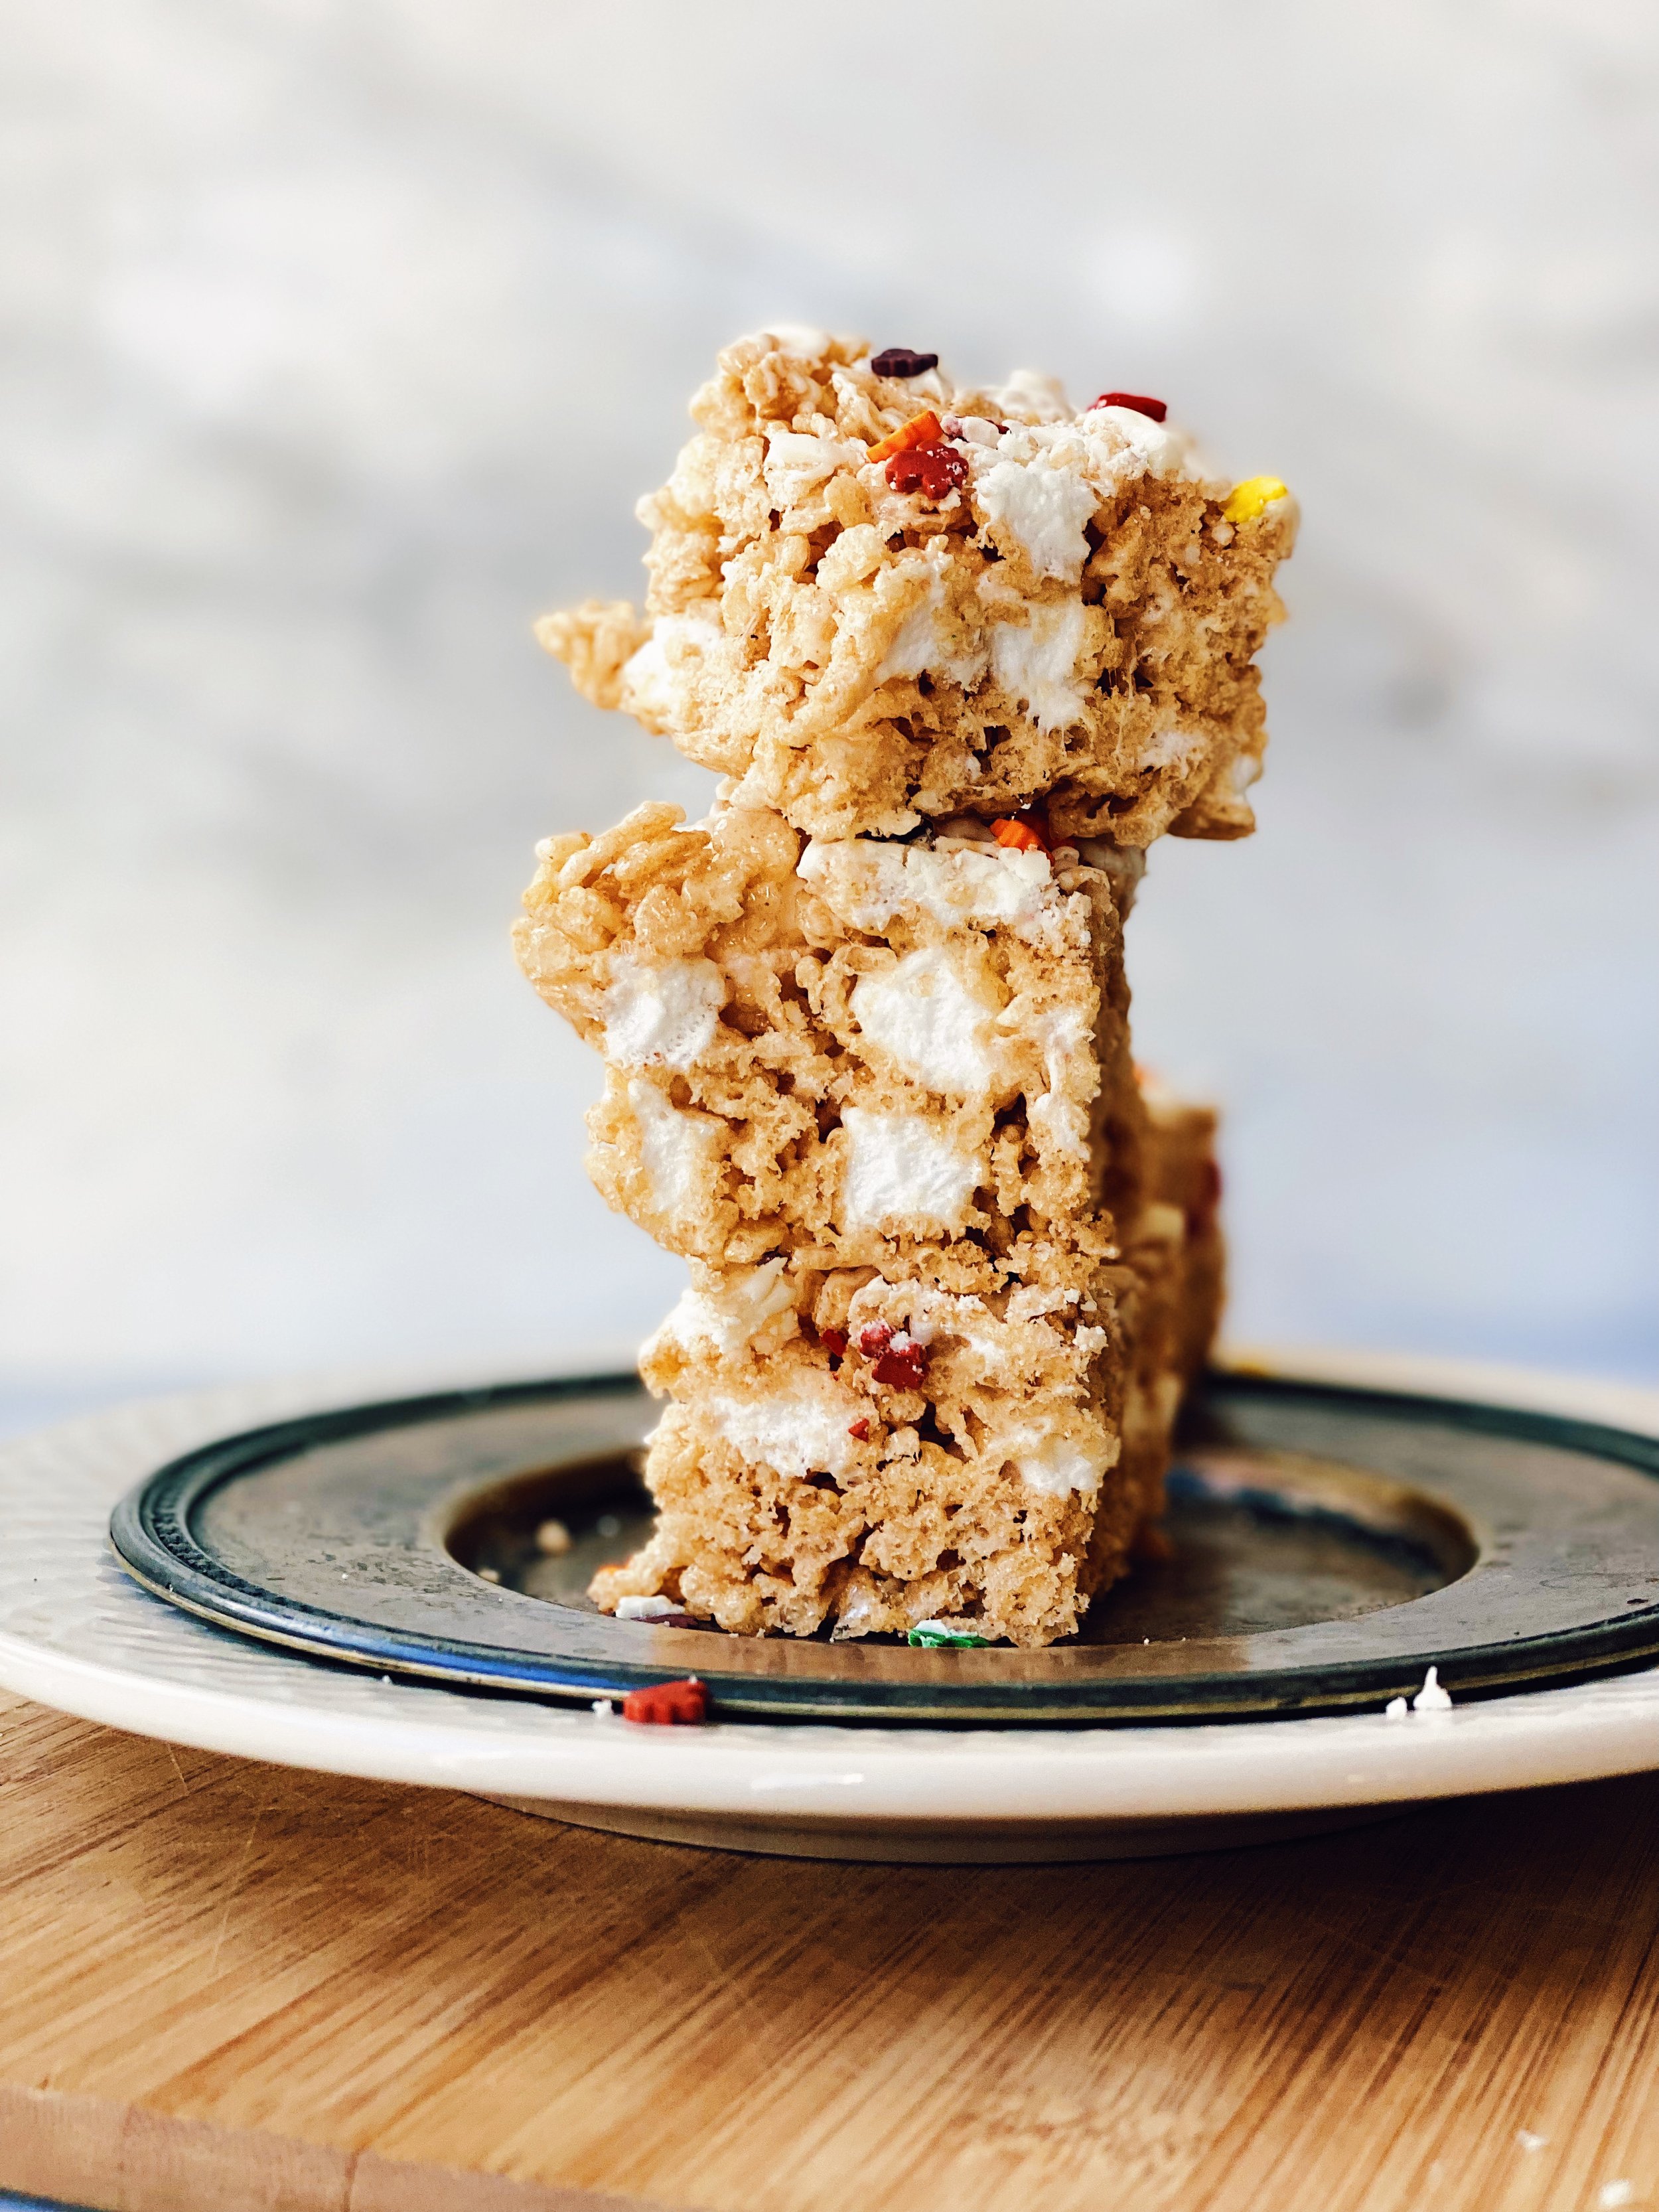
Rice Krispie treats are such a classic recipe, you really cannot mess it up. But you can definitely jazz it up a bit, and honestly…I can’t go back. Trust me on this friends.
Yield: 12-18
Author: Ari Morasco
Brown Butter White Chocolate Rice Krispies
Once you start making rice krispie treats this way, I promise you it will be so hard to go back. The combo of brown butter mixed with soft chewy marhsmallows, a crunch from the cereal, and a sweet hint of white chocolate...amazing!
Prep time: 2 MinCook time: 10 MinTotal time: 12 Min
Ingredients
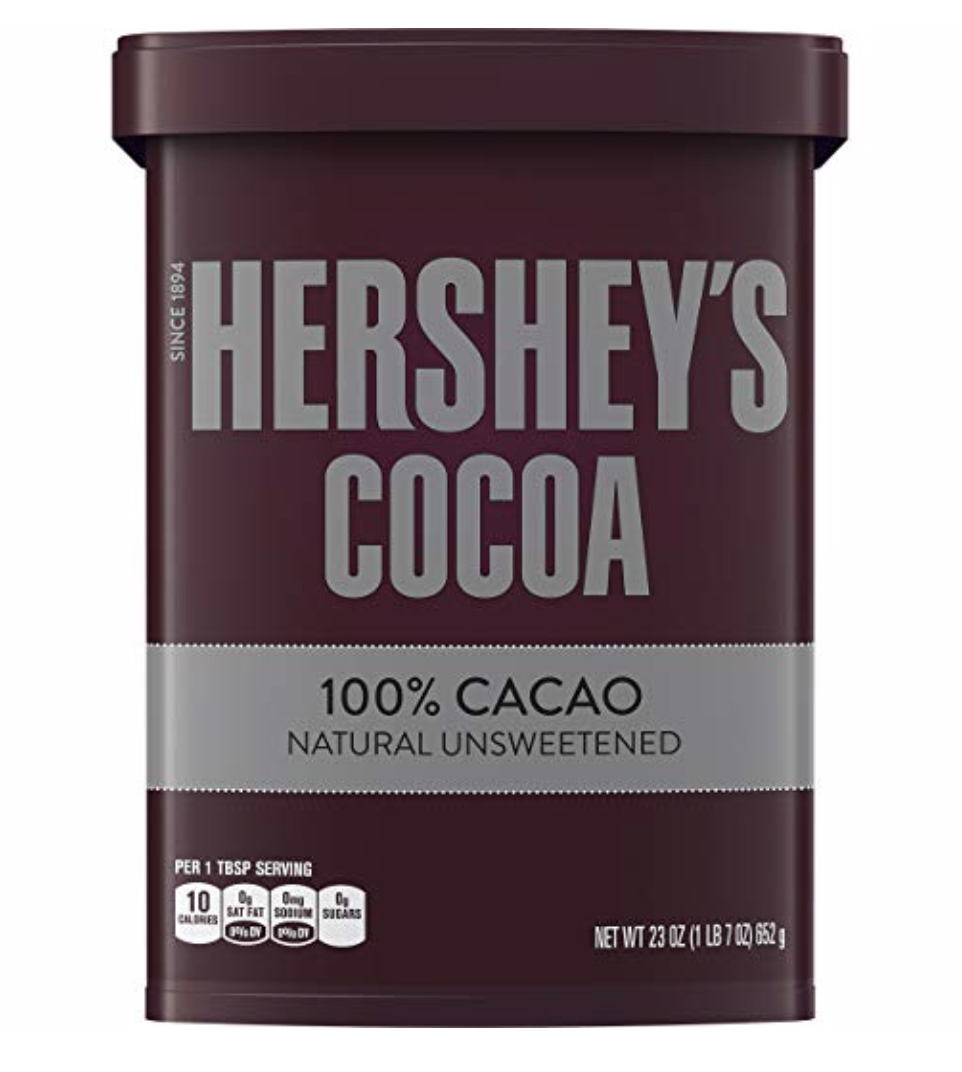
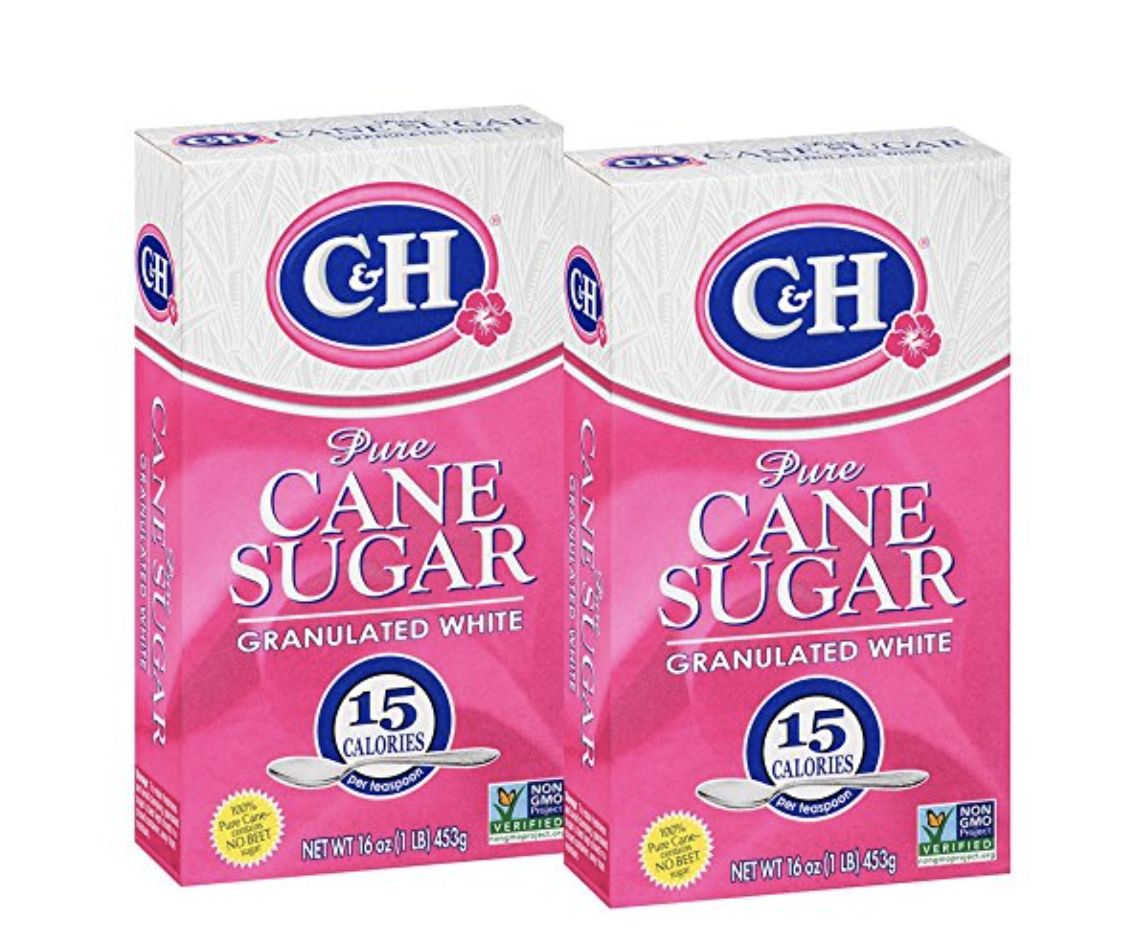
Rice Krispies
1 stick salted butter, or 1/2 cup
1 - 10 ounce bag marshmallows, plus 1 cup
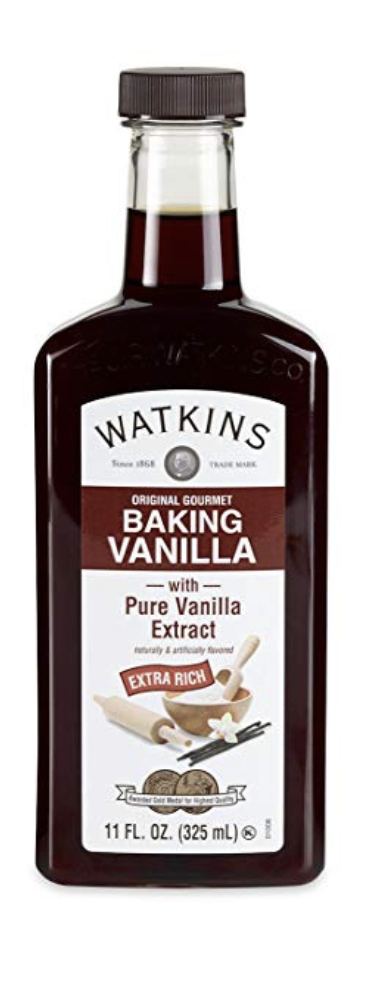
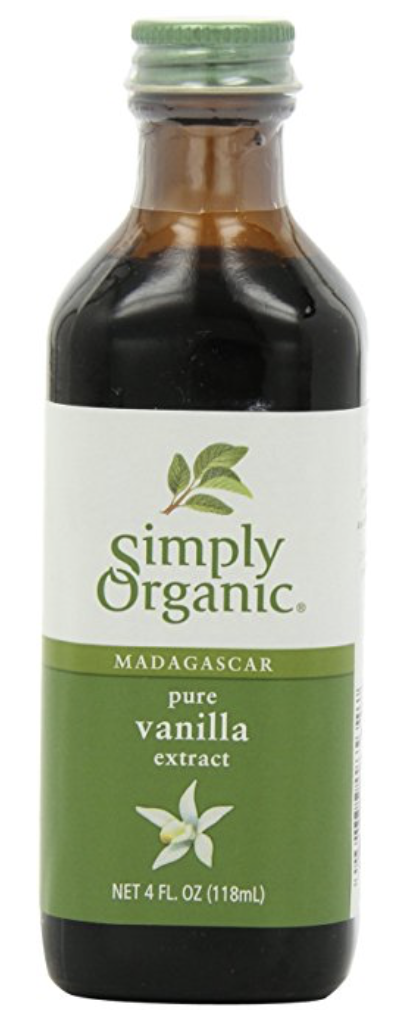
1 Tb. vanilla
6 cups puffed rice cereal, can use Kellogg brand
1/2 cup chopped white chocolate or chocolate chips
Instructions
Reserve 2 cups of your marshmallows and set aside.
Grease a 9x13 pan and then line with parchment paper. Set aside.
In a shallow pan add your butter. Heat on medium and melt butter, then continually cook while constantly stiring, or stiring often.
The butter will start to bubble, then froth, and eventually start to turn a deep caramel bown color. Once it reaches that level, remove from heat.
Pour butter into a large pot and heat on medium. Add your marshmallows, not the 2 cups, and stir until melted. Then add your vanilla. Turn off heat.
Fold in rice krispies and then extra marshmallows.
Pour mixture into pan and gently press into pan.
Melt white chocolate and drizzle on top of treats. Let cool or dig in immediately for a melty goodness!
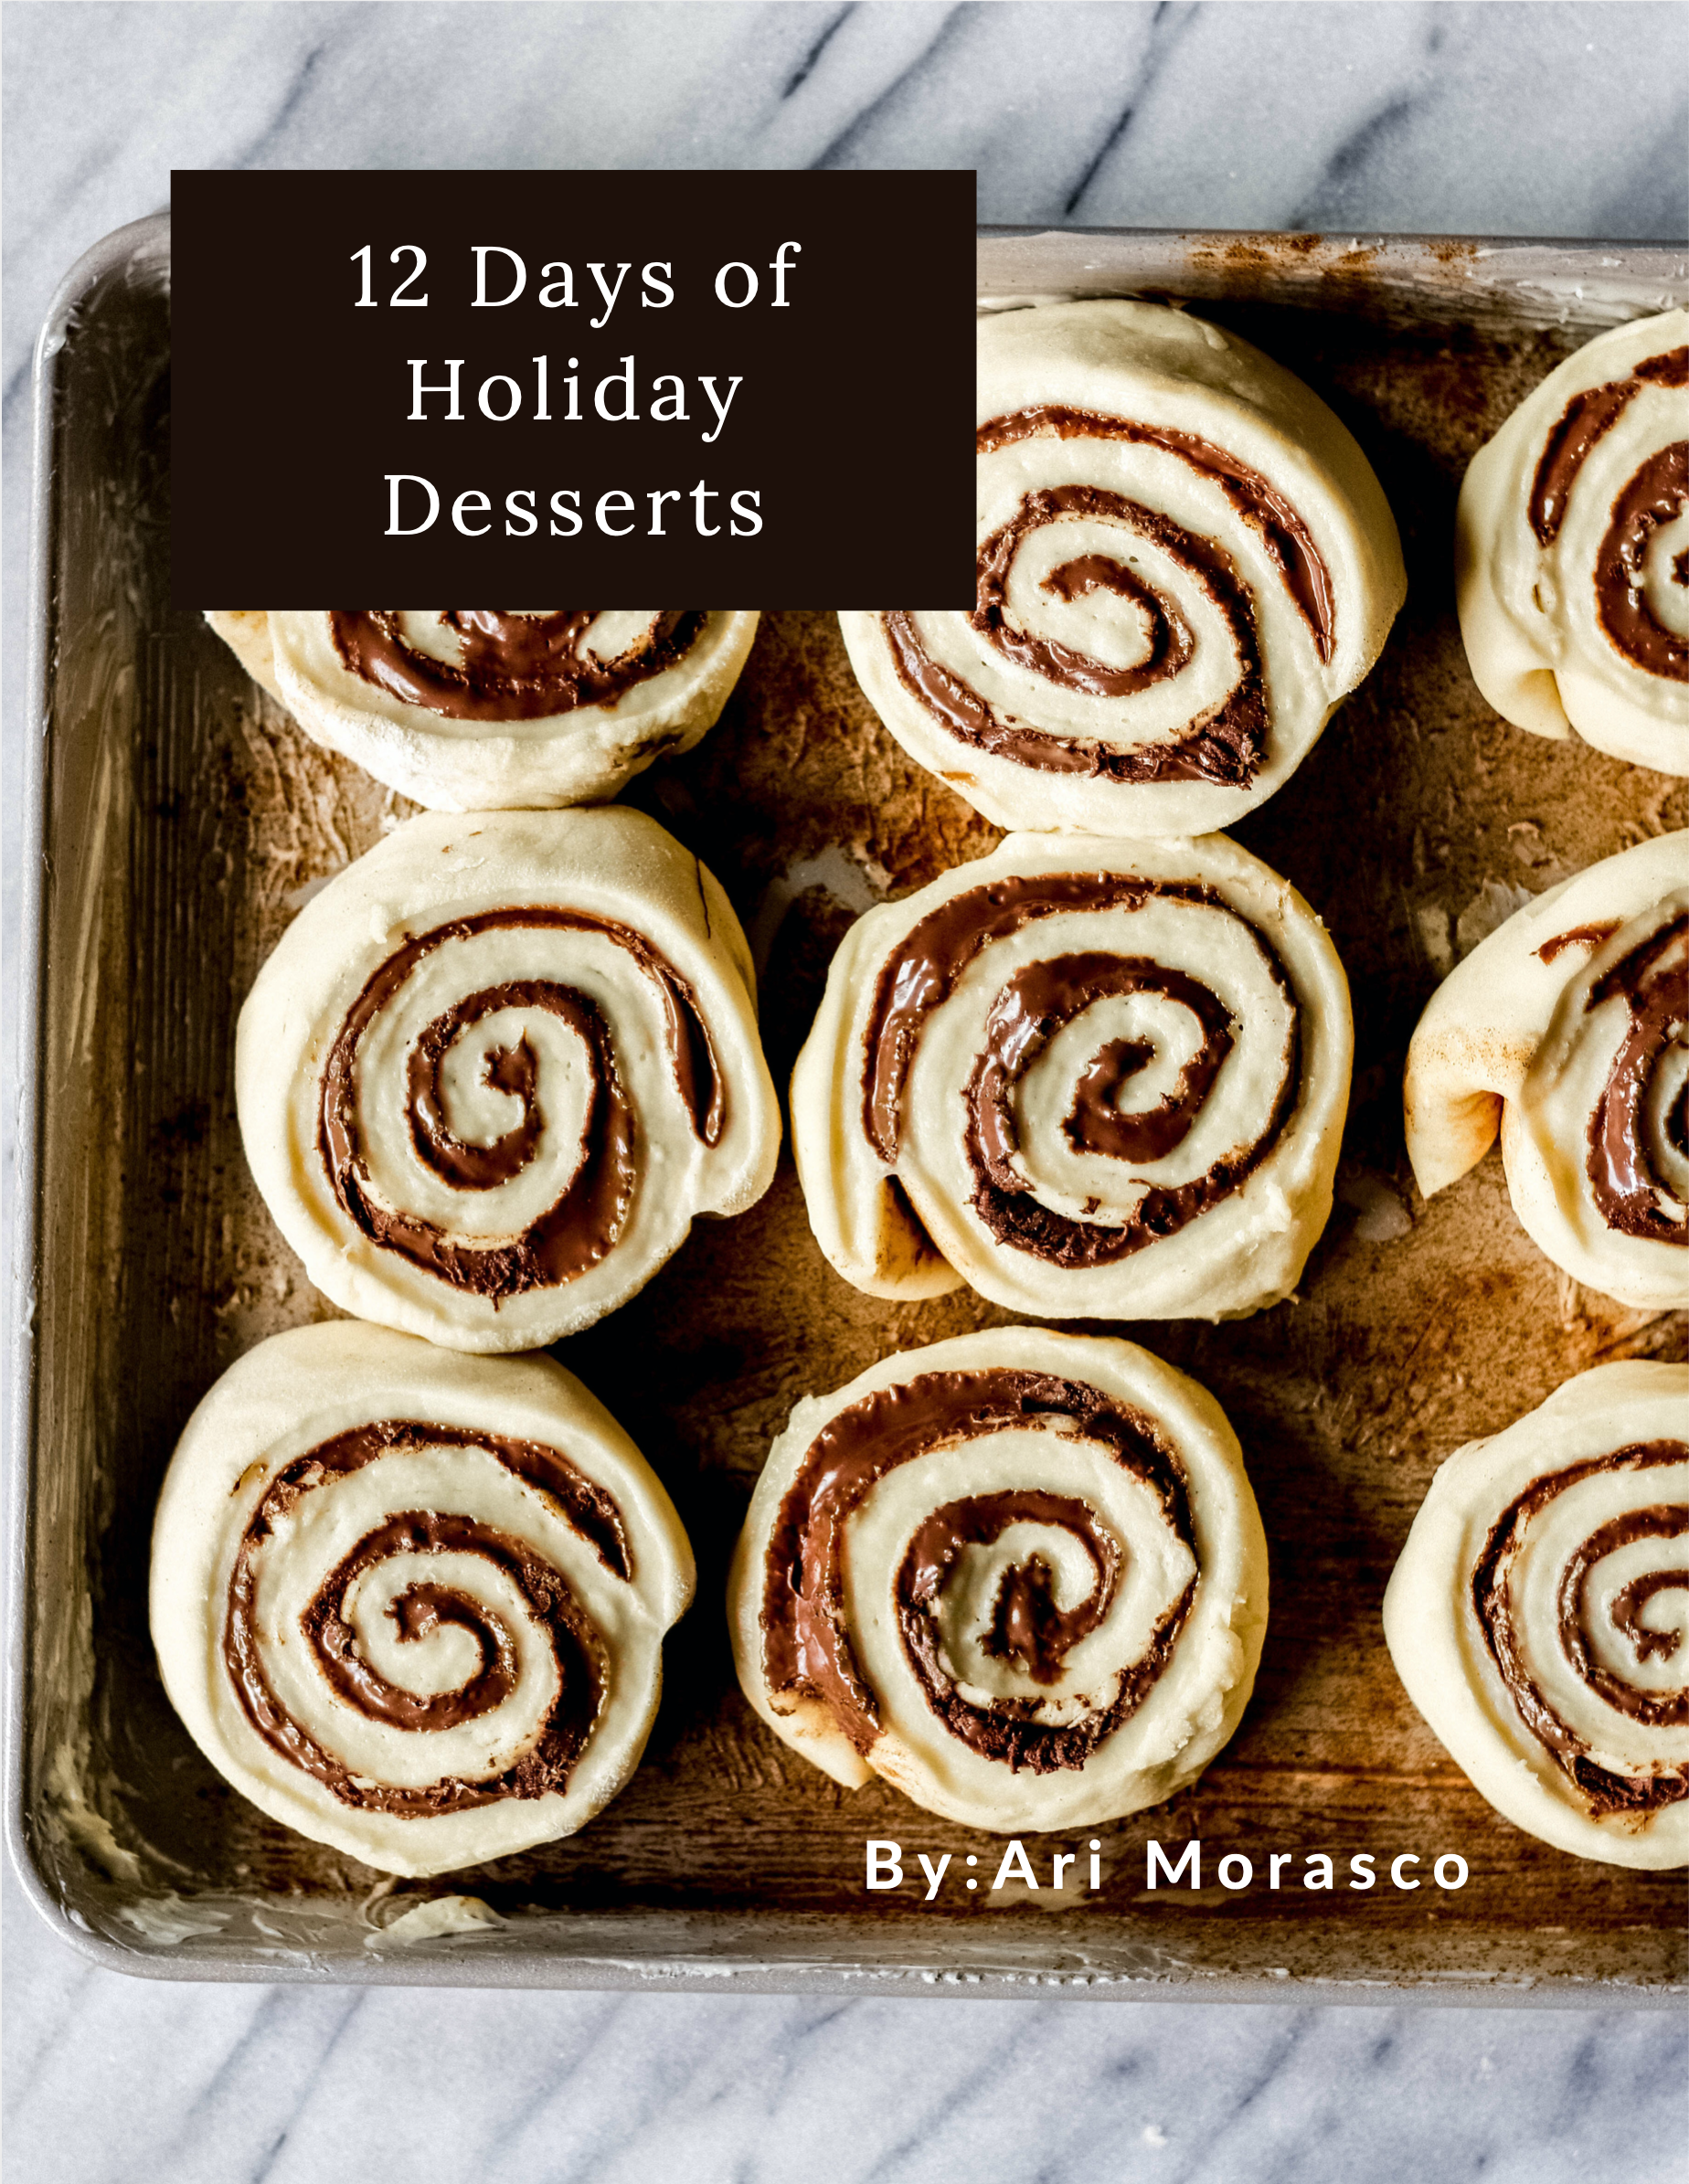
I am incredibly excited and proud to introduce to you my very first ebook! I can’t tell you how many hours and time went into creating this recipe book just for you! It’s filled with 12 days worth, plus some extra, holiday desserts that are easy, delicious, indulgent, crowd pleasing, and memorable!
The best part is that it’s only $7!! It’s worth so much more in my mind, but I want everyone to have to opportunity to have a collection of delicious recipes for the Holidays!
12 days worth of Holiday Desserts, plus a few extras! After owning my own baking and dessert catering company, plus being a food blogger for over 12 years, I’ve decided it’s time to share some of my most treasured dessert recipes with you! Perfect for any Holiday you celebrate this season!
Add to Cart
Thank you SO MUCH for your continued support! It means the world to my family and I!
For years I have made this ice cream for my family and they’ve all loved it! I knew It was about time to share this wonderful and delicious recipe with you! I hope you enjoy it as much as we have over the years!
Whisk sugar, flour, and salt into a bowl. Set aside.
Heat milk in a saucepan until scalding hot. Add in sugar mixture and stir on low until mixture has thickened, 10 minutes.
Add 1 TB. milk to beaten eggs and continue whisking in more TBs. of hot milk until the eggs are heated up enough so you can add them into the milk mixture. You don’t want scrambled eggs!
Whisk in the eggs to the milk and continue to cook for 1 minute. Turn off the heat and let the mixture cool COMPLETELY. Once it’s cool keep it in the fridge until ready to use. You want the mixture COLD before using.
Add mixture to the heavy cream and vanilla. Whisk together.
Add to an ice cream machine and follow the machines instructions.
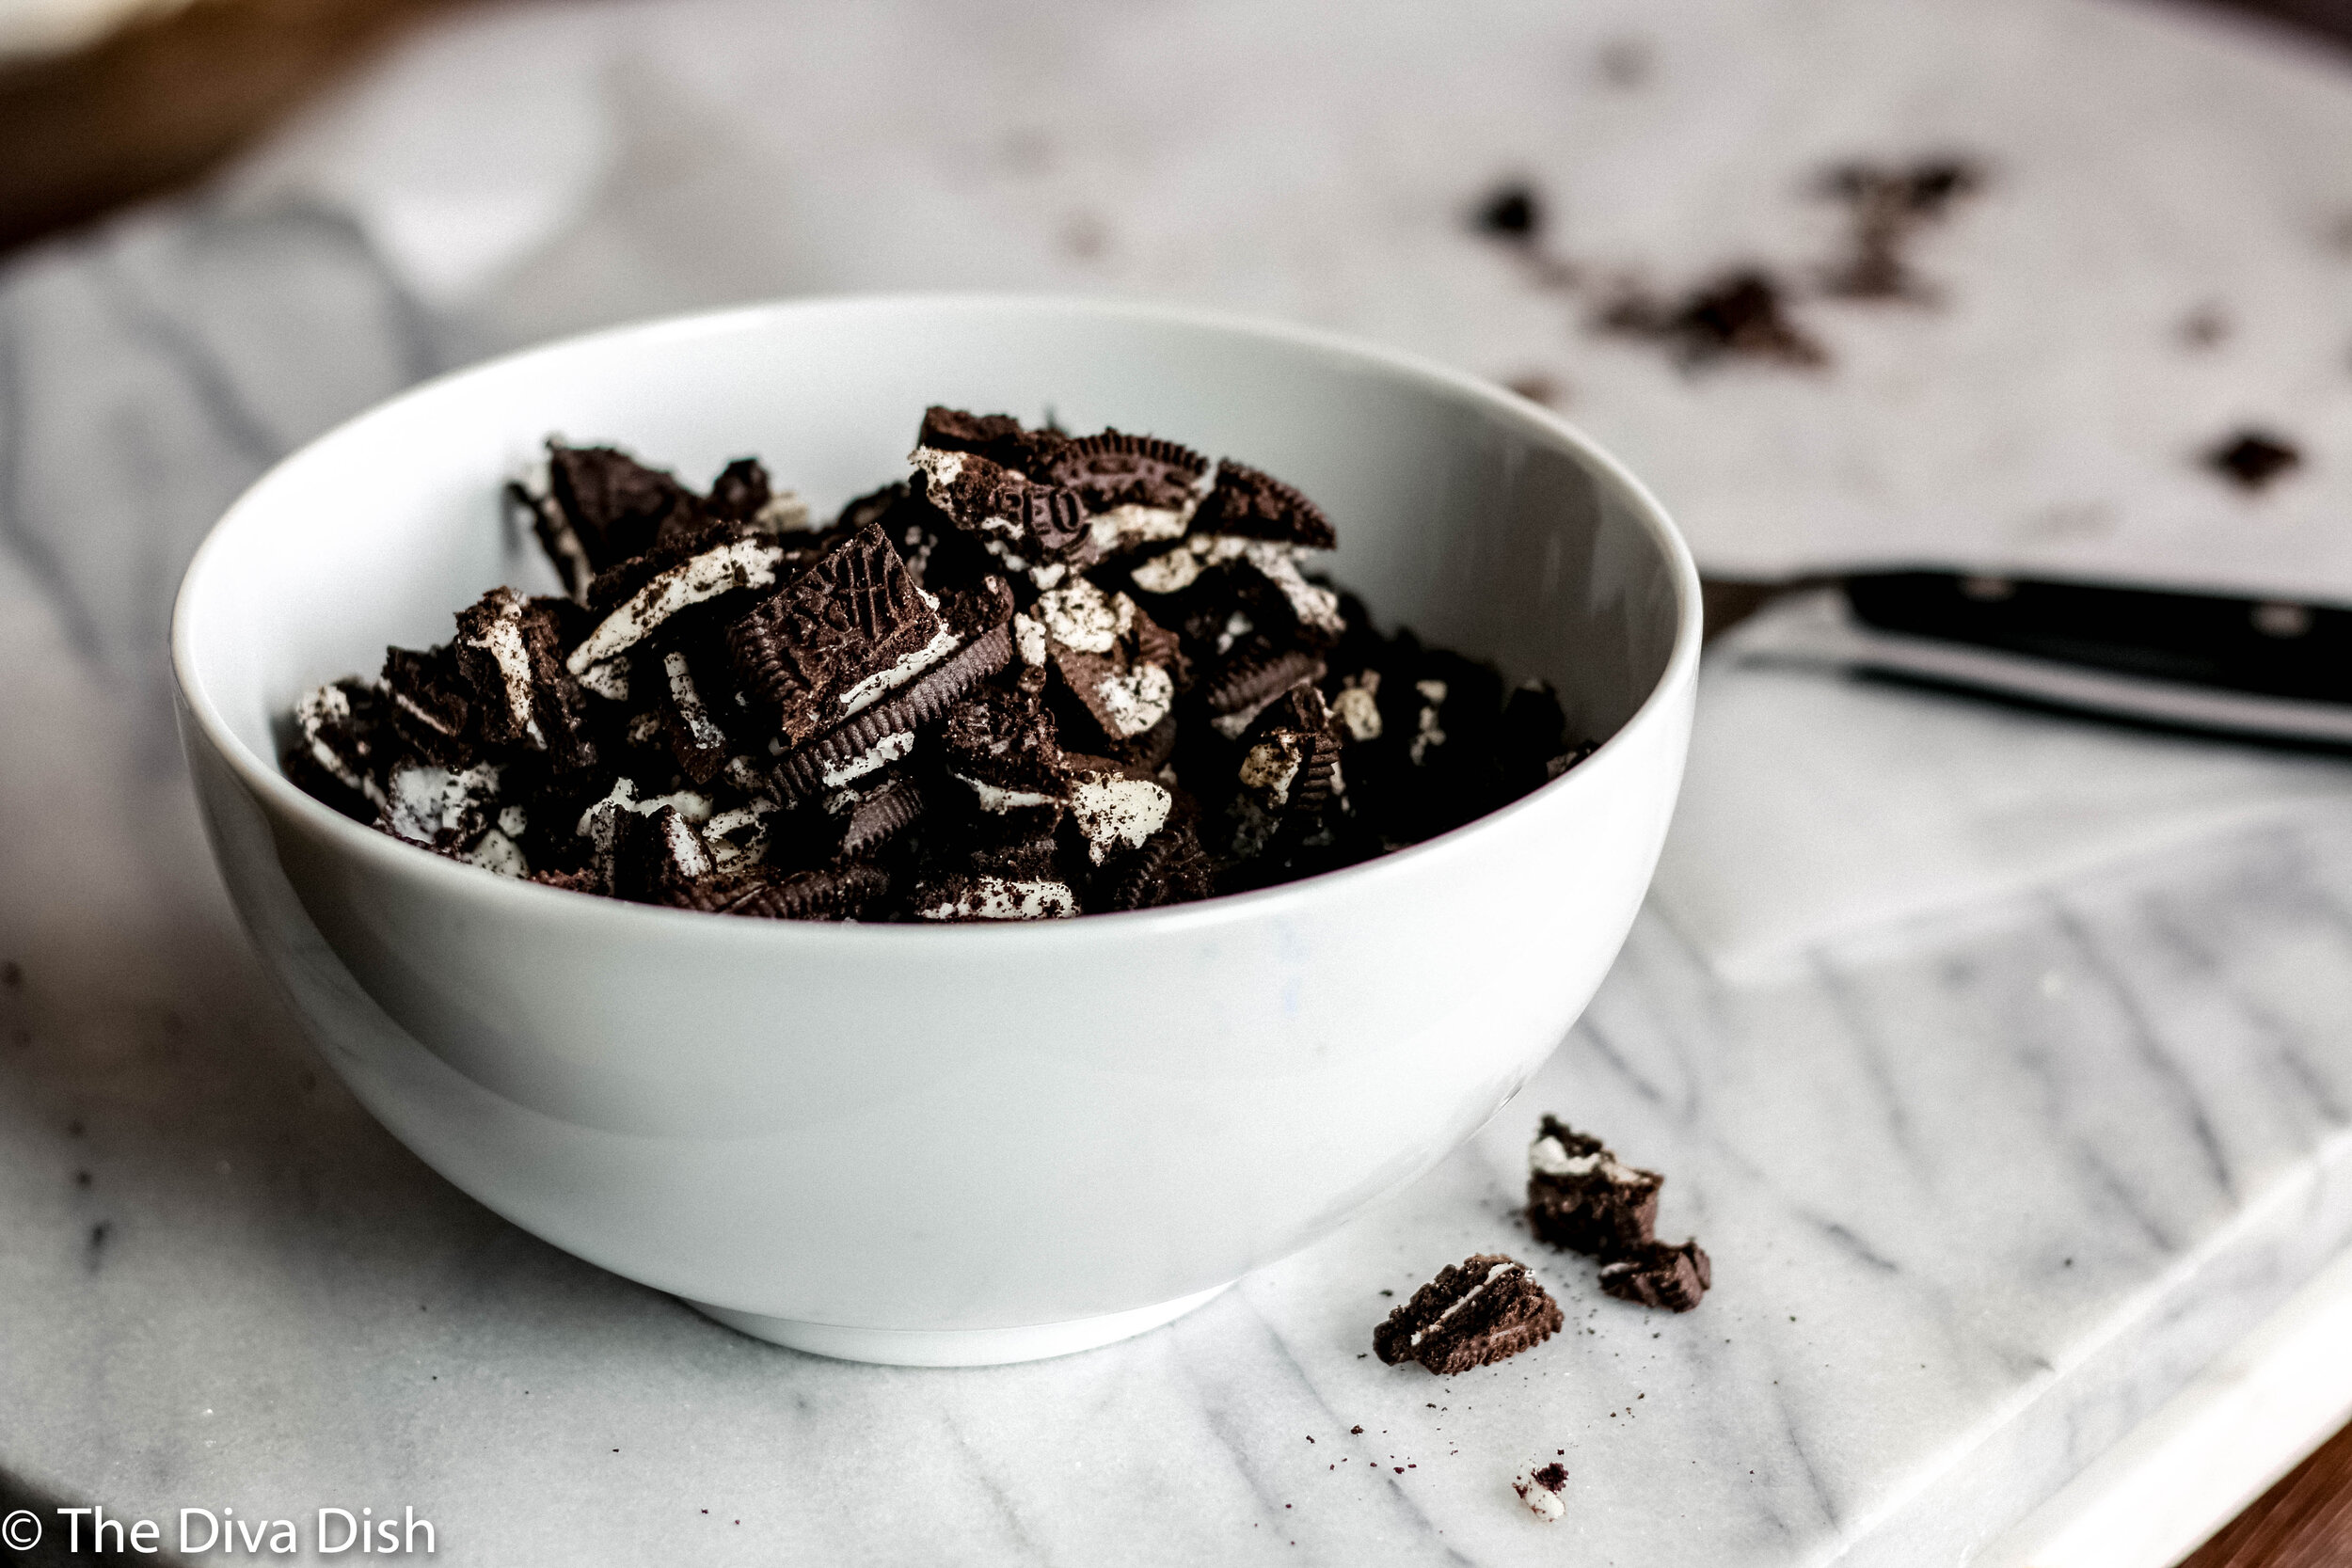
Once the ice cream is done, fold in the Oreos. Place in a sealed container and set in the fridge for the ice cream to harden, or eat immediately.
For years I would spend a whole day in the kitchen making and assembling cookie plates for all my neighbors and friends for Christmas, and I’m pretty sure the majority of sweets get tossed because there is so much abundance! While I love a delicious cookie plate, I've really tried to do different gifts that others can use and love!
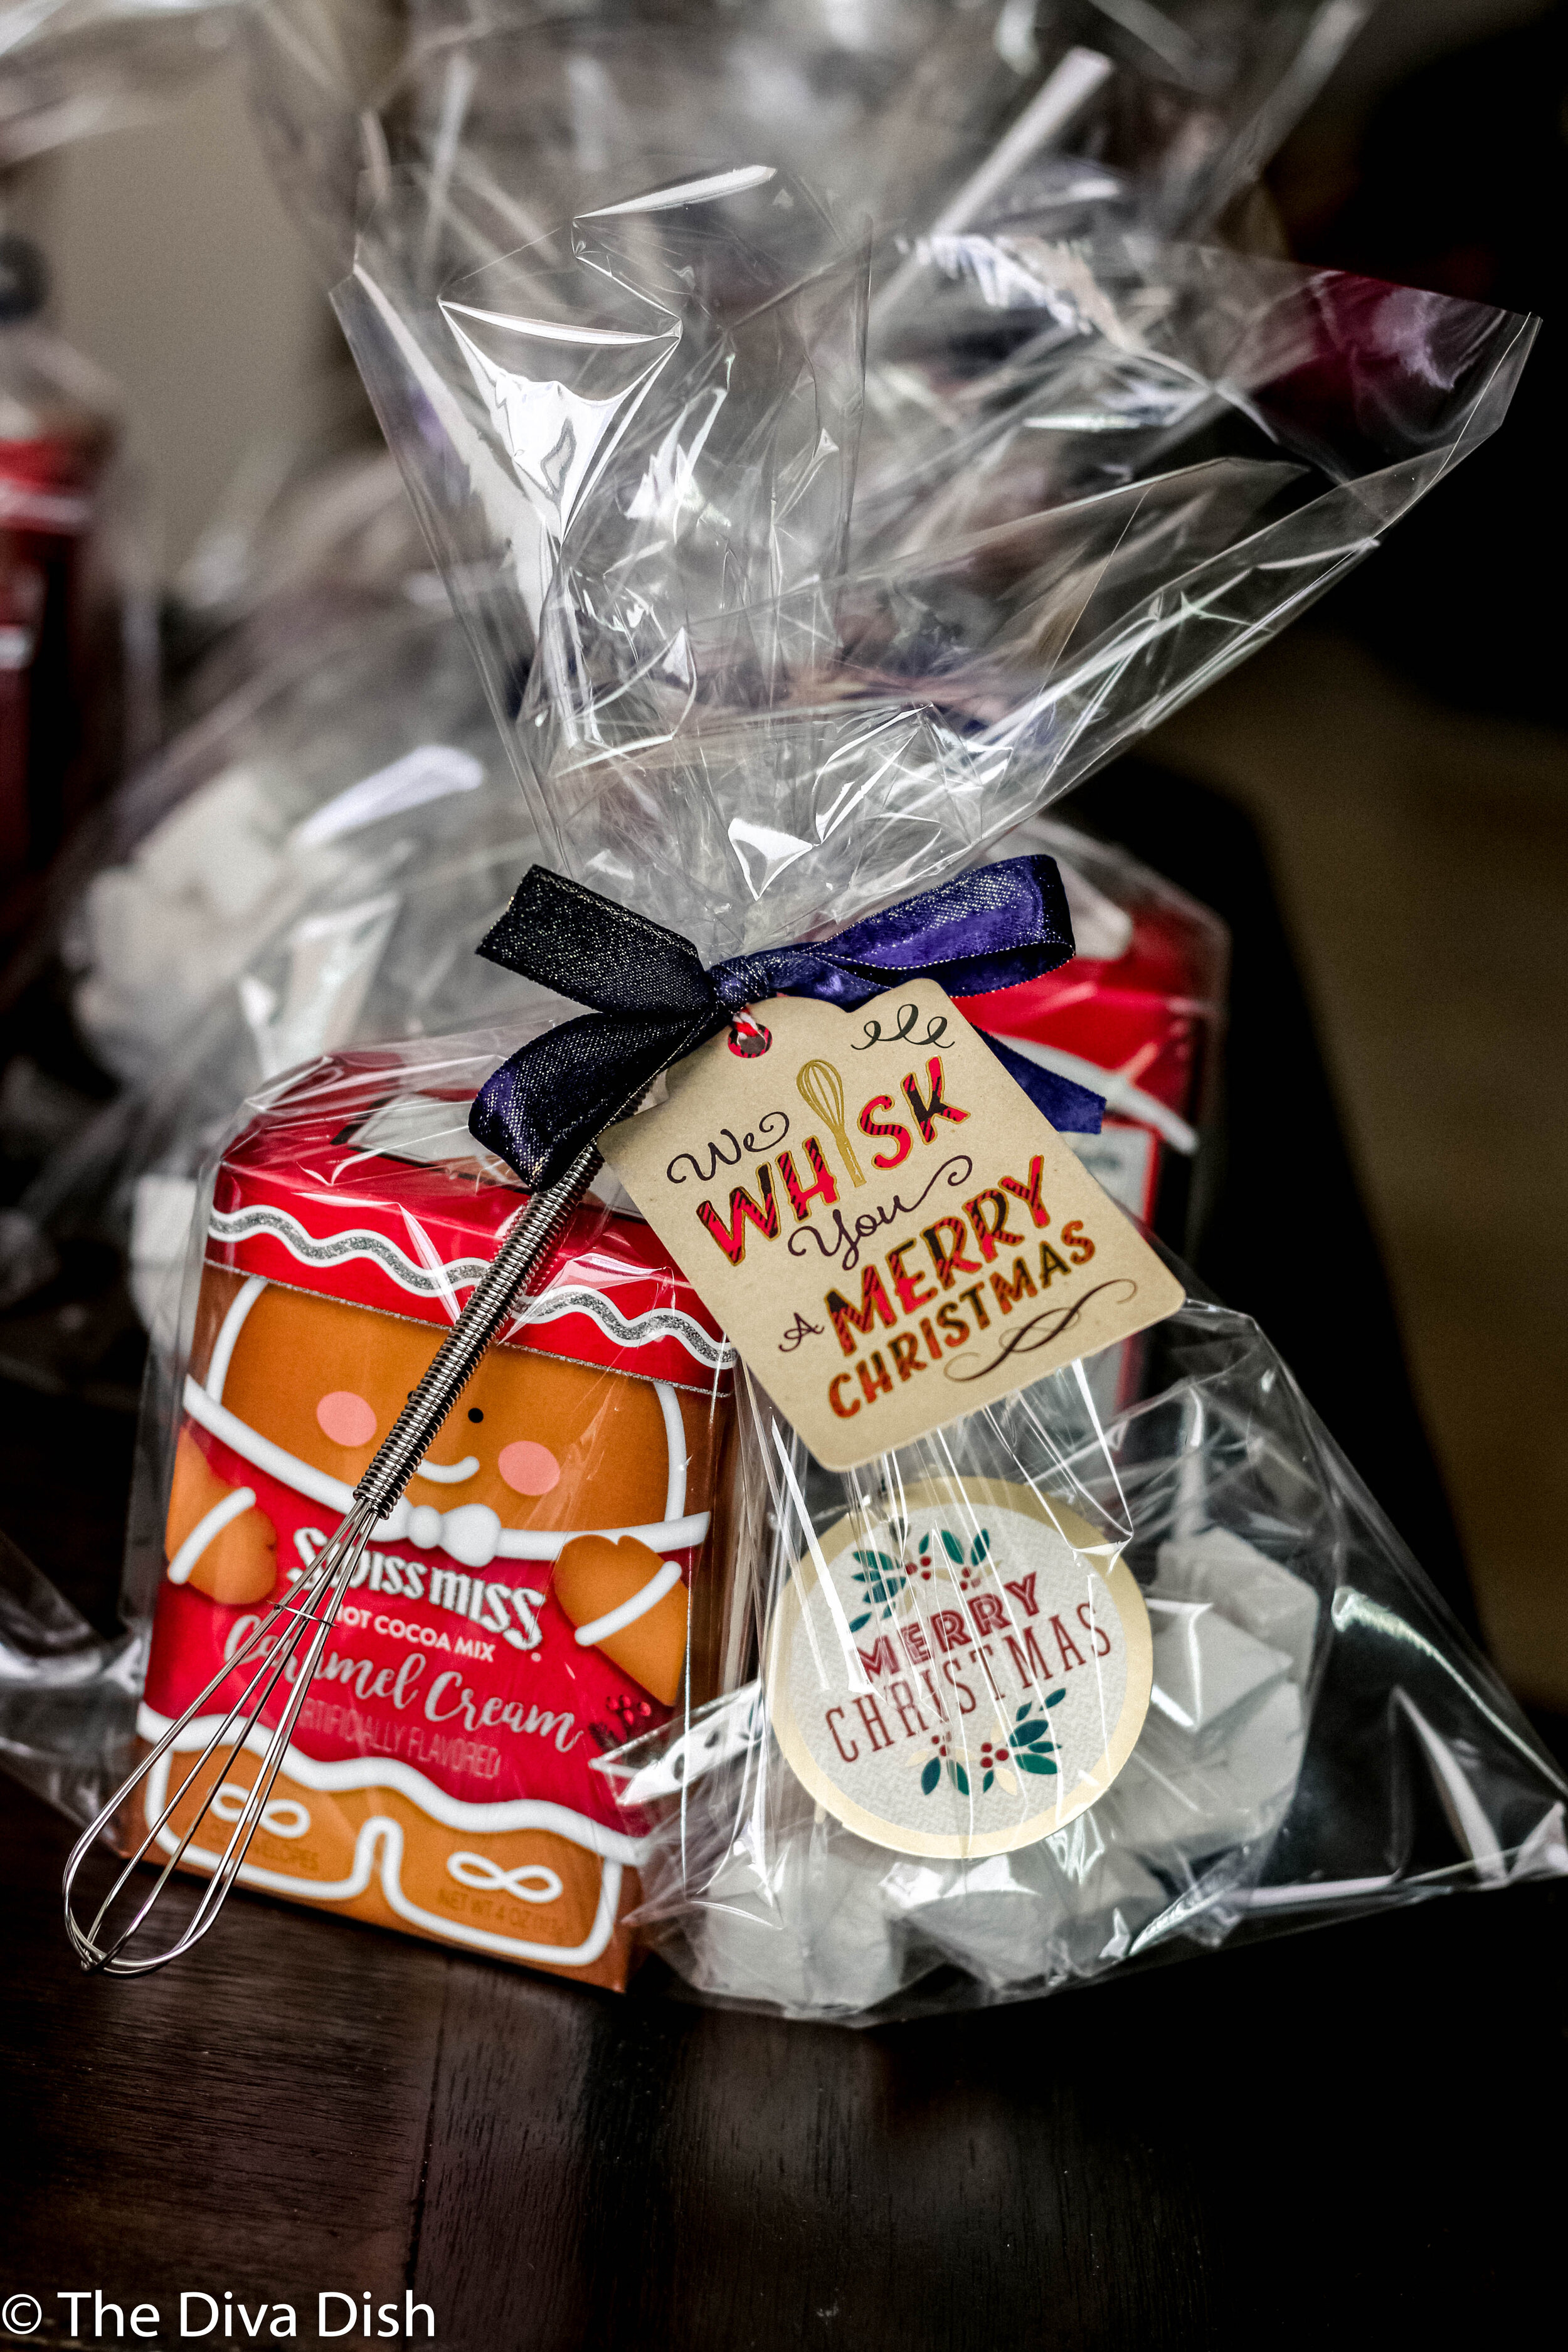
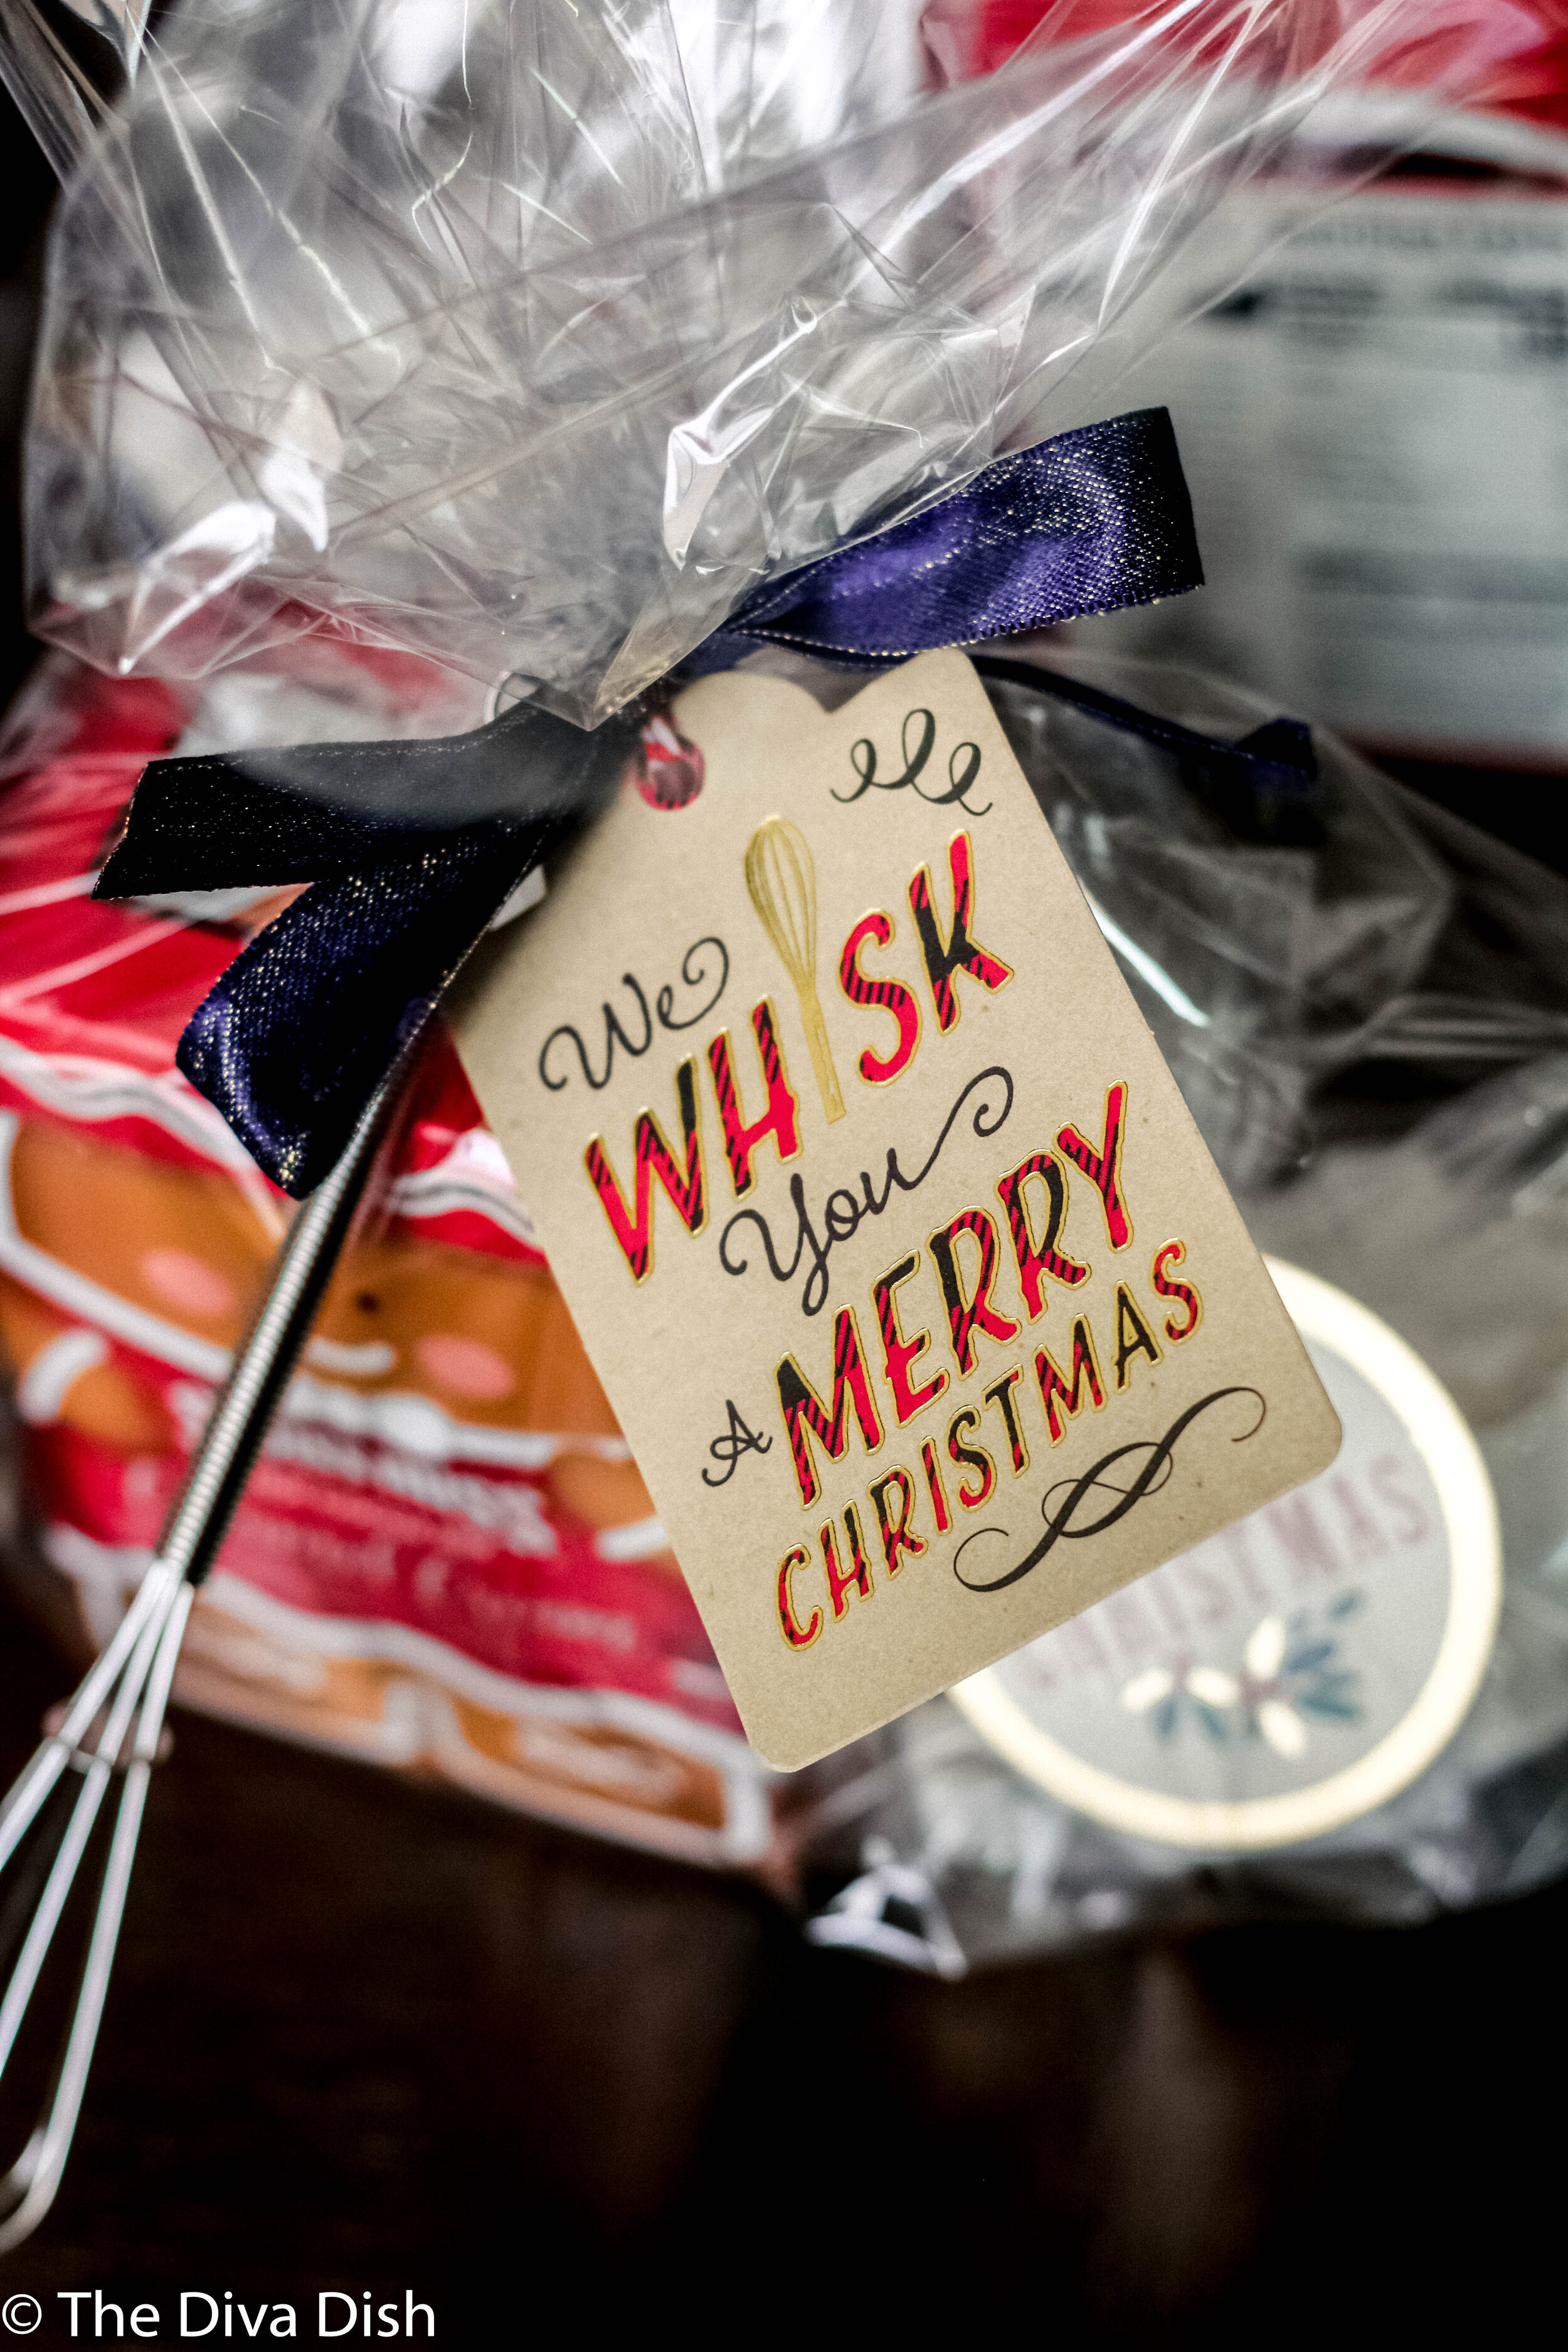
This year I added a store bought aspect, while also added a homemade touch.
I got the idea for this years gift one day at Walmart when I found these cute tags, “We Whisk you a Merry Christmas!” I immediately thought of hot chocolate and how cute it would be to pair a little whisk with it.
Add In some homemade marshmallows and cute packaging and you’ve got a unique neighbor gift!
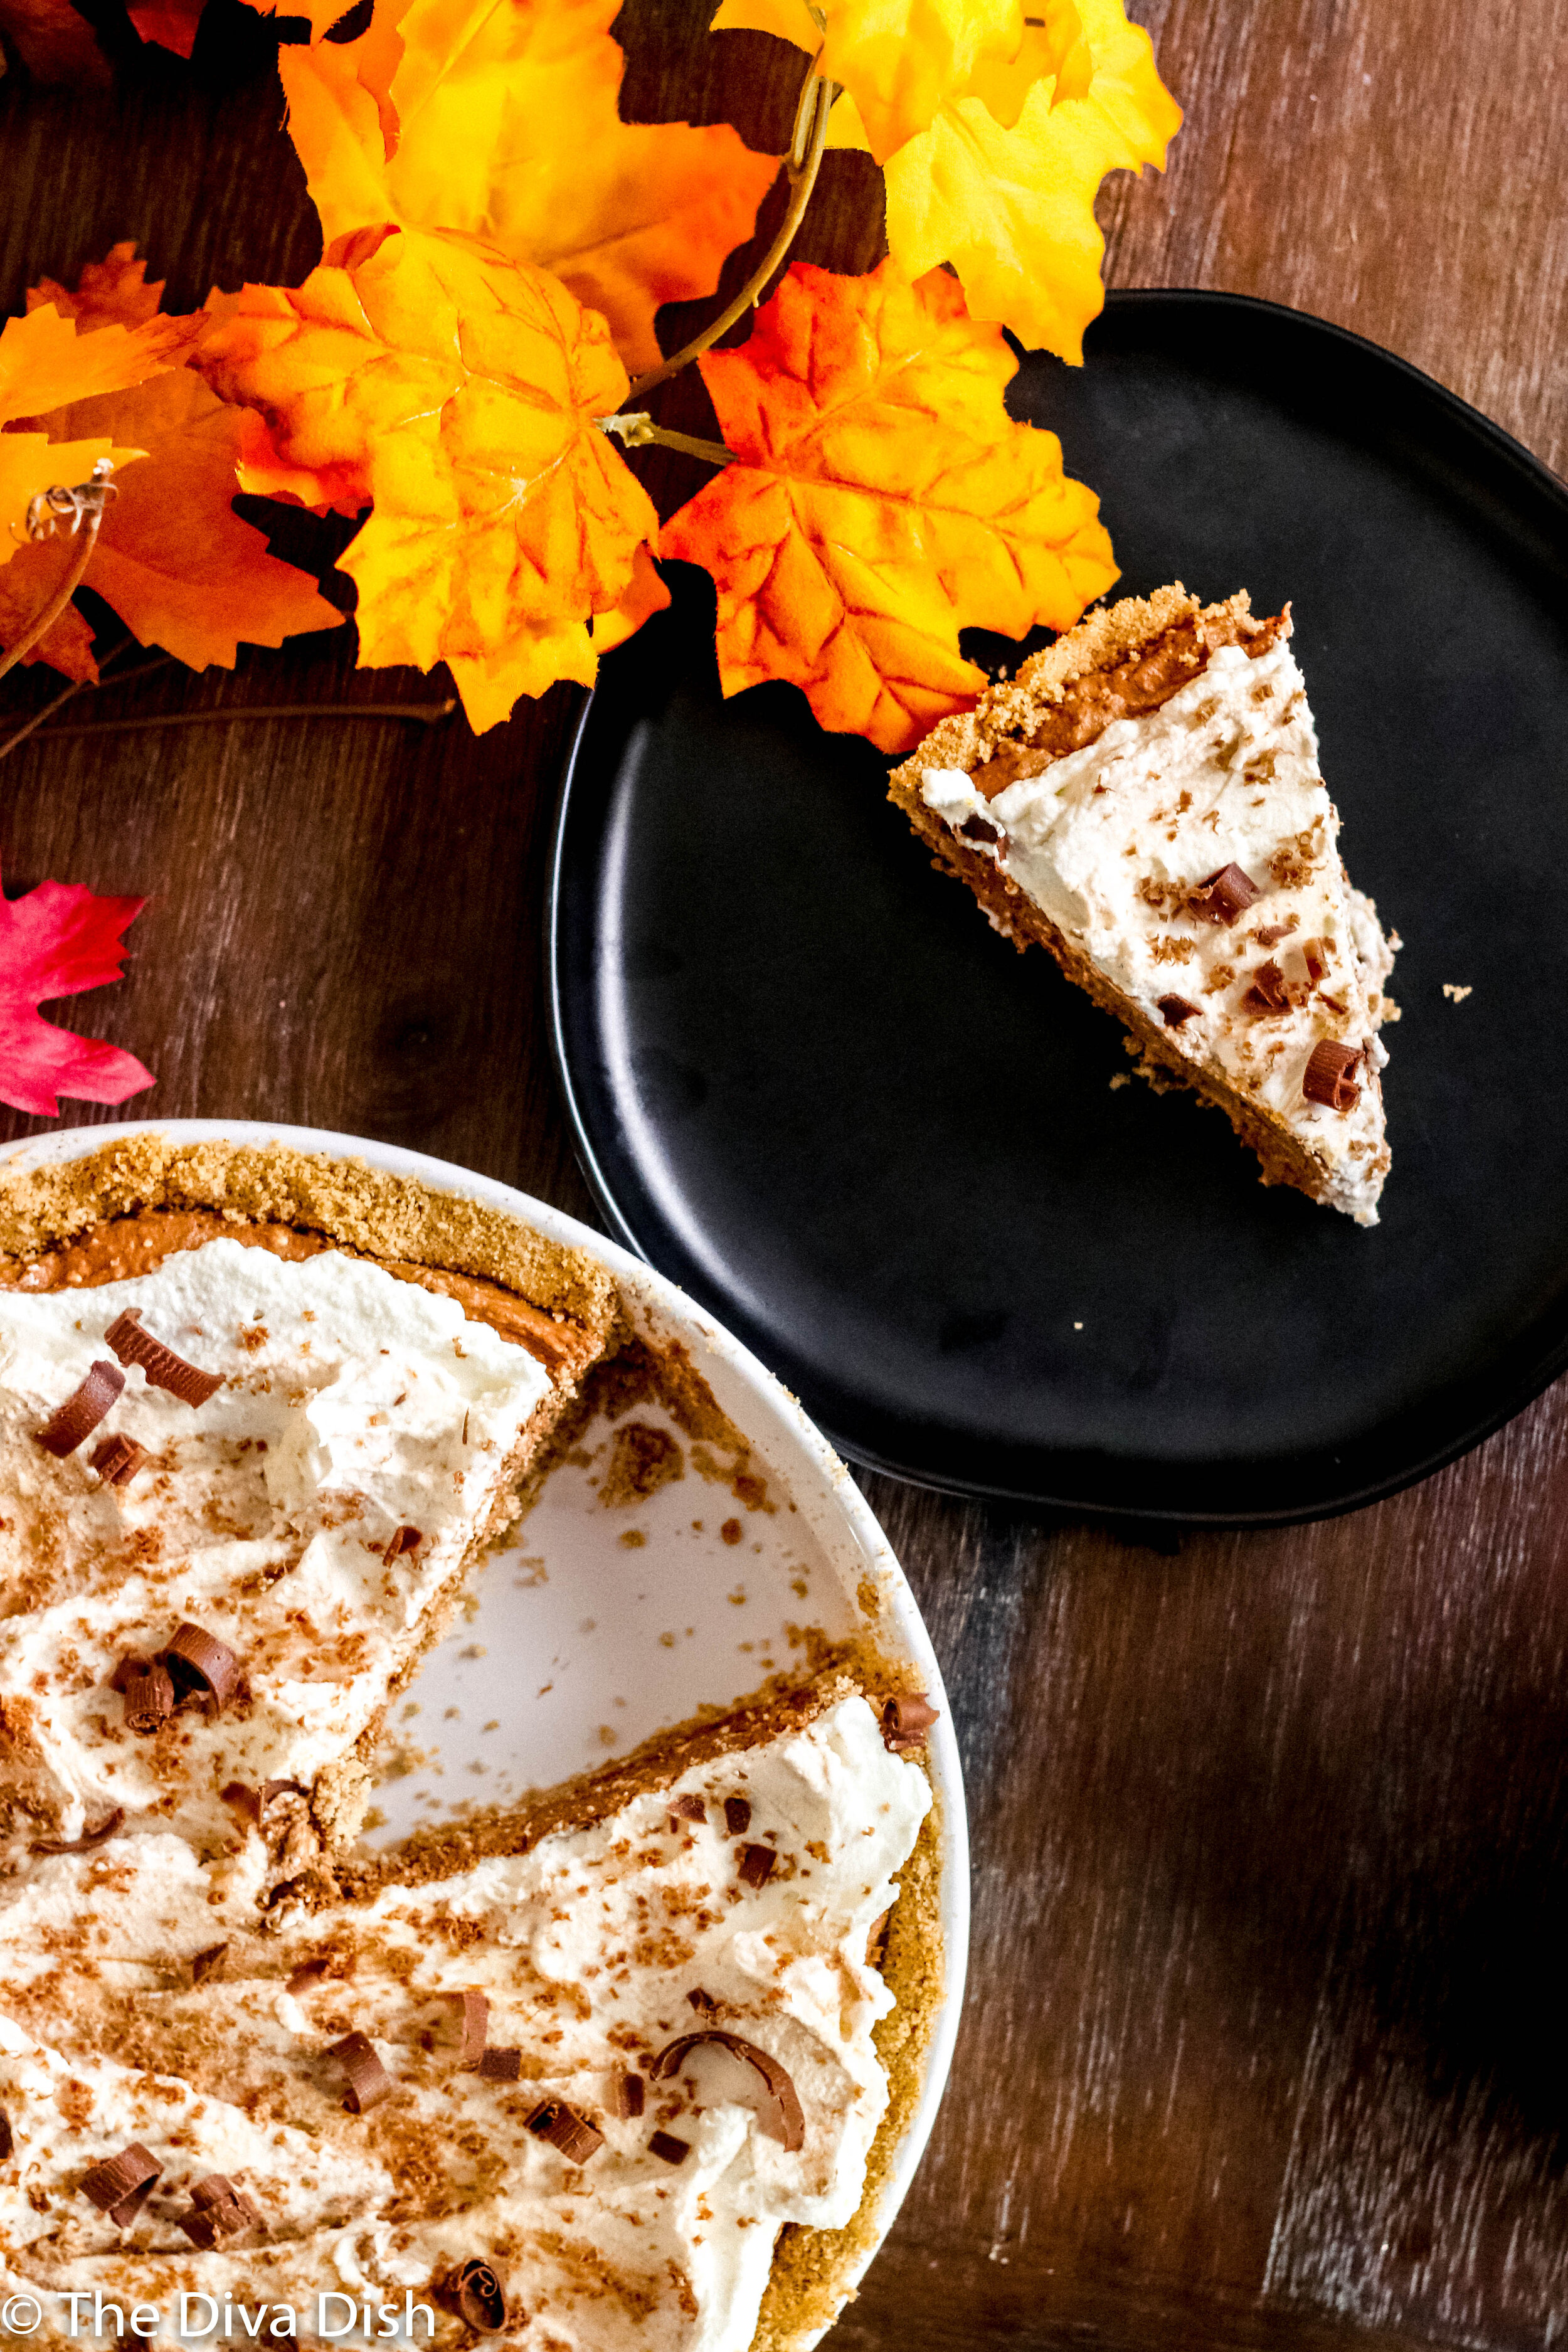
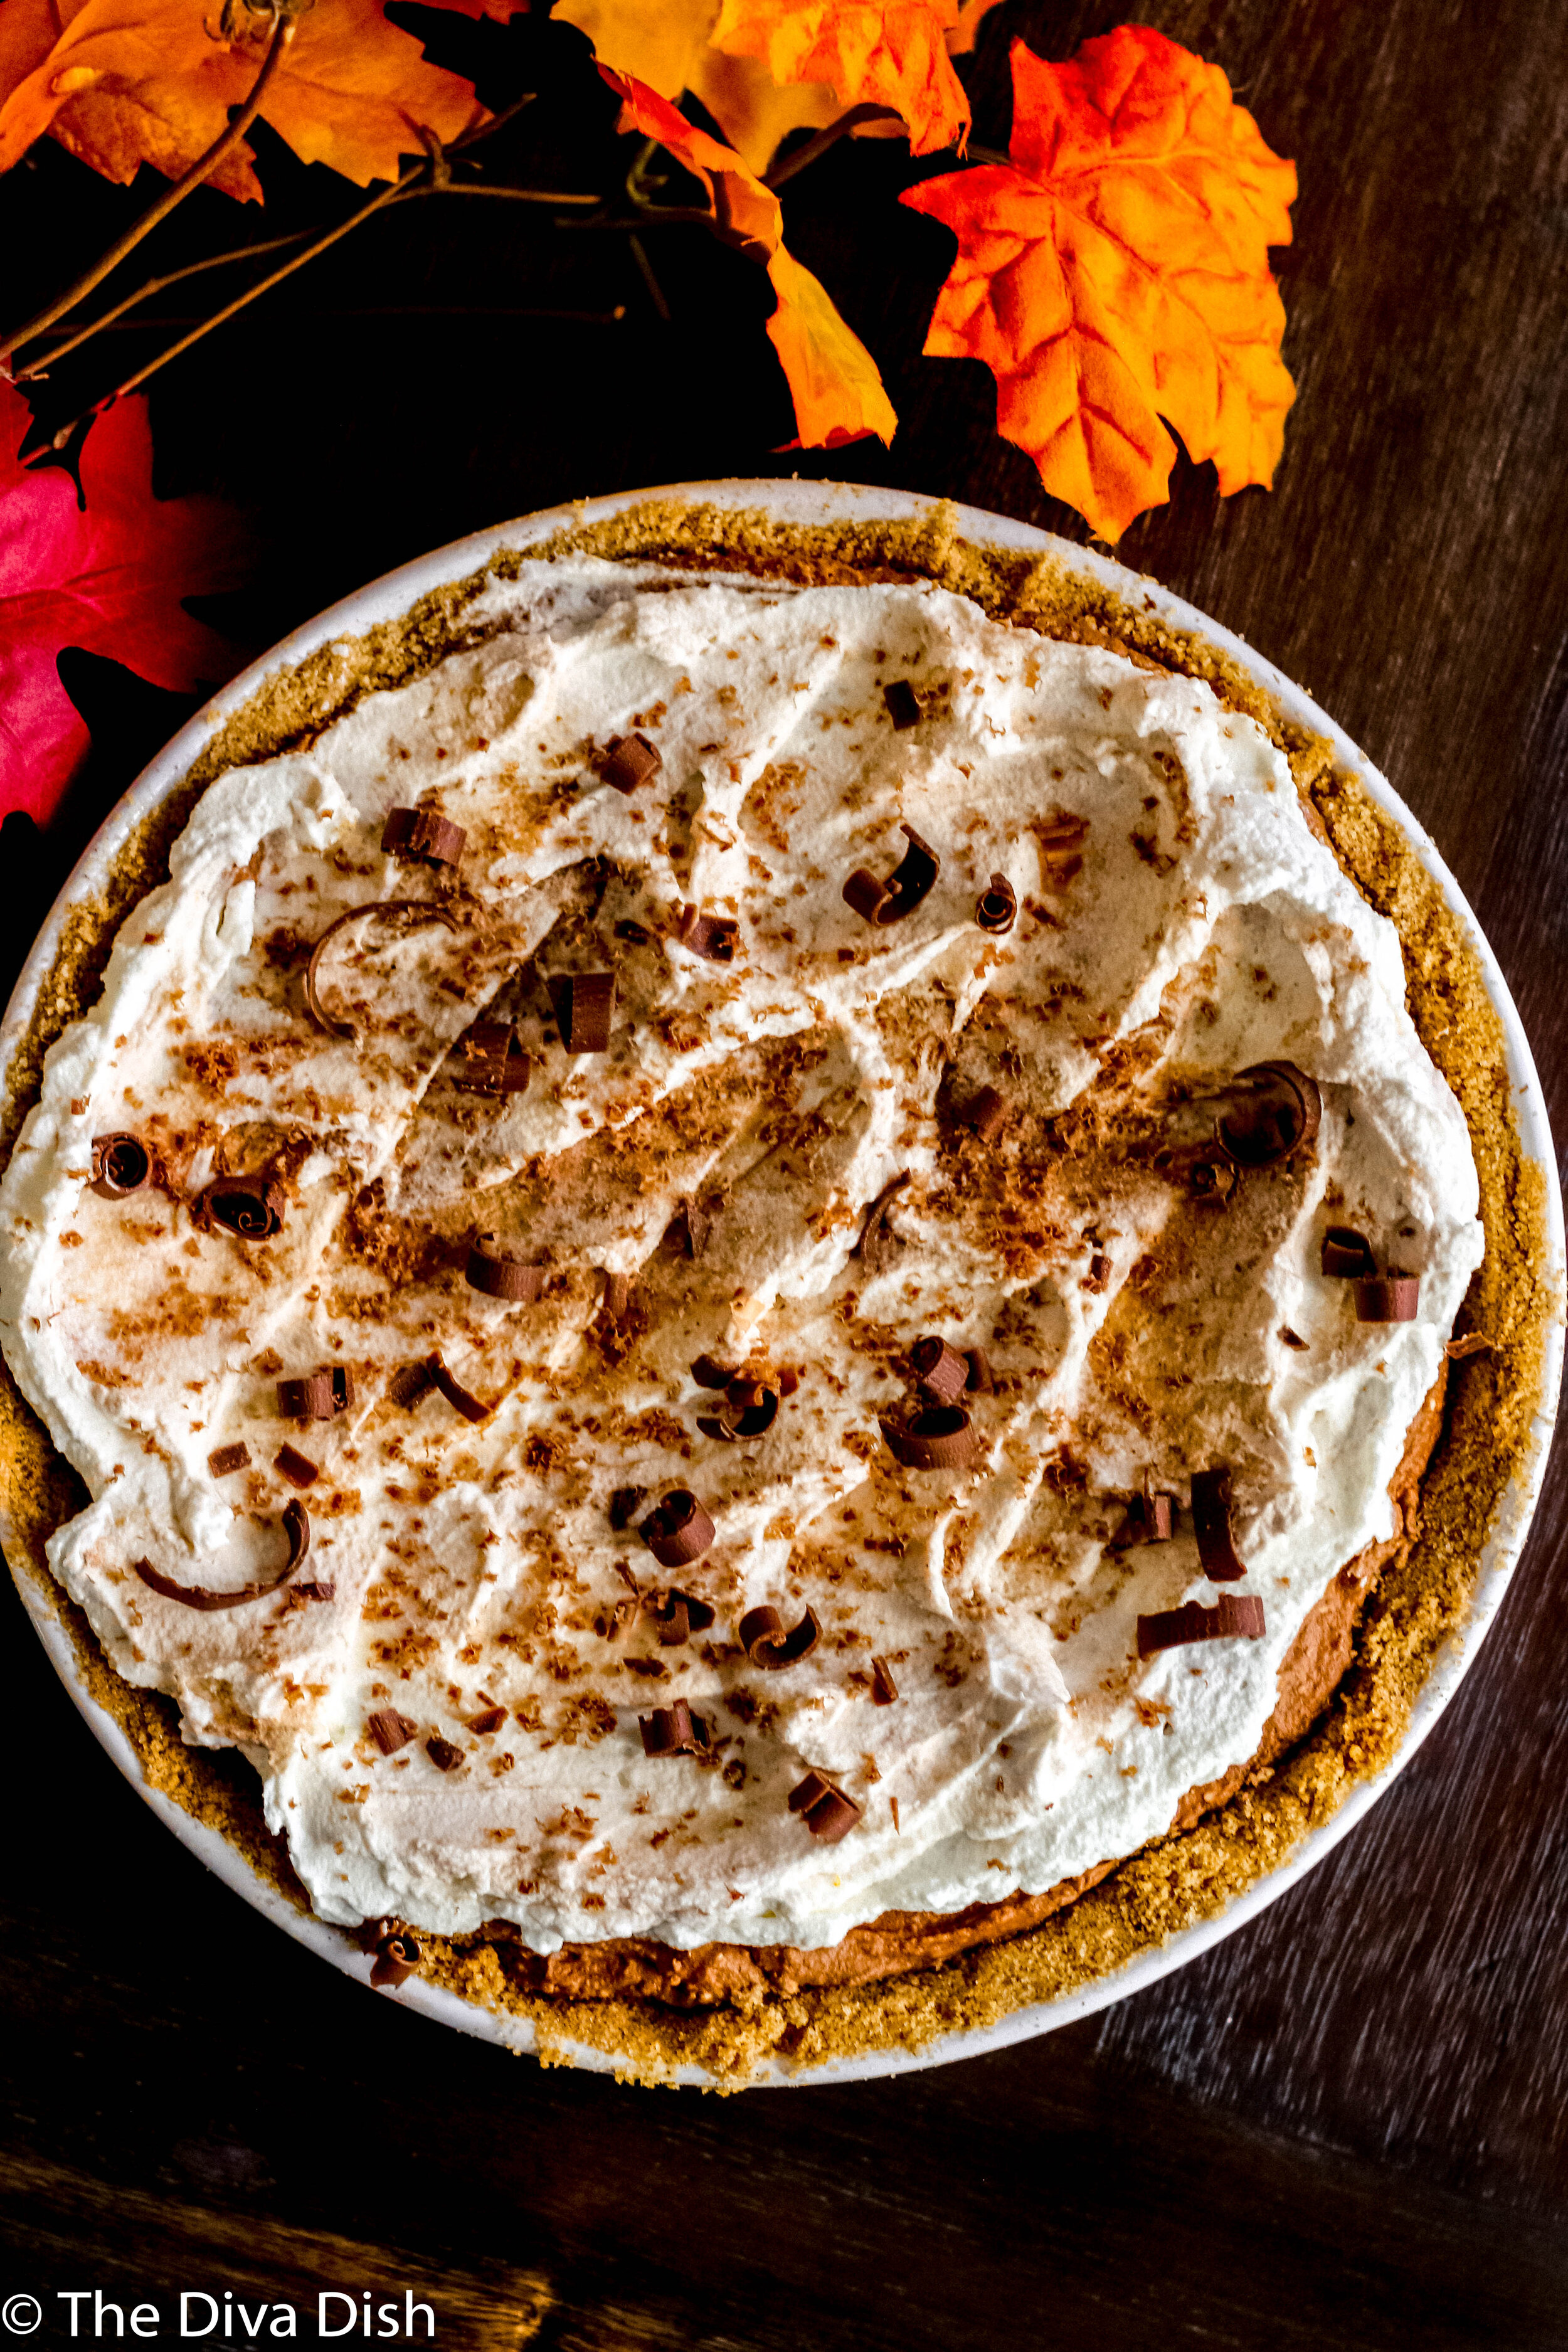
I came to the conclusion this year that pie was not my thing. The cooked fruits honestly give me the chills and I can’t get myself to enjoy it at all. This means that Thanksgiving has always been a disappointing holiday for me when it comes to dessert. So I've been on a mission to create the most delicious no bake/no soggy fruit pies for those that feel a little lonely and sad when the Apple Pie makes its appearance after the big dinner!
{No Bake} Pumpkin Chocolate Cream Pie
Ingredients:
1 prepared graham cracker crust (I made my own with a tsp. of cinnamon mixed in!)
8 oz room temp, softened cream cheese
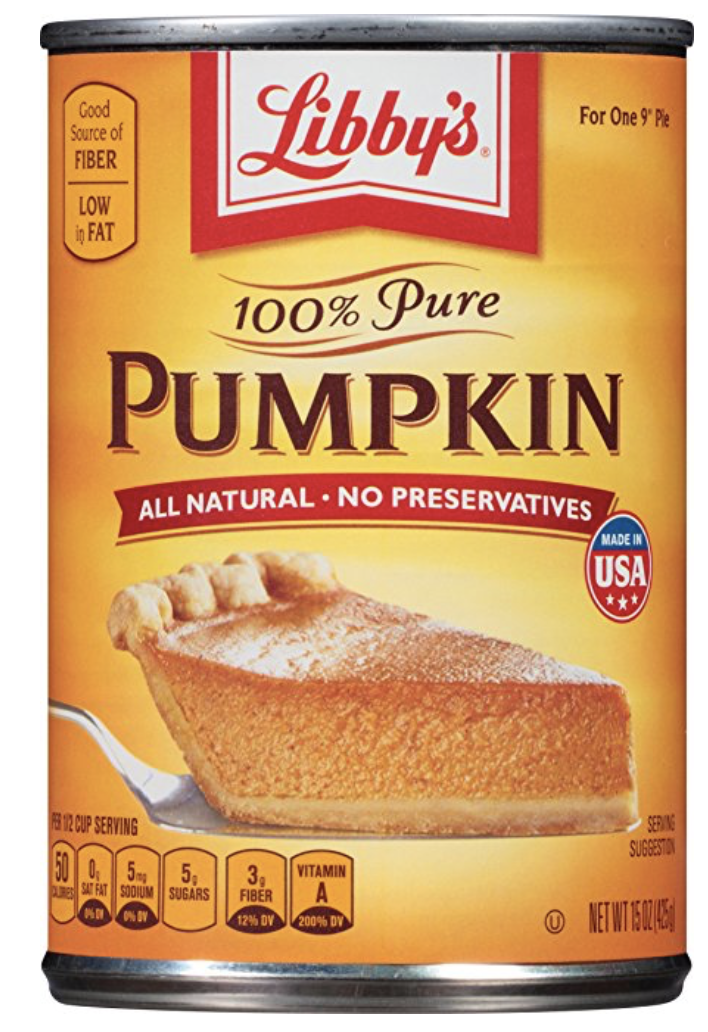
1 can pumpkin puree, not pie filling
1/2 cup packed light brown sugar
1 TB. vanilla extract
2 tsp. pumpkin pie spice
1 cup dark chocolate chips, or semi sweet, or milk.
1 cup heavy whipping cream
1/4 cup powdered sugar, or more depending on preference.
1/4 tsp. cream of tarter
optional: chocolate bar for toppings
Directions:
Melt chocolate in the microwave. Set aside. In a large mixing bowl, beat the softened cream cheese until creamy. Then mix in the pumpkin, sugar, vanilla, and spice until combined and smooth. Set aside.
In a separate bowl, beat the whipping cream, powdered sugar, and cream of tarter until soft peaks appear, about 5 to 7 minutes. Taste and adjust sweetness if needed. You don’t want it overly sweet because
Gently fold half the whipped cream into the pumpkin mixture. Pour the mixture into the prepared crust. Then top the pie with the additional whipped cream. Grate chocolate over the pie or chop a chocolate bar finely for the top.
Let set and harden in the fridge for 4-6 hours or overnight before serving. Keep covered in the fridge up to 3-4 days. Can be made in advance!
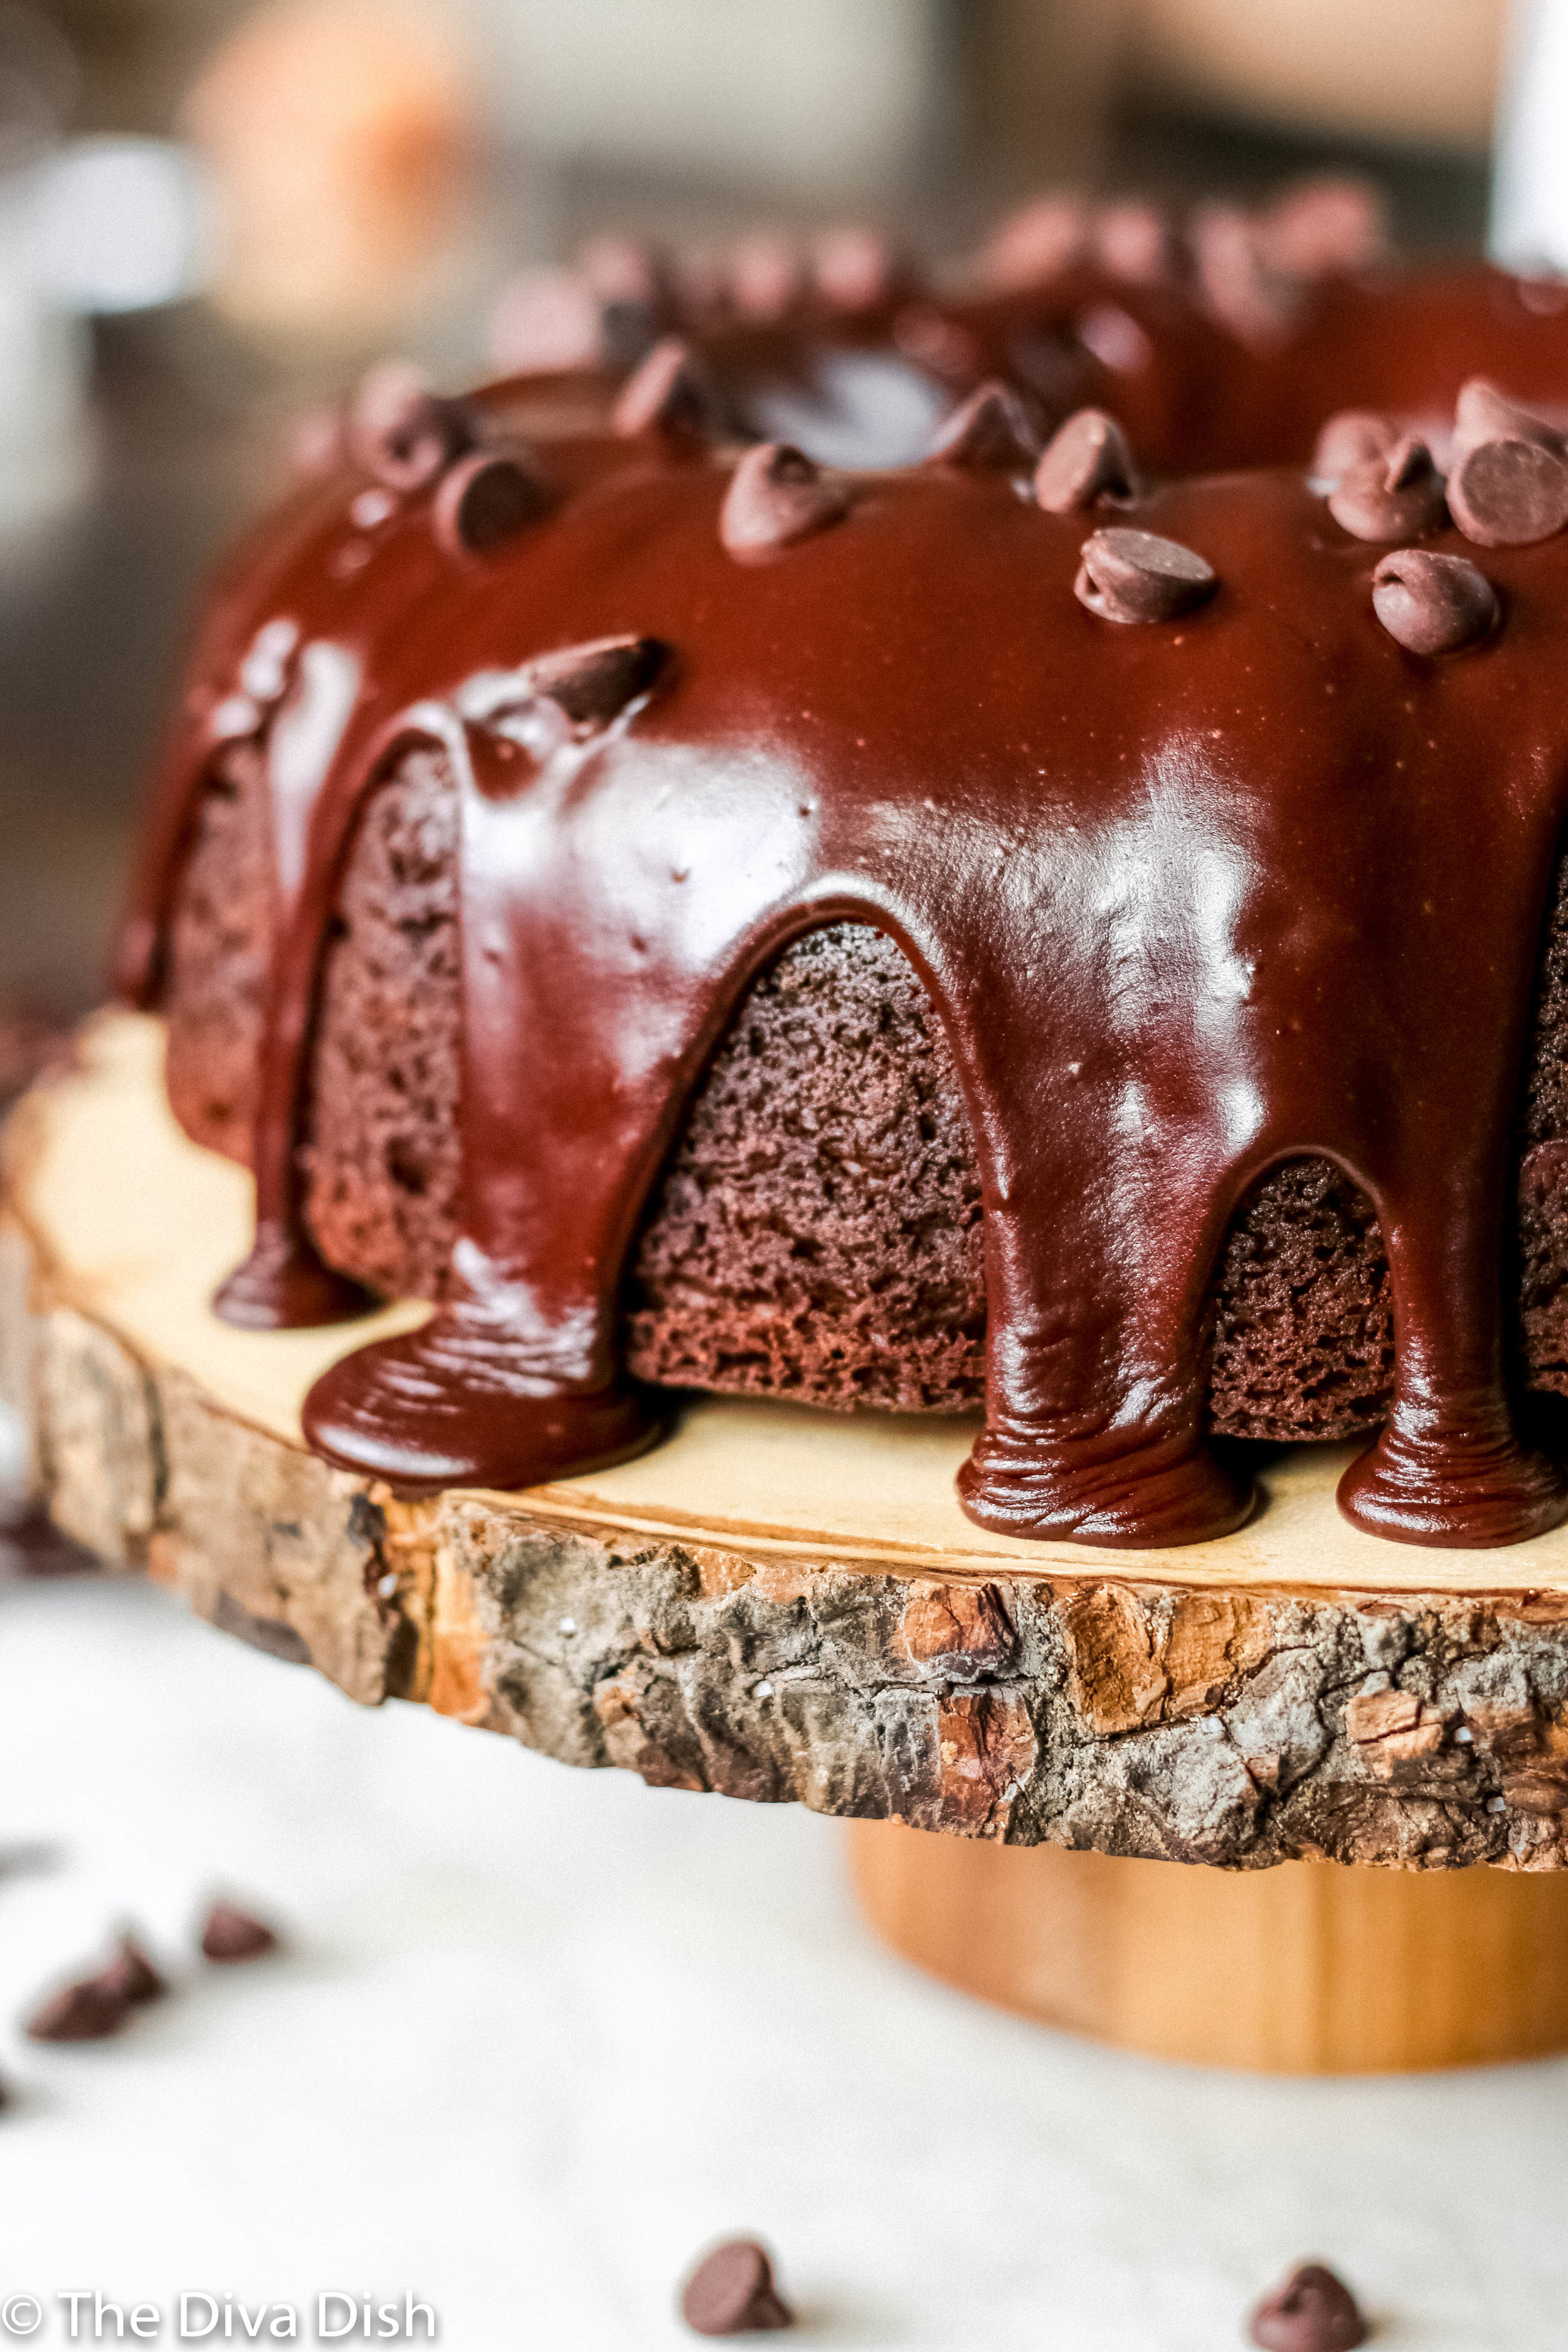
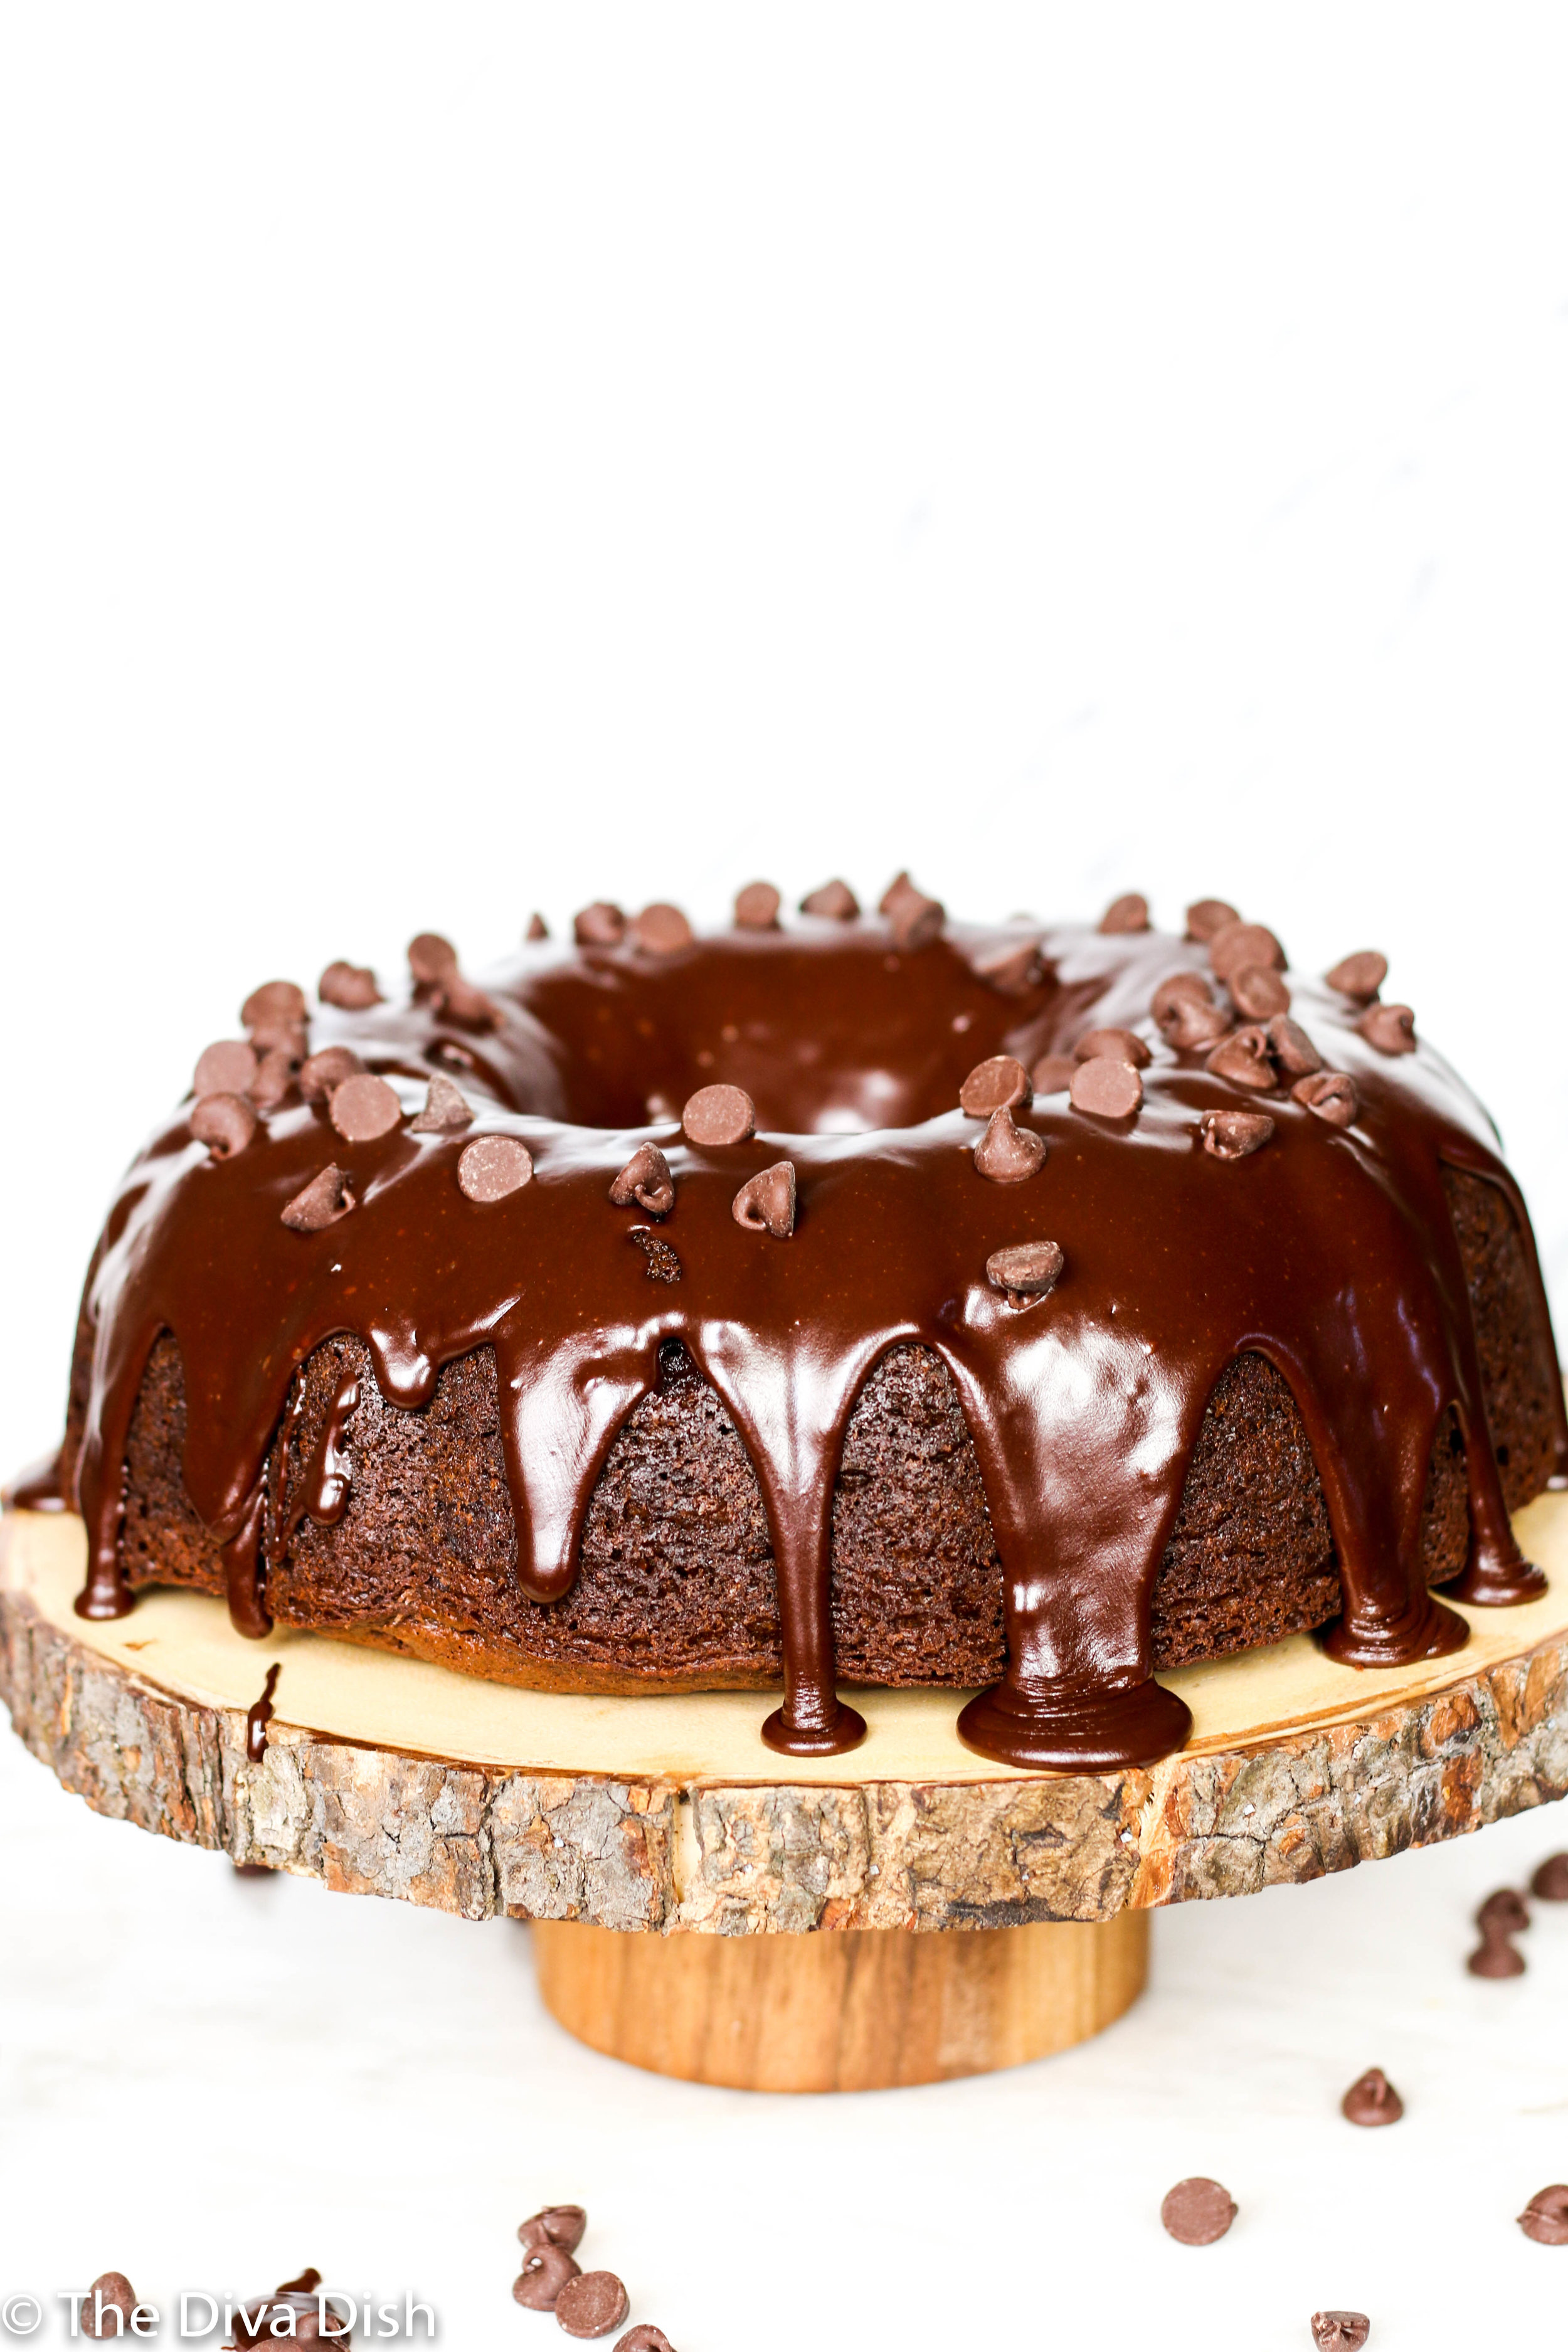
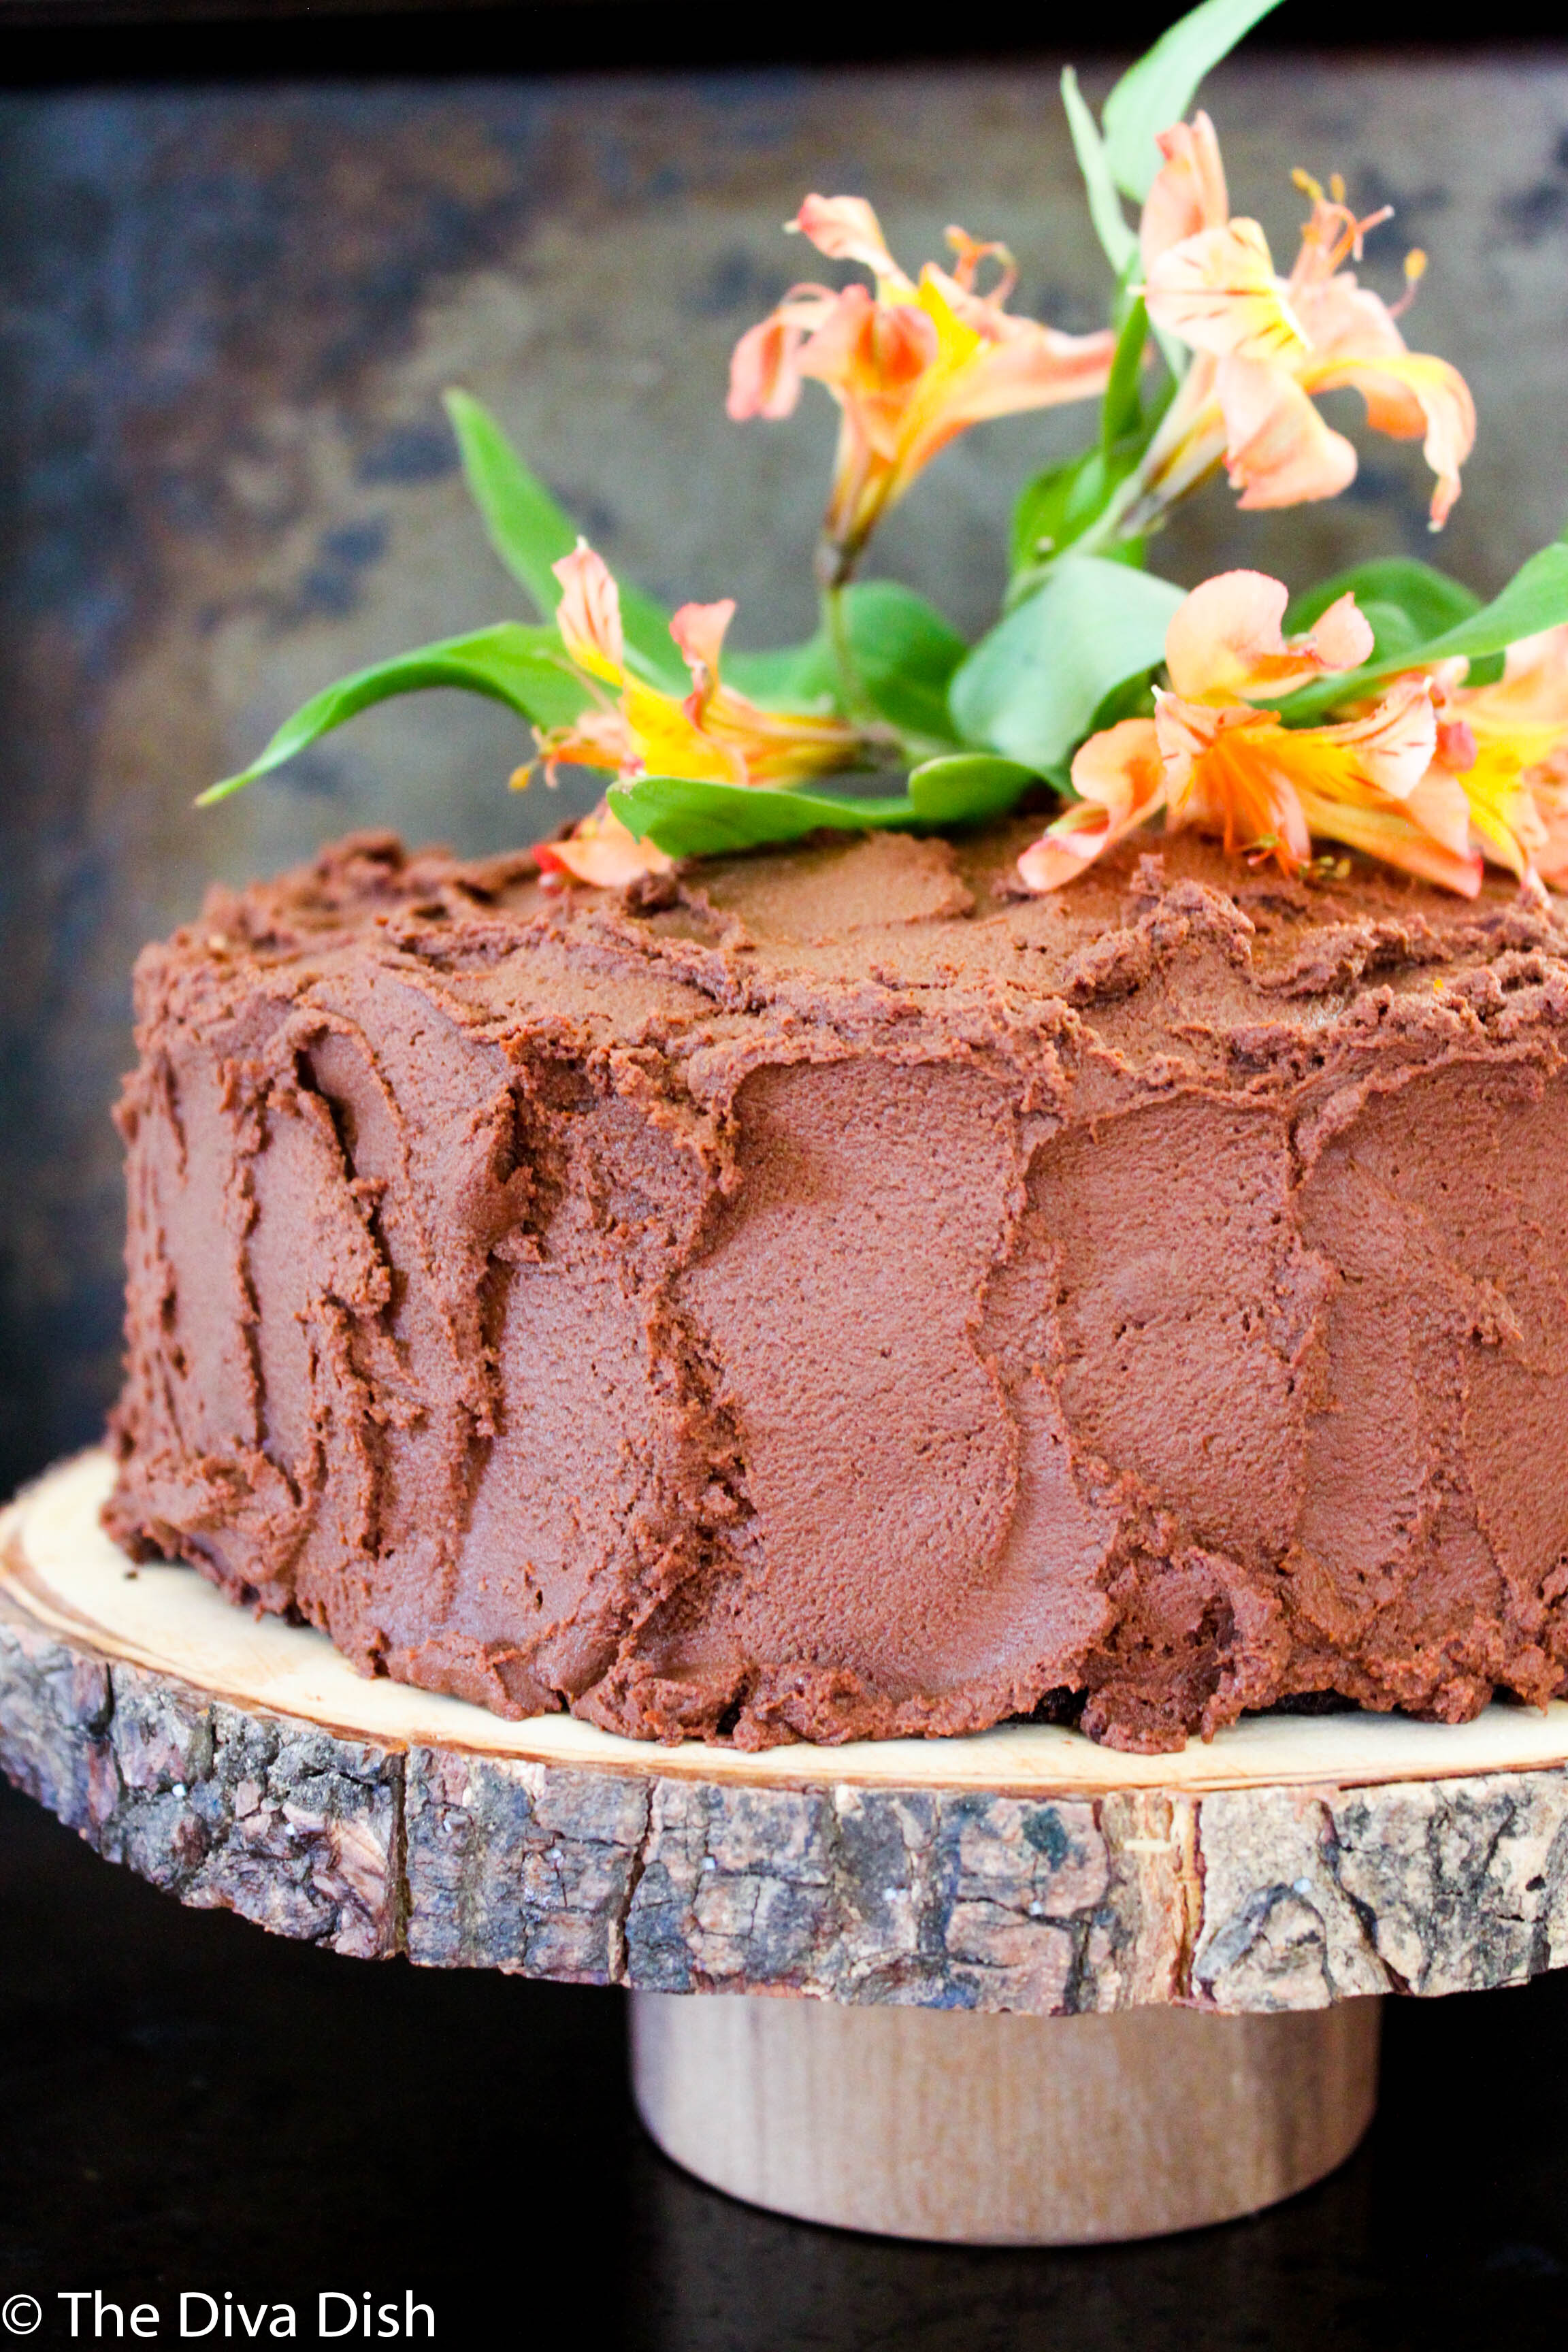
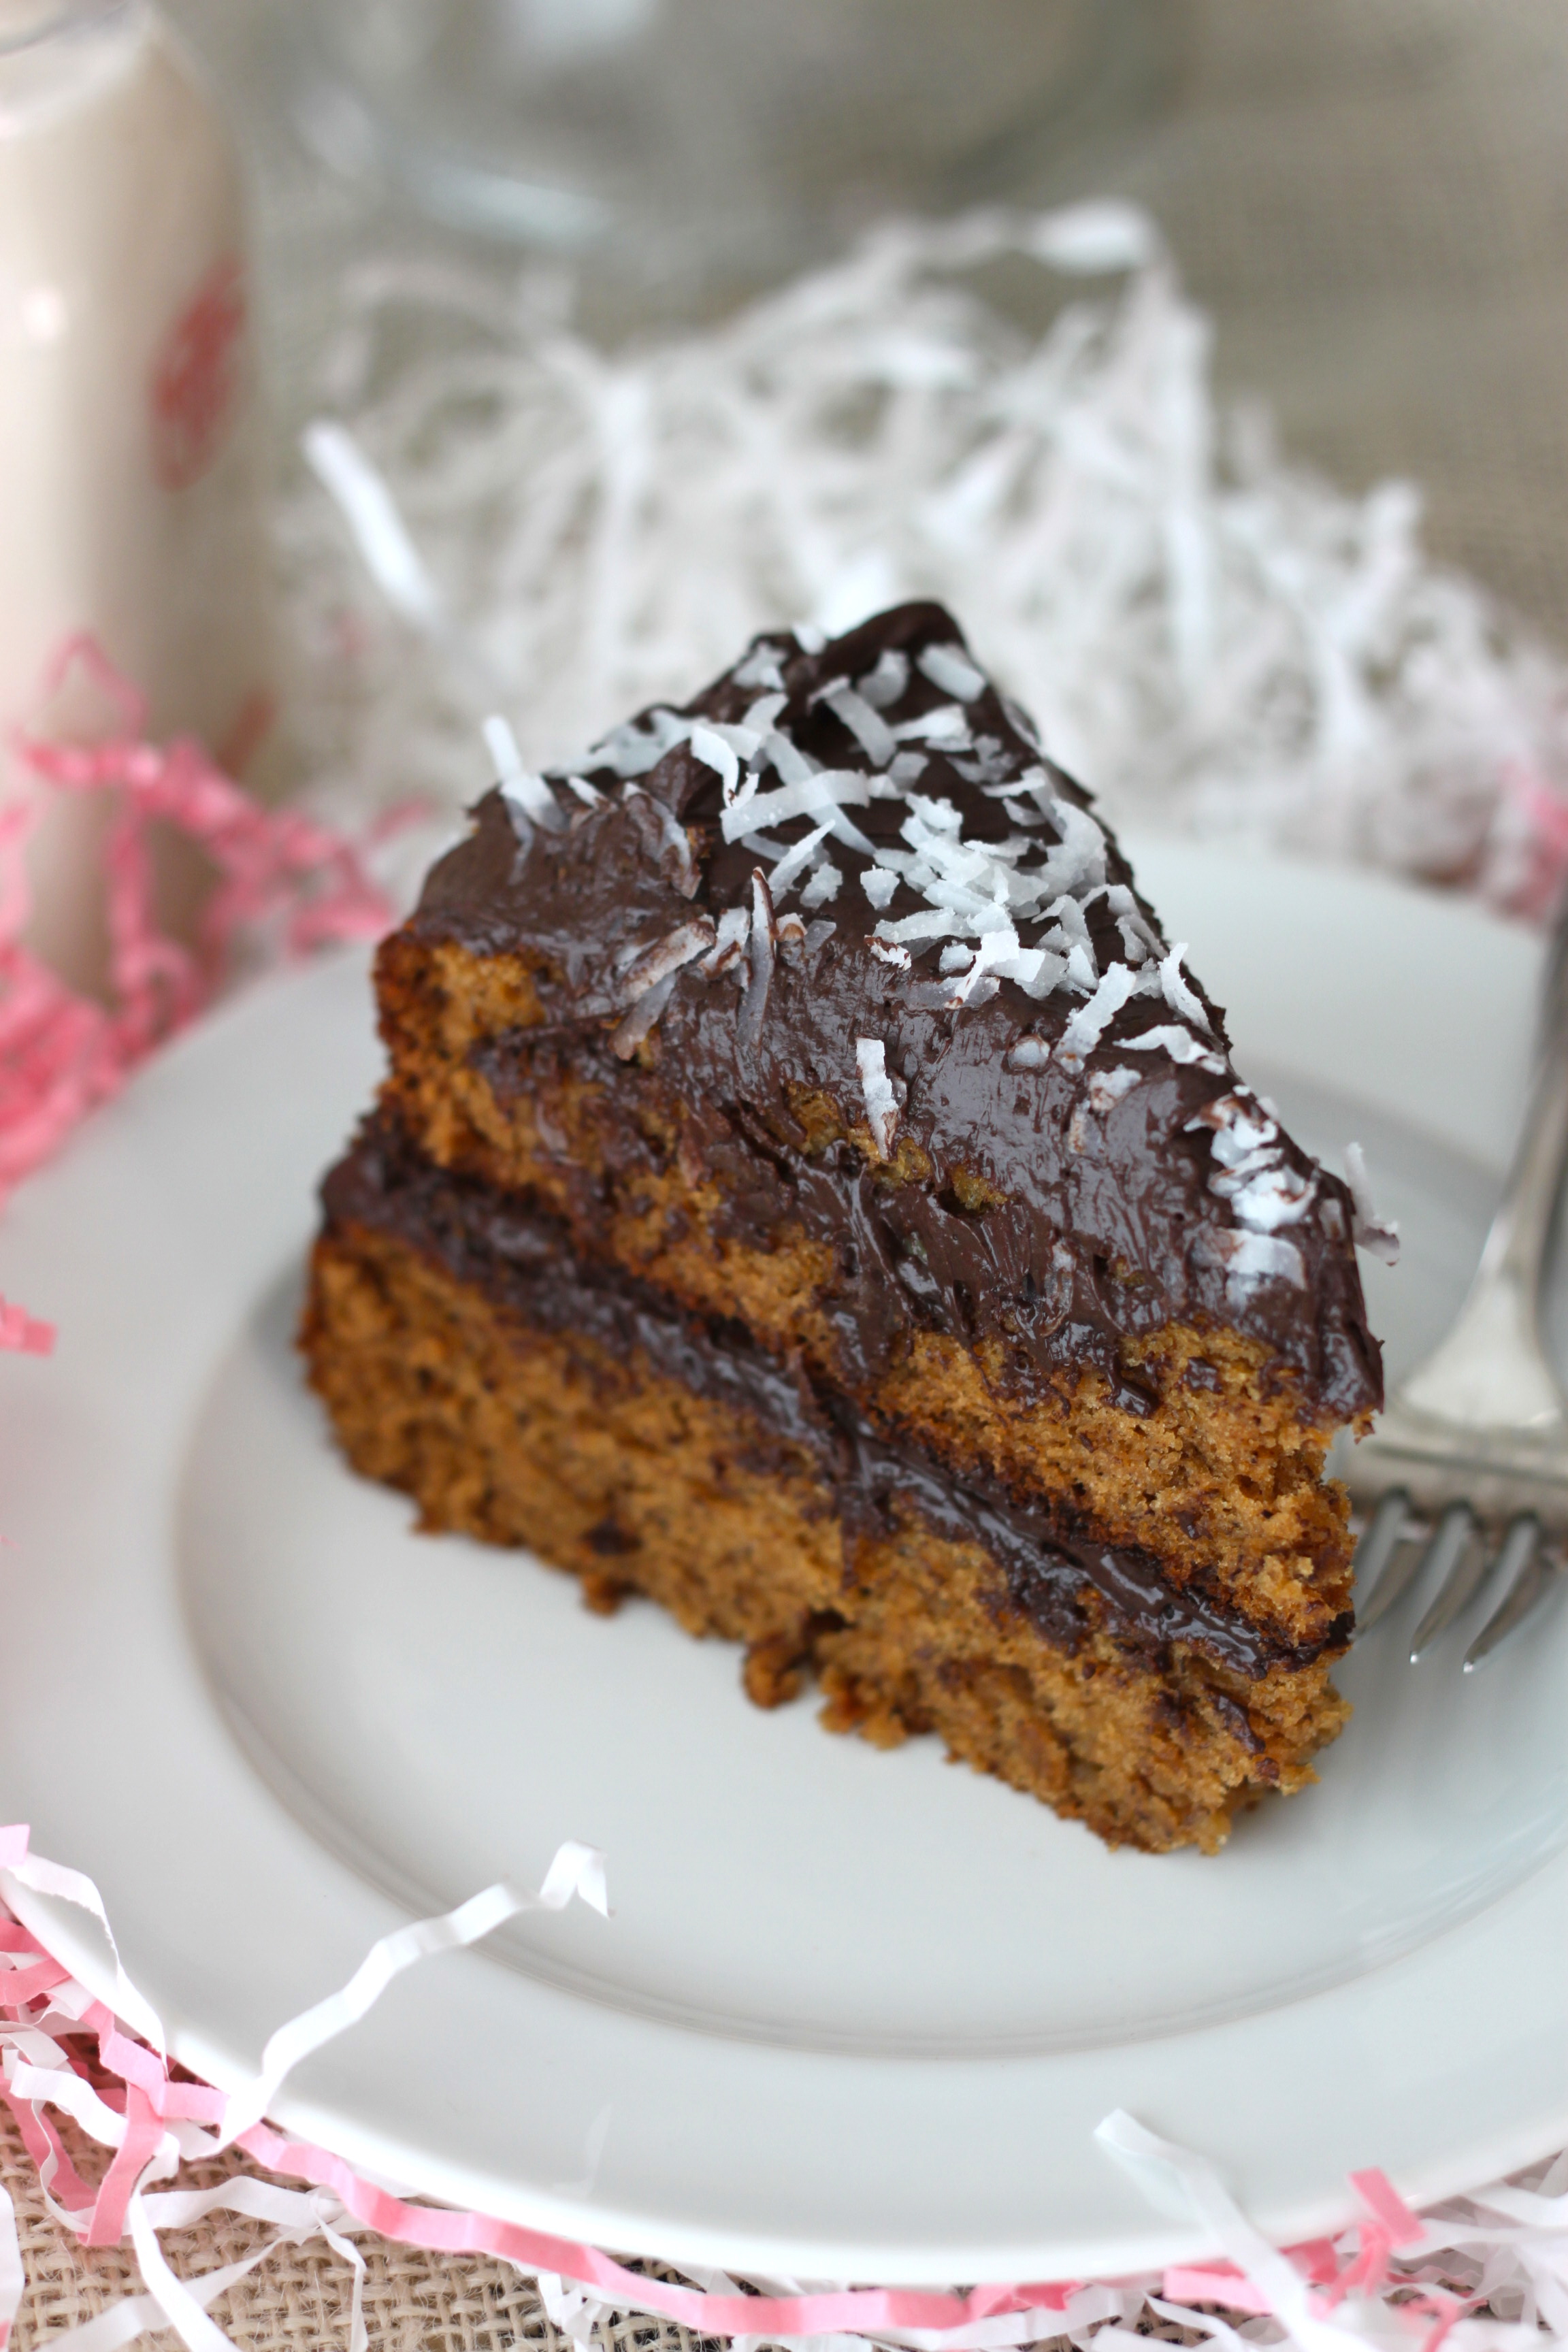
“I’ve been making this cake for almost 10 years. It’s evolved a bit over the years with different frostings and shapes and sizes, but every single time I get asked for the recipe. It is literally THE BEST chocolate cake. It’s indulgent, fudge like, intense, satisfying, and addicting! You won’t regret making this for your friends and family!”
To know me is to understand that chocolate cake will always and forever be my first true love. It may have made my pants a little tighter and my thighs a little more full...But it has also cured many broken hearts, brought joy to a new mom or struggling friend, and even made birthdays that much more special.
Time and time again, as I go back and forth trying to figure out how to feed my body right, I always fall back on chocolate cake. No matter where I am in my life, I consider it healthy. I could not live in a world without it.
I may eat the kale salads and vegetables but I can promise you that if my day has been hard, nothing makes me feel better than to make this chocolate cake. Whether I am making it for my family, or dropping it off to someone who might need it more…
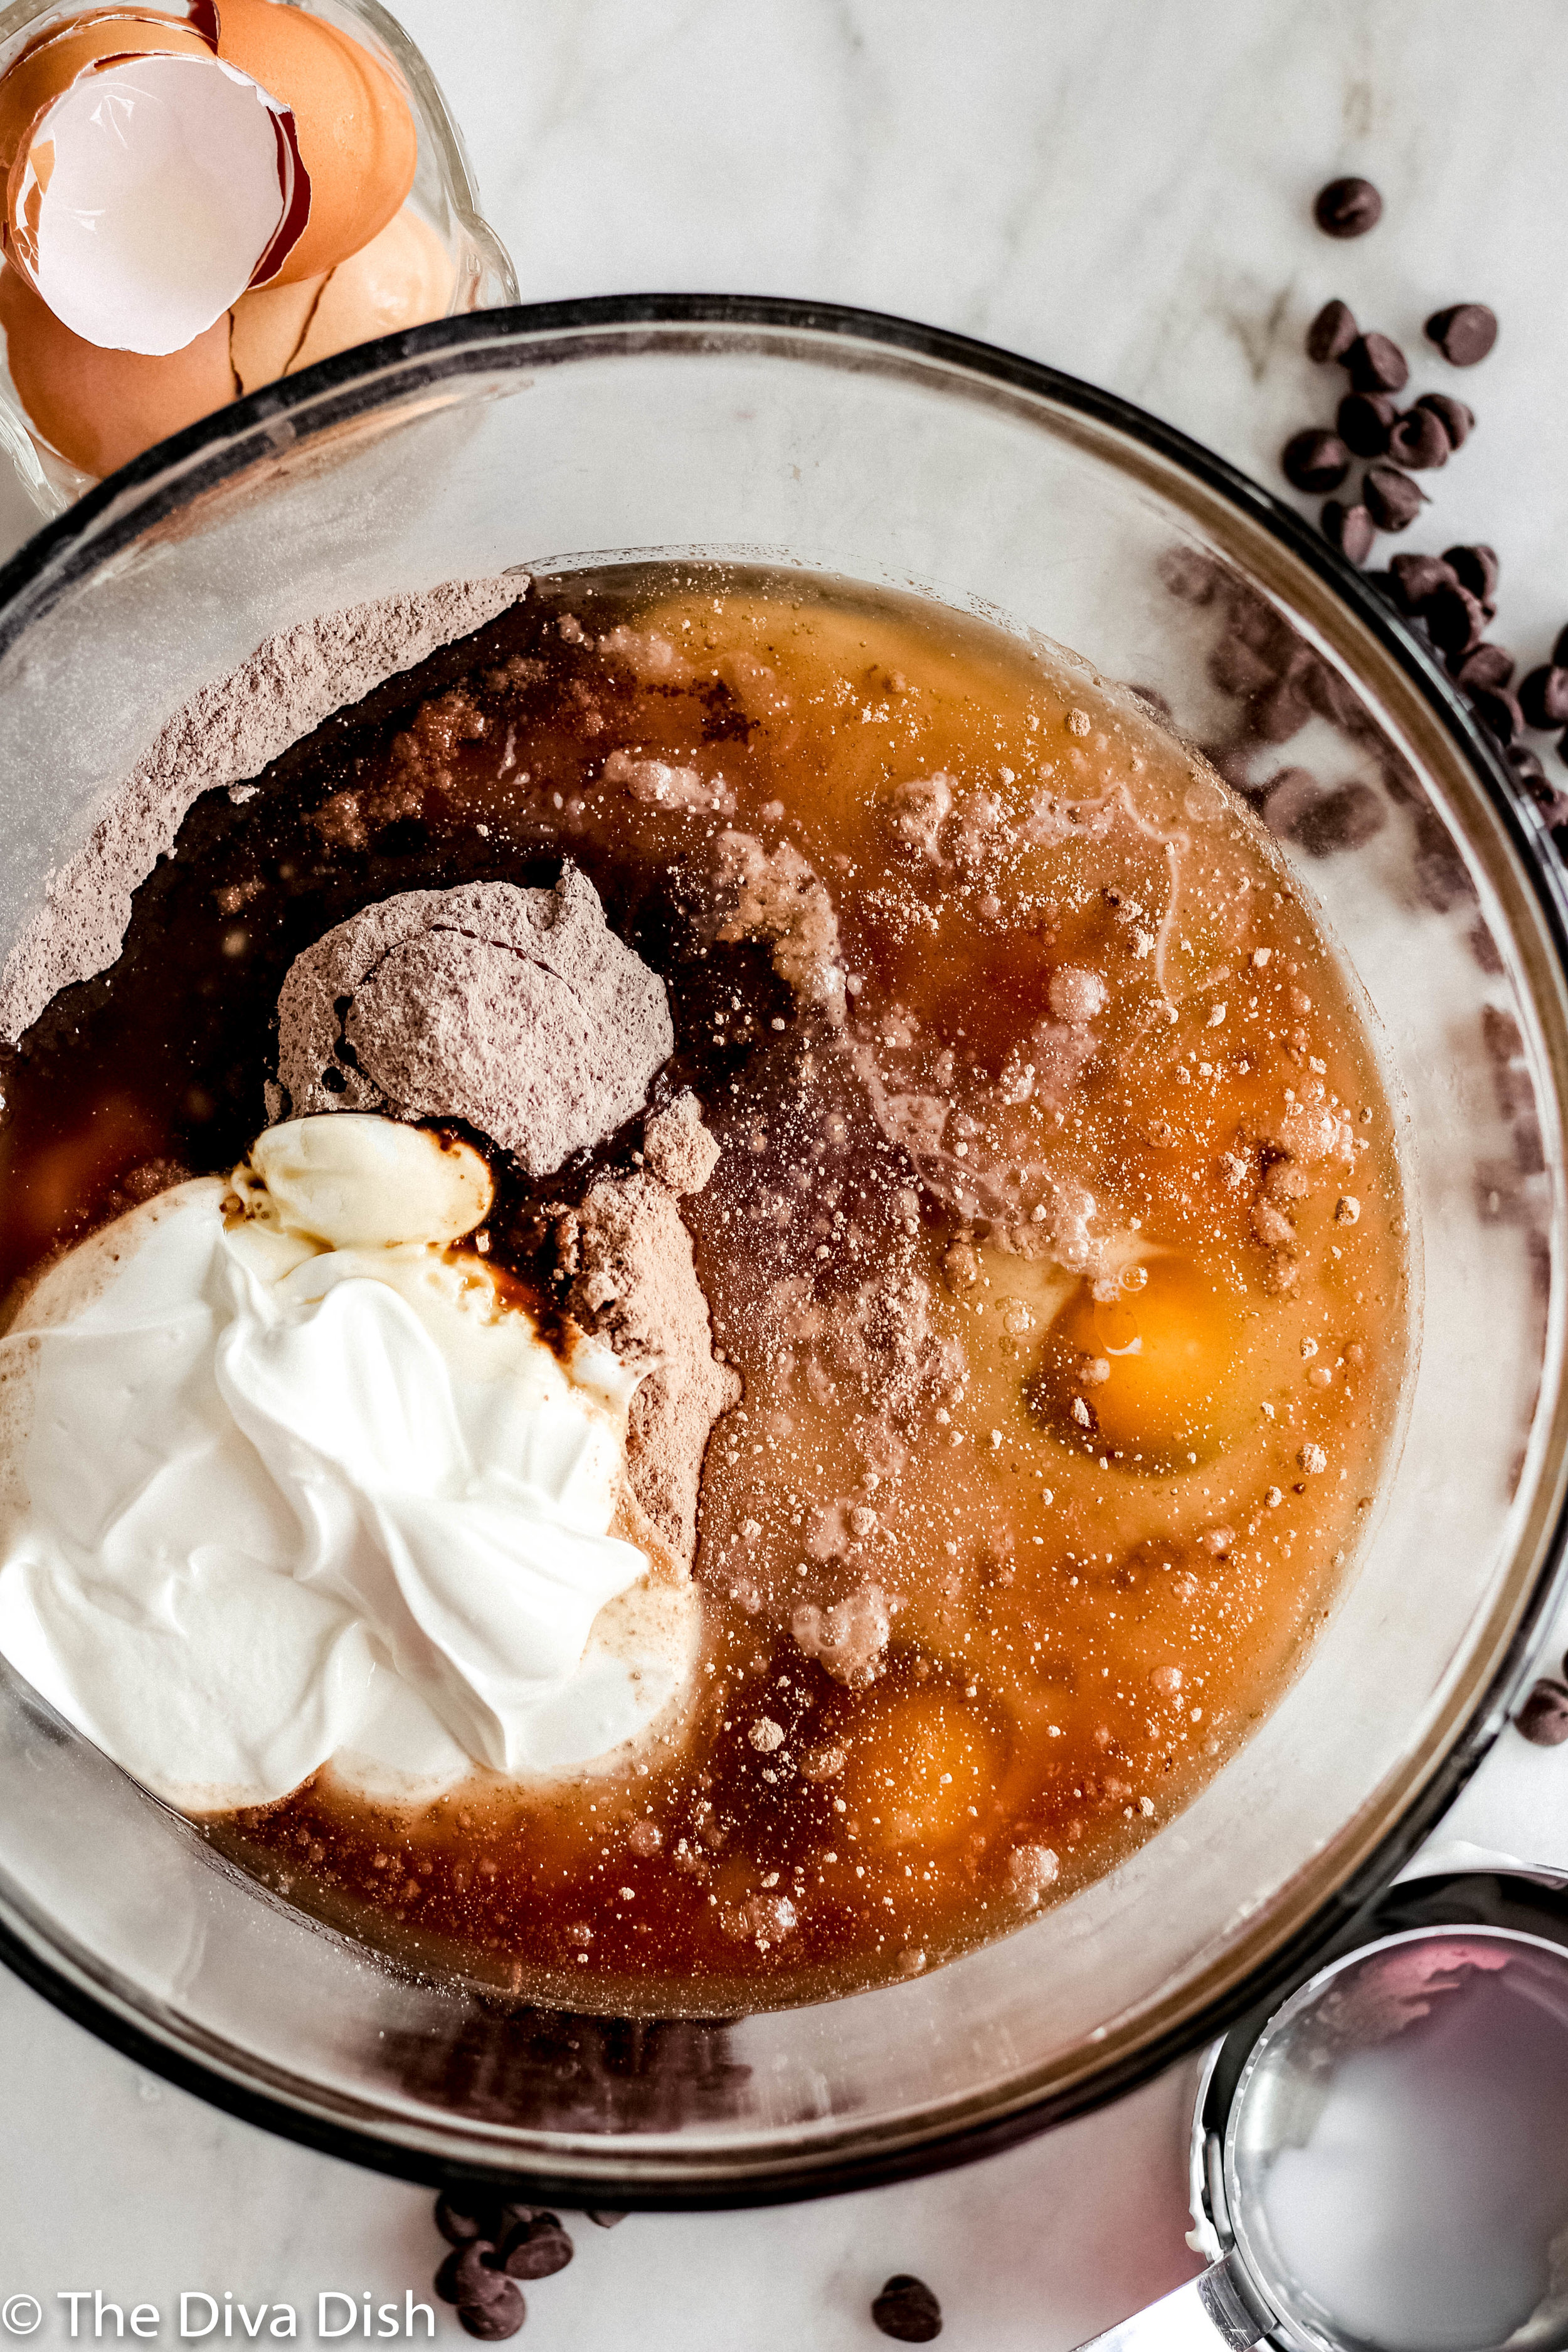
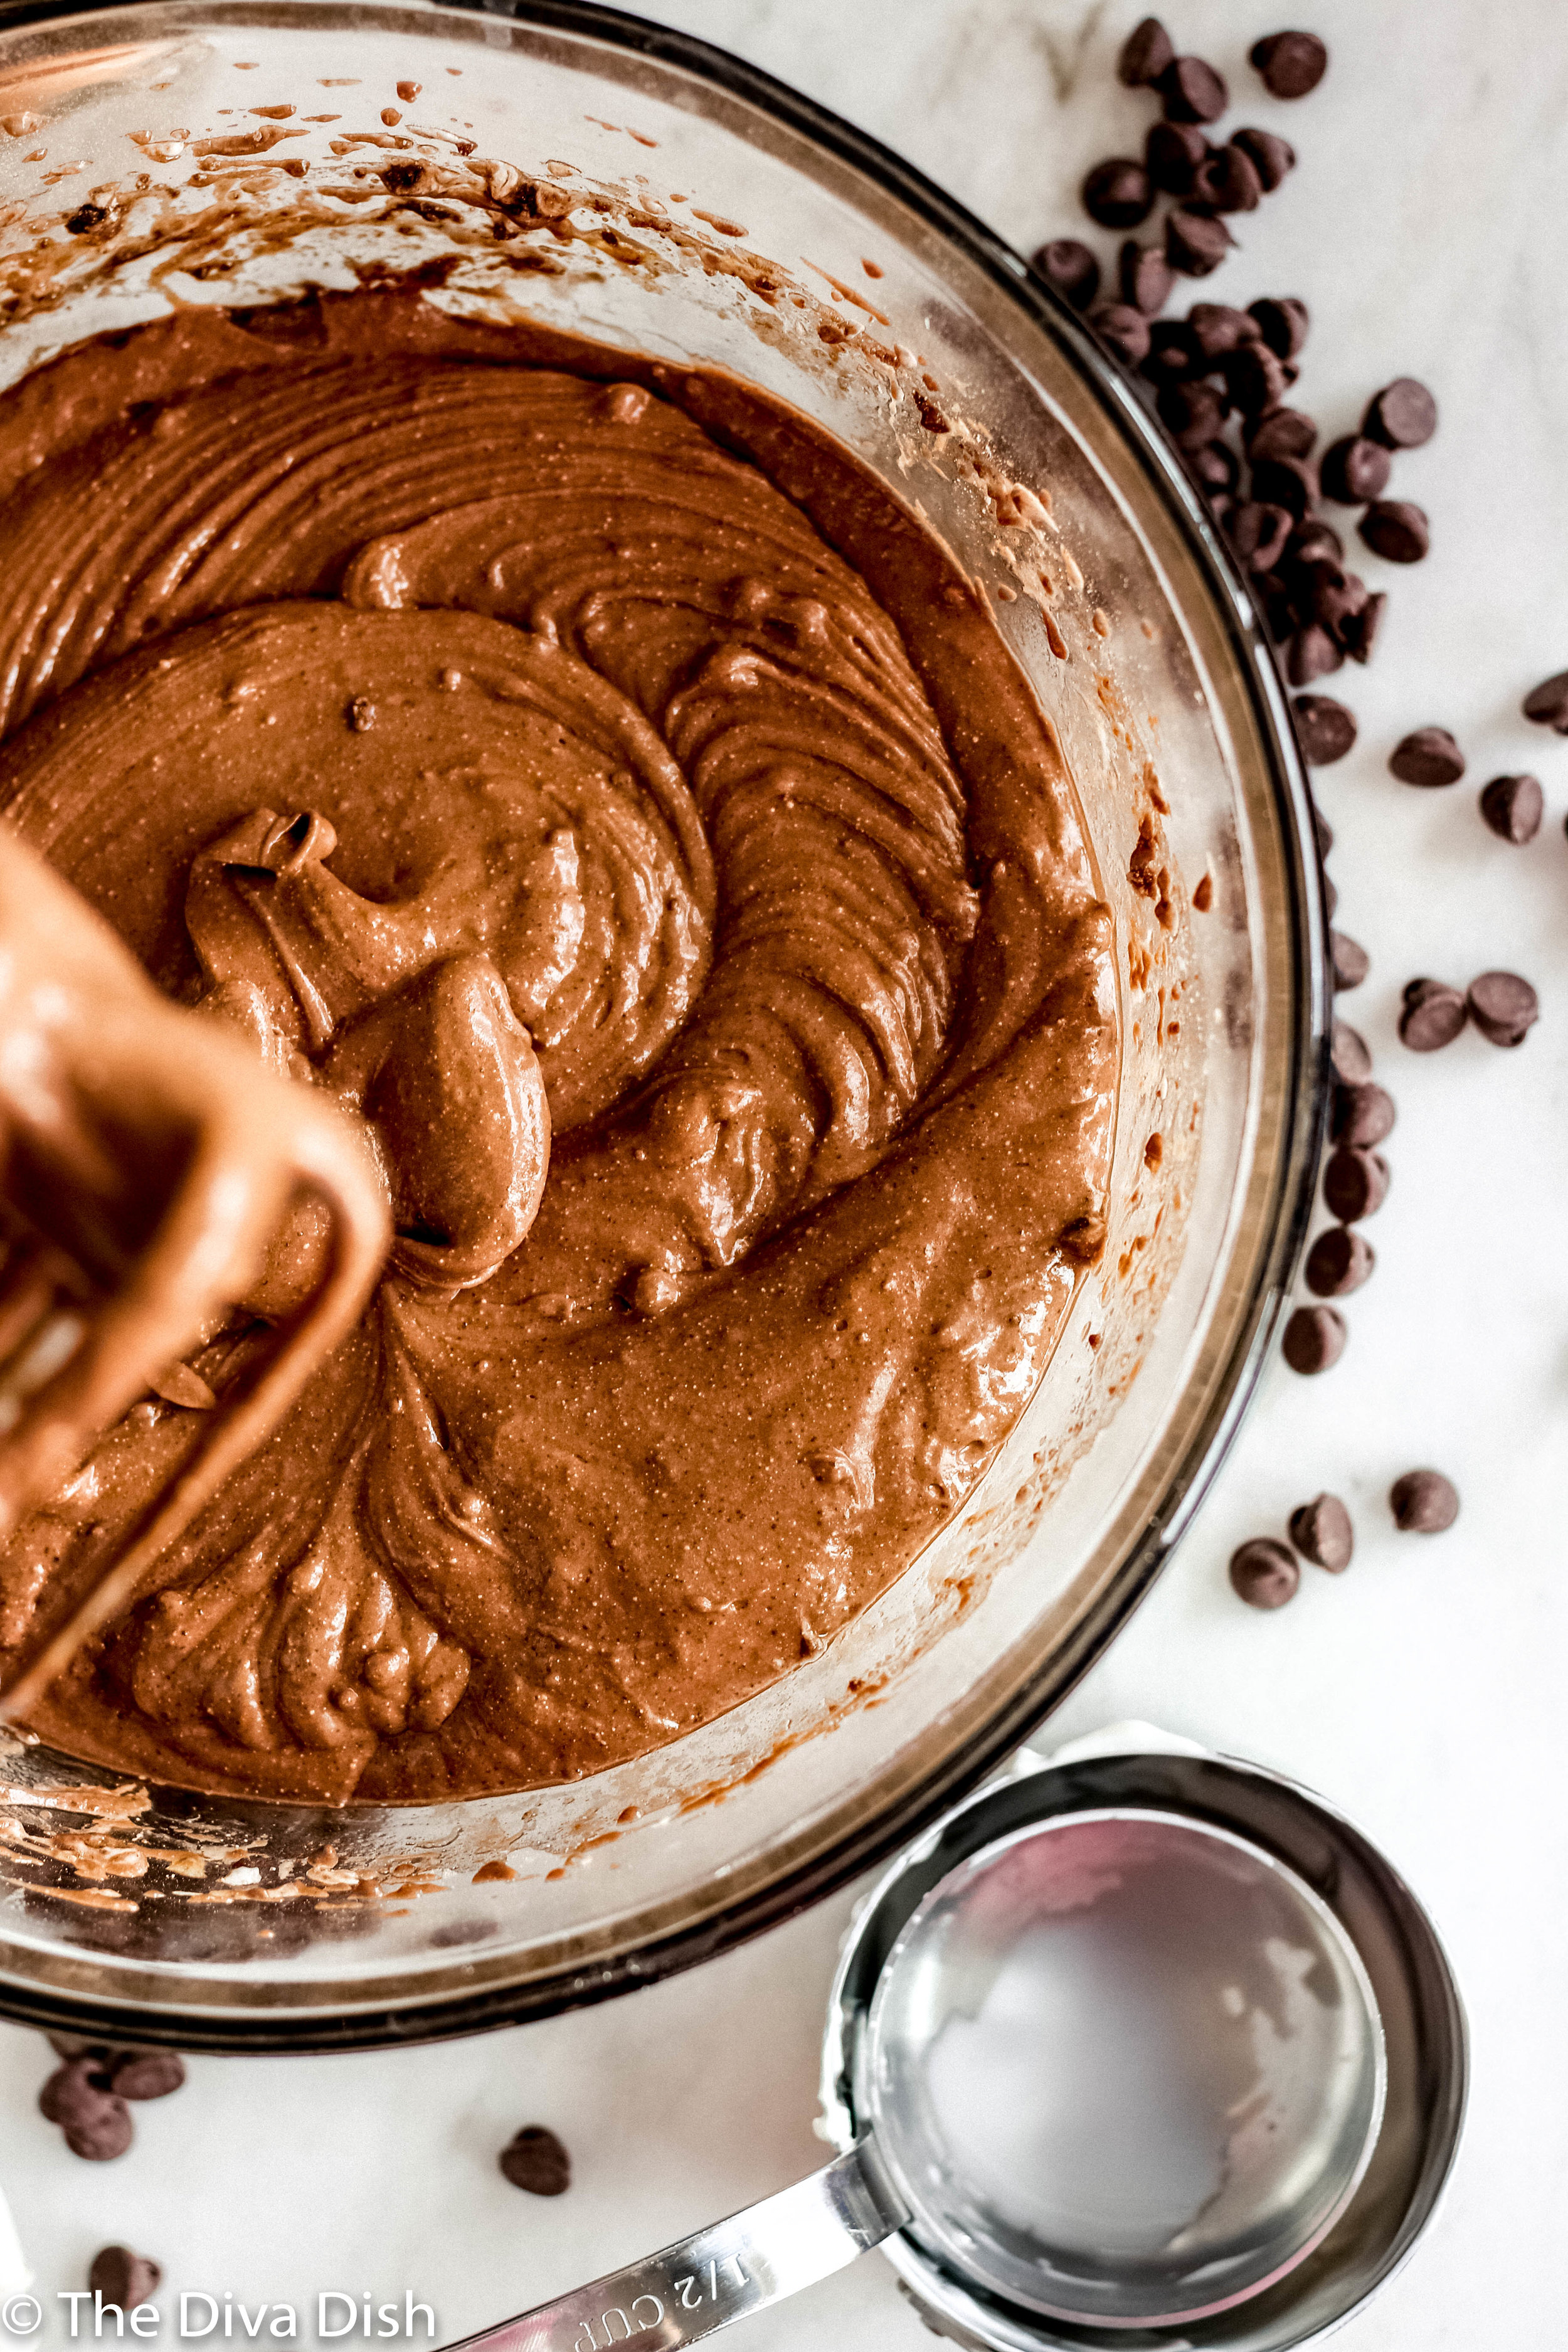
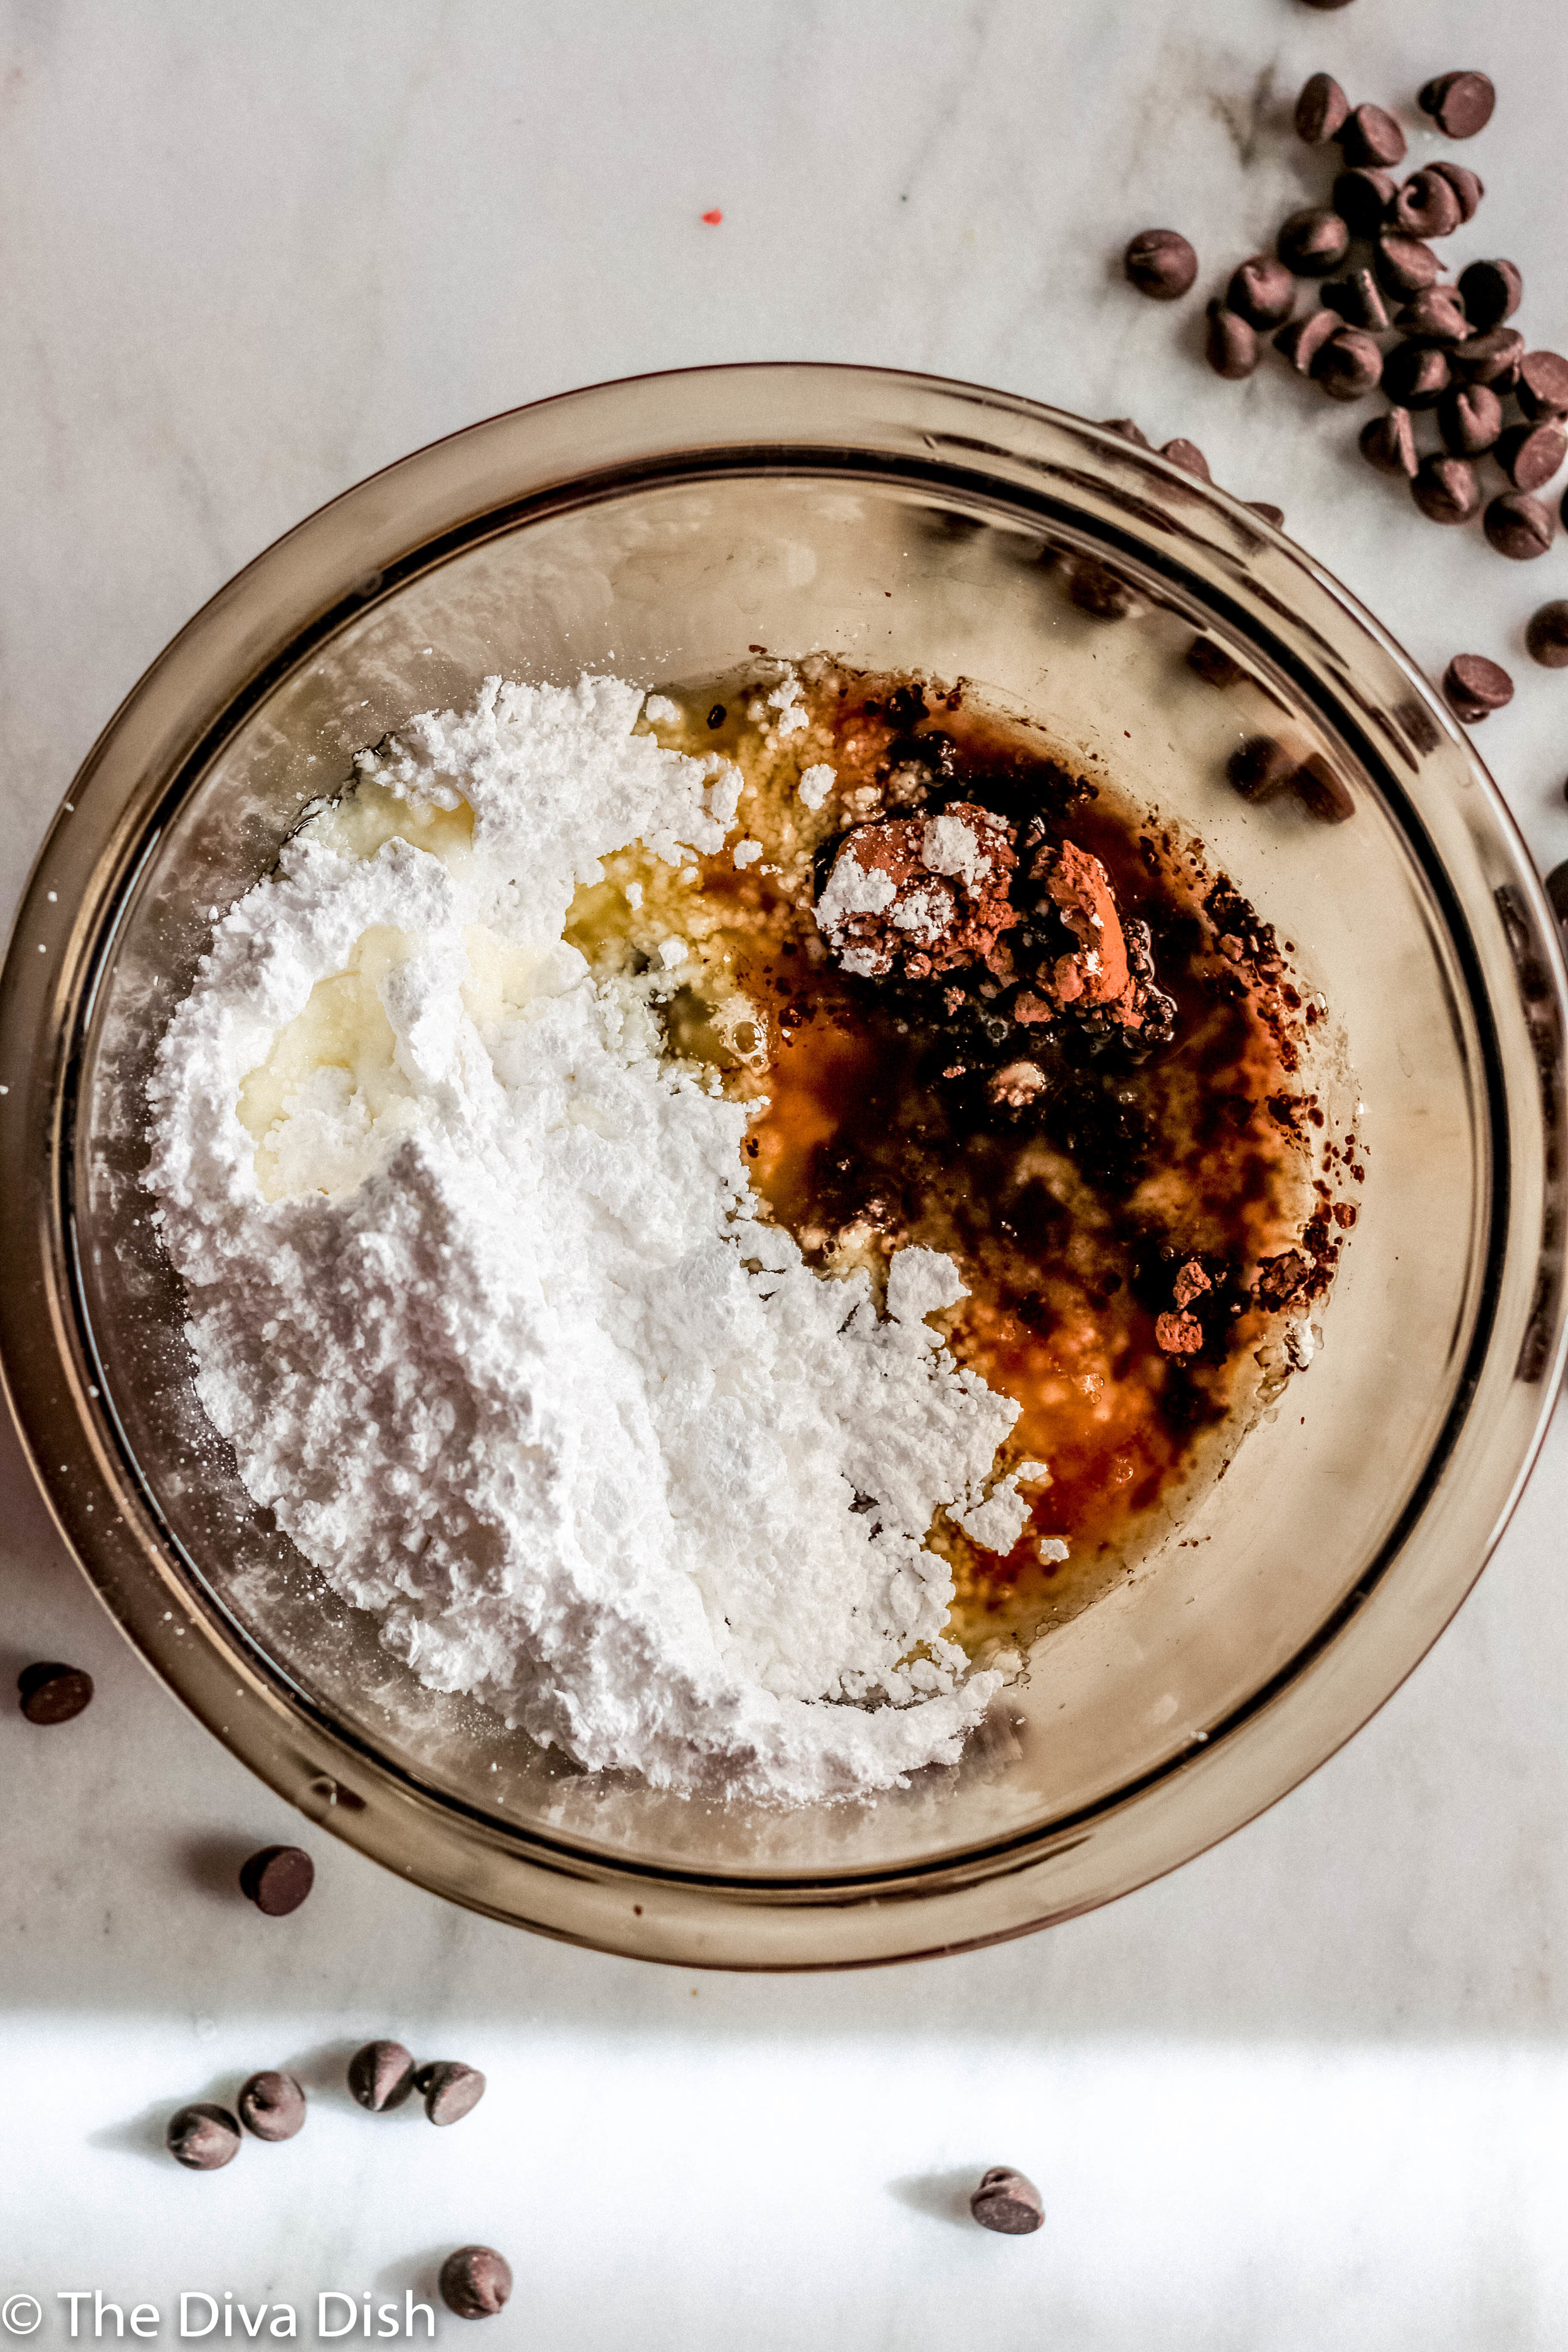
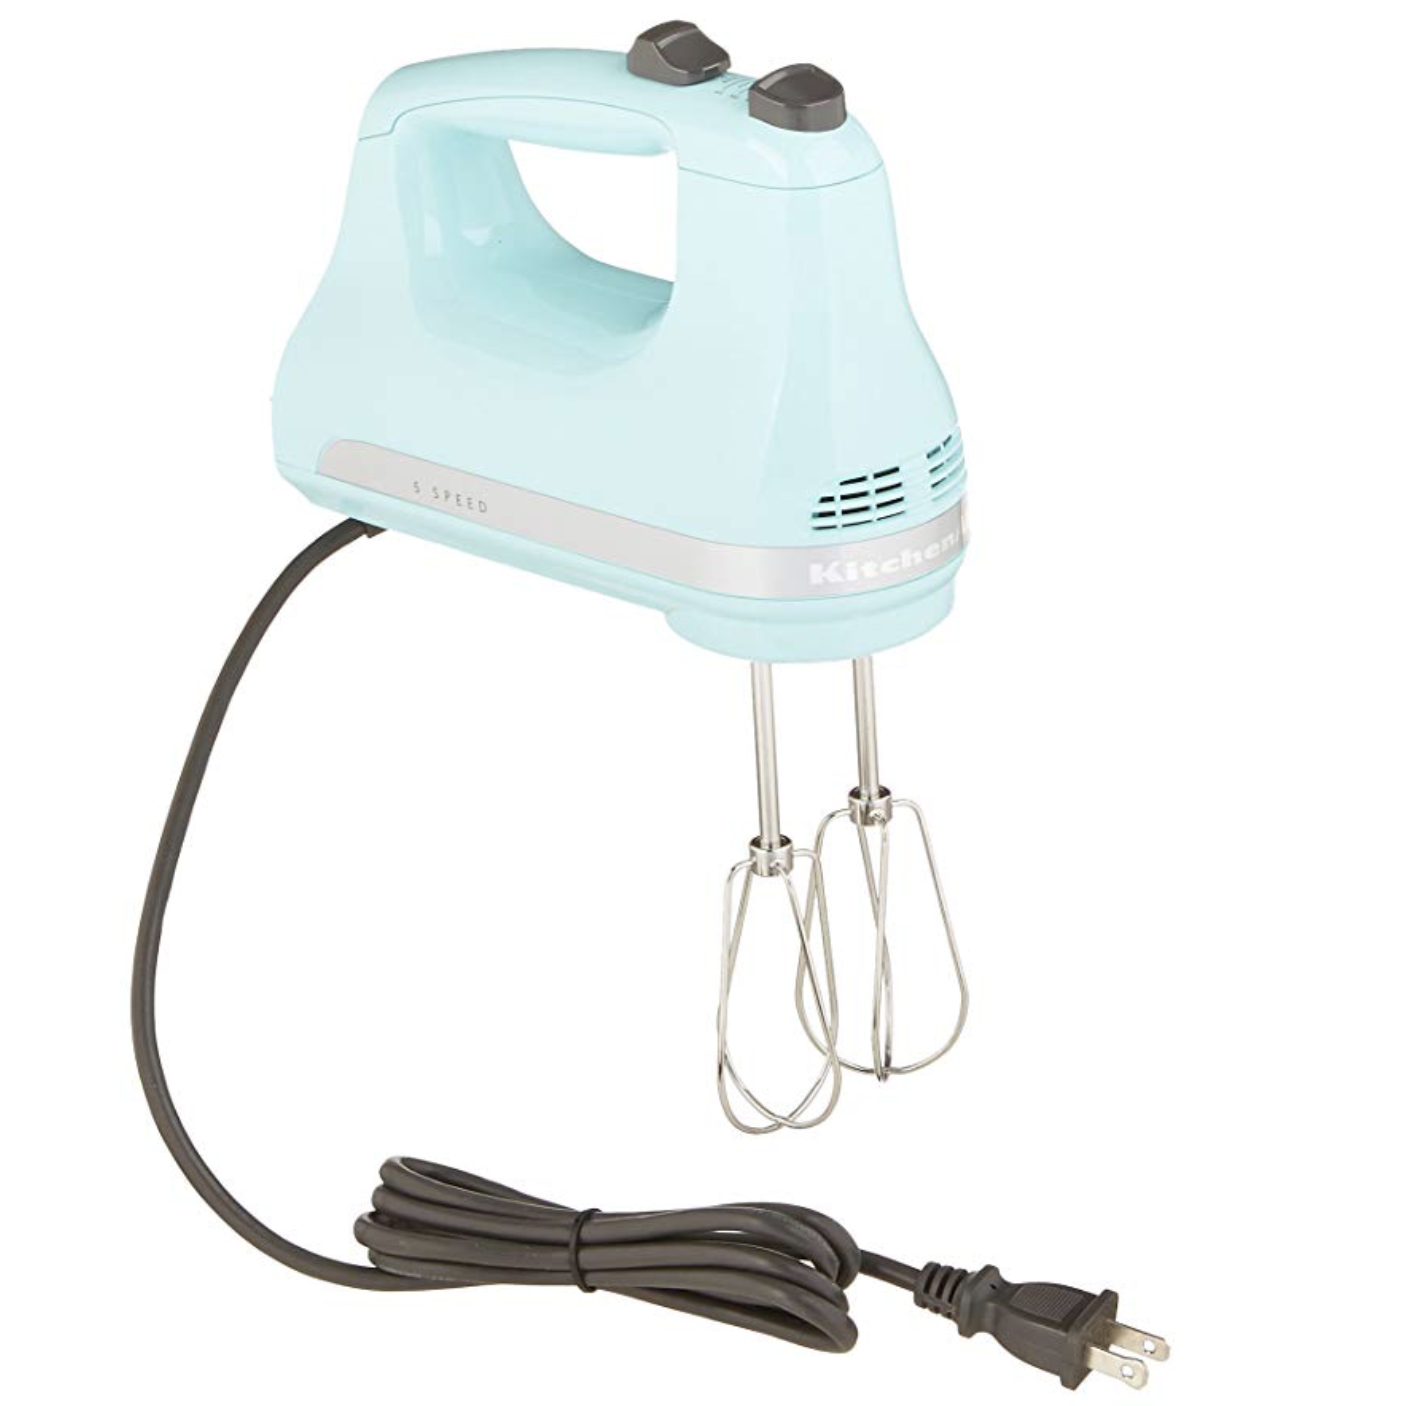
In a large mixing bowl add all the cake ingredients except the chocolate chips. Using a hand mixer, beat the ingredients until they come together and the batter is nice and smooth.
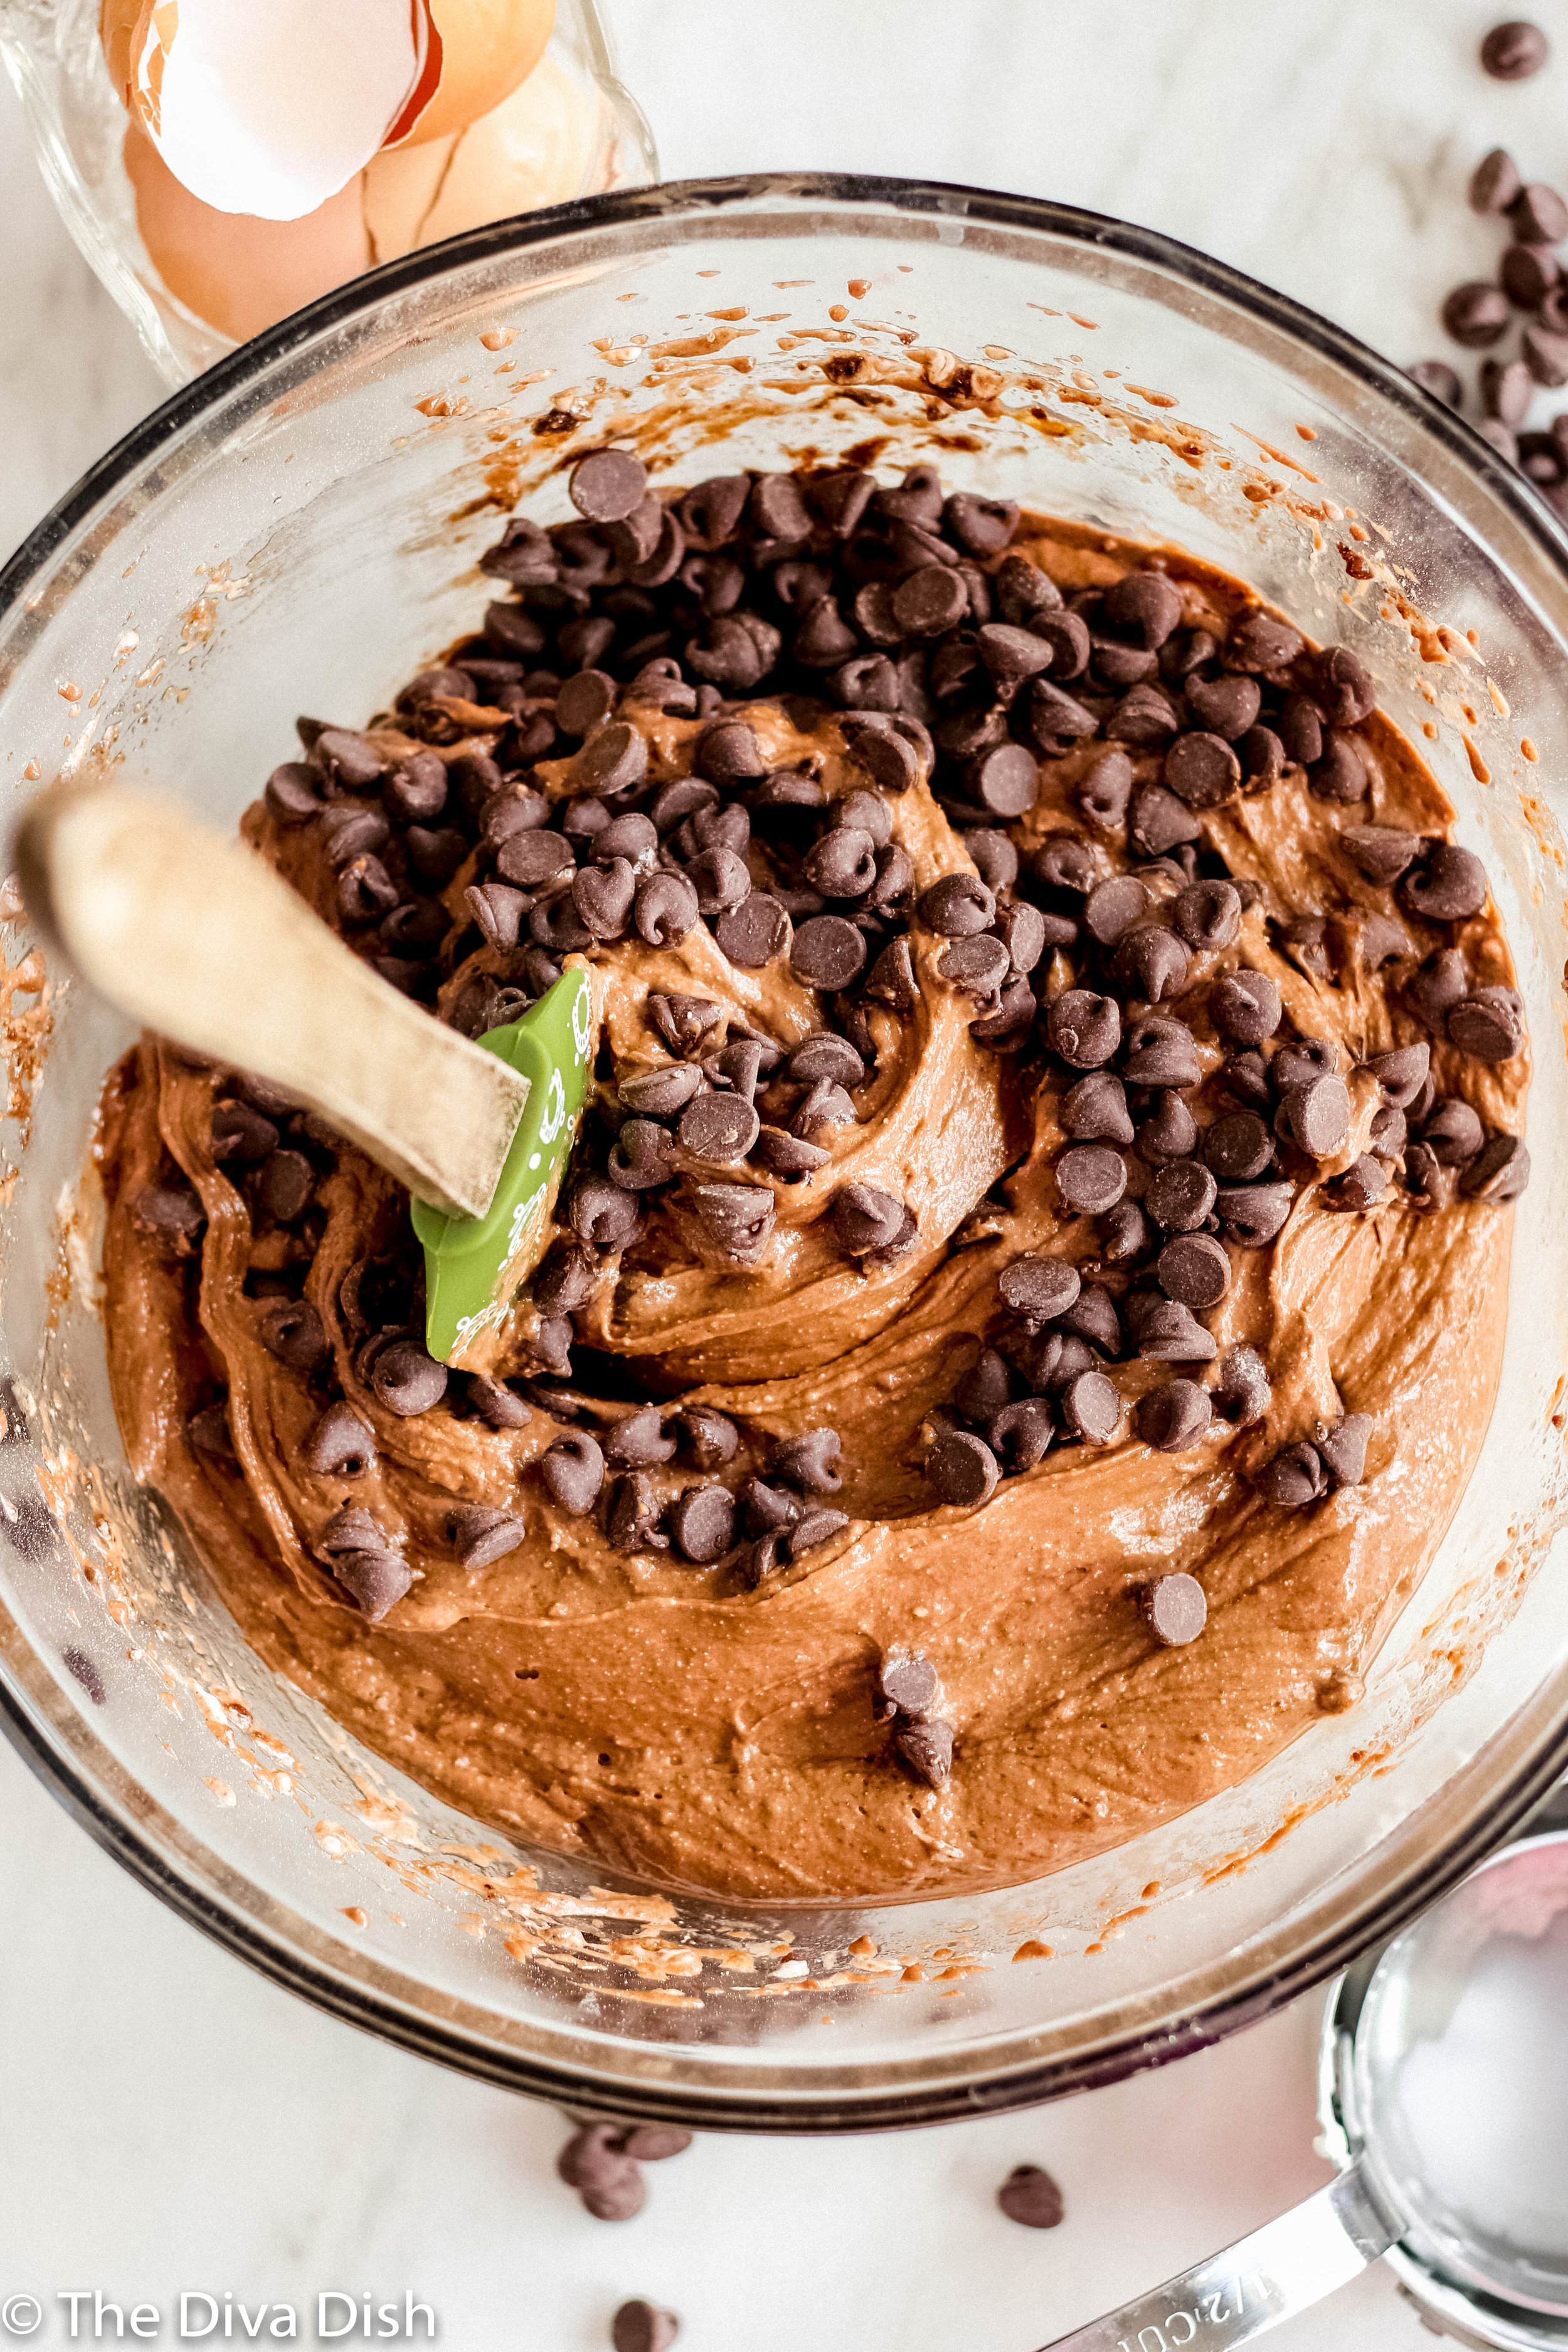
Fold in the chocolate chips.
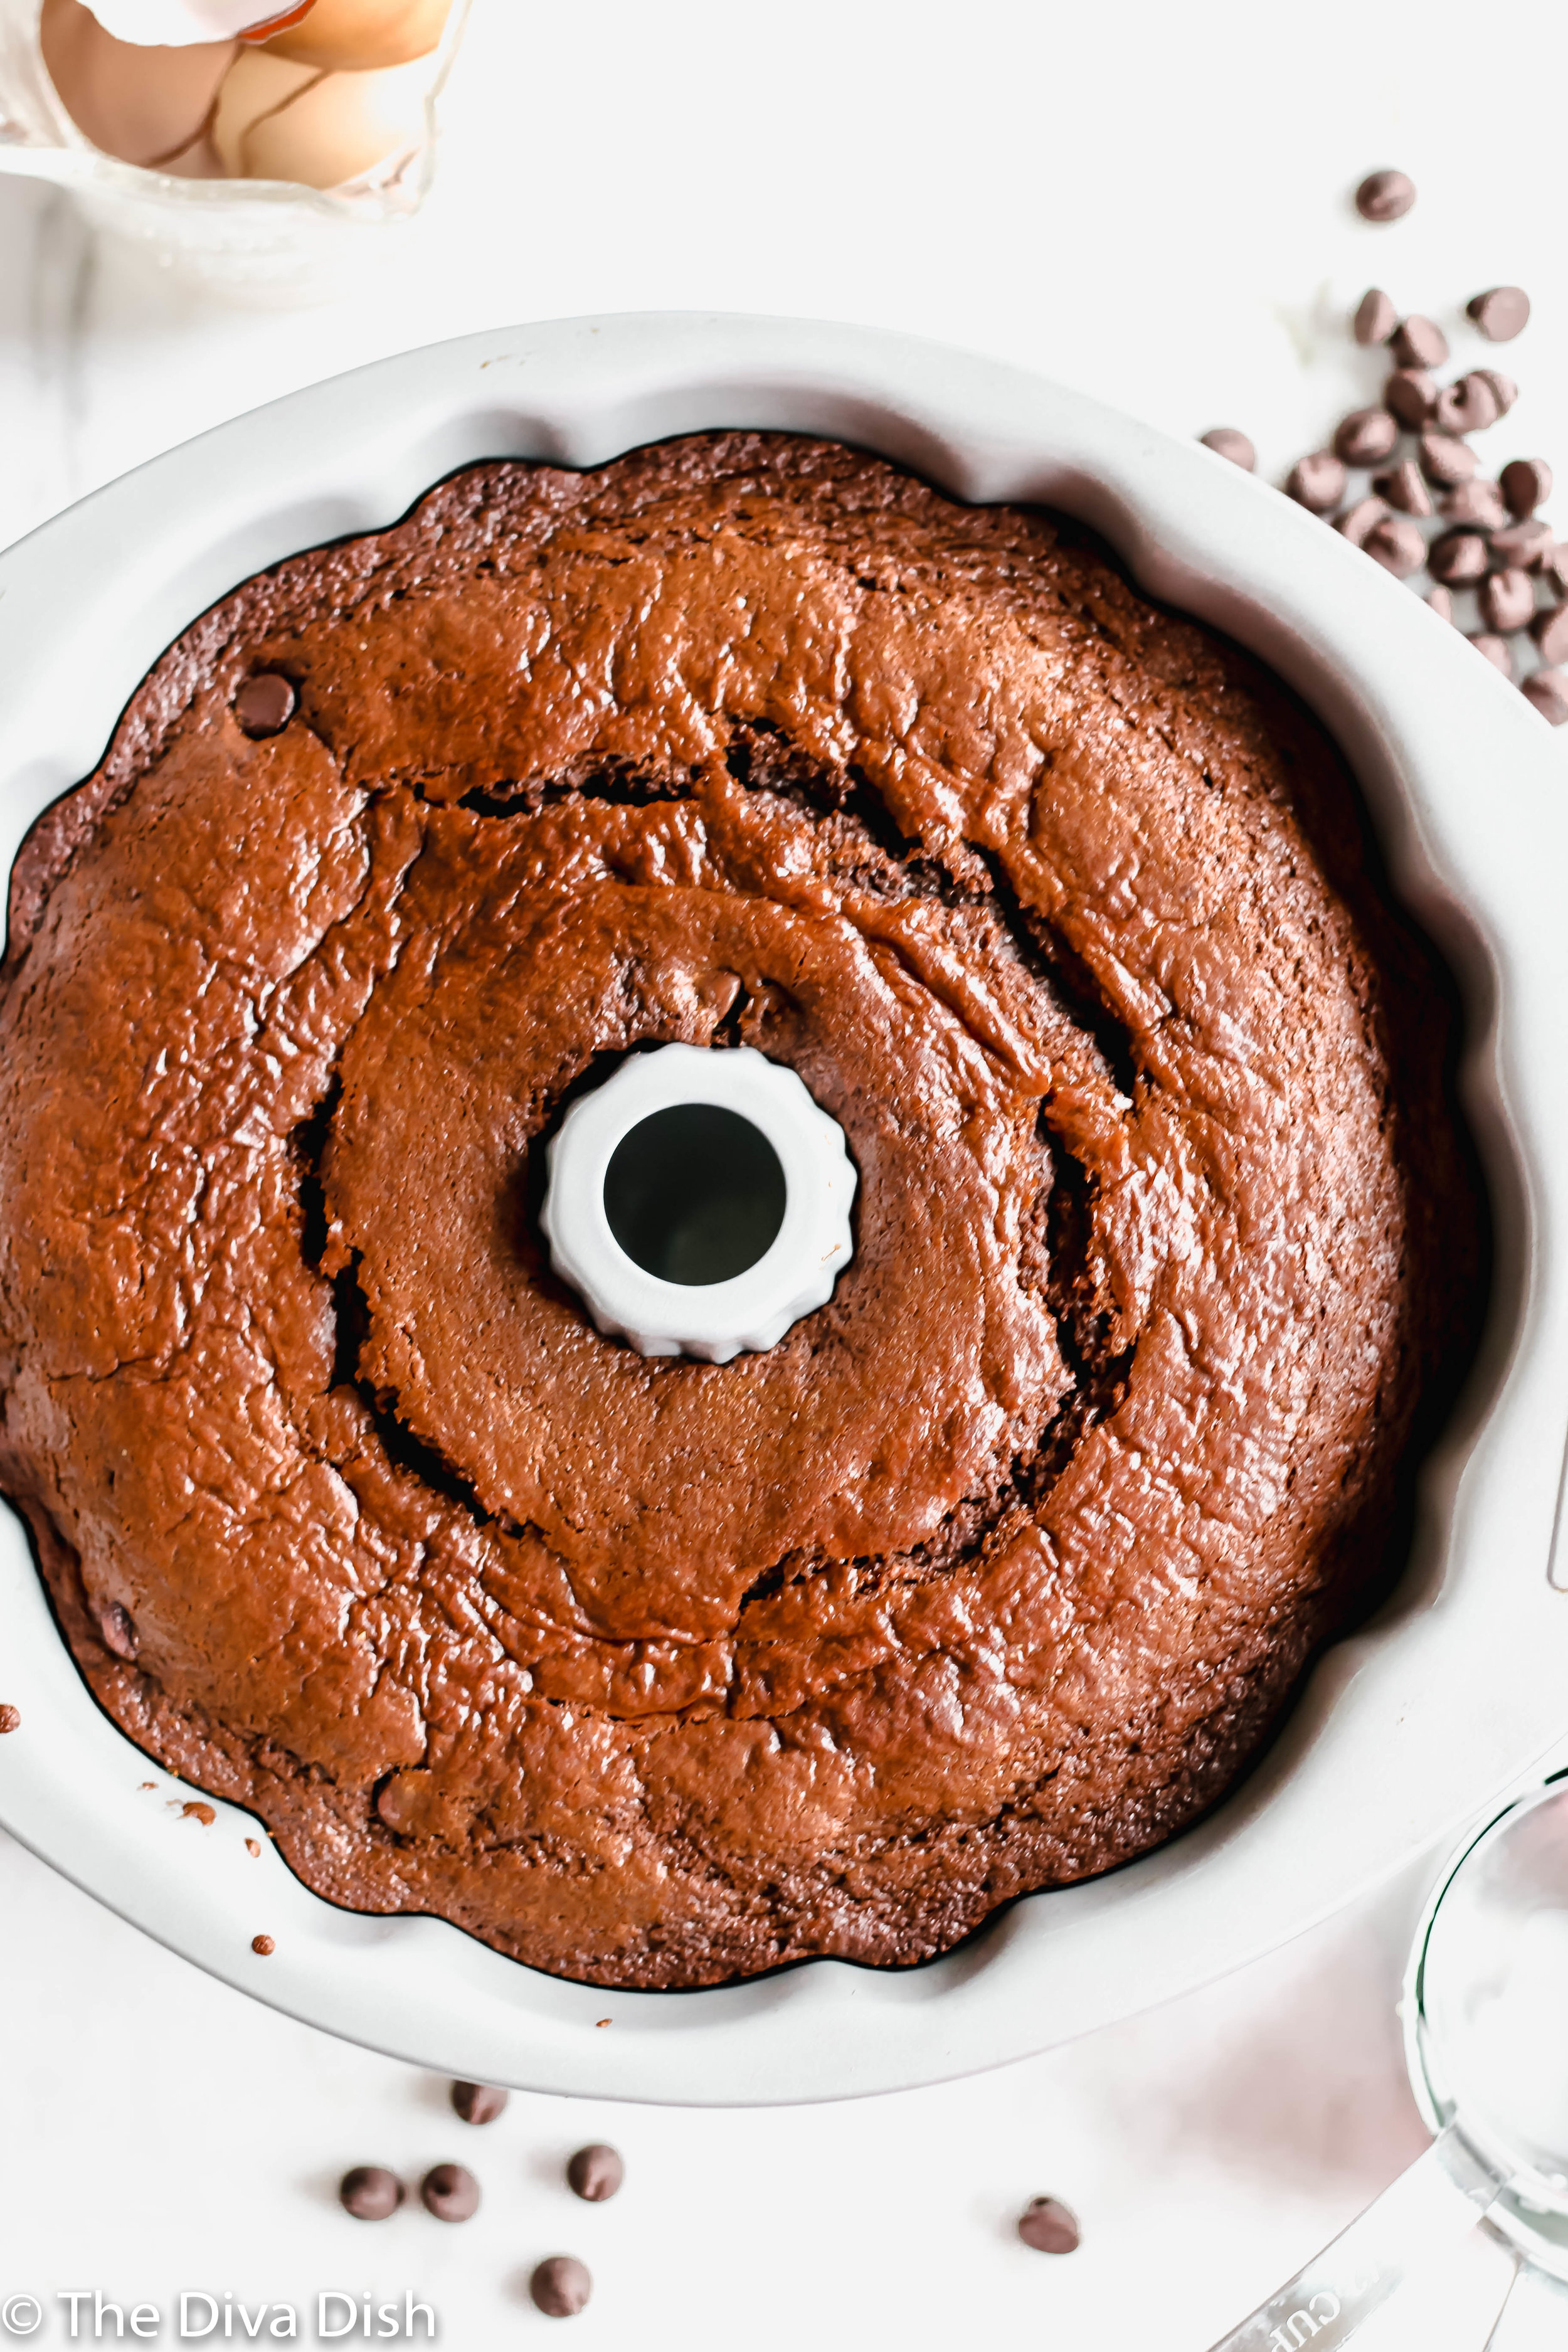
Generously grease a bundt pan.
Pour the batter into the bundt pan and smooth it so it’s completely even on top, meaning there isn’t more batter to one side or other other.
Bake in the oven for 30-40 minutes, or until the top bounces back and is completely cooked.
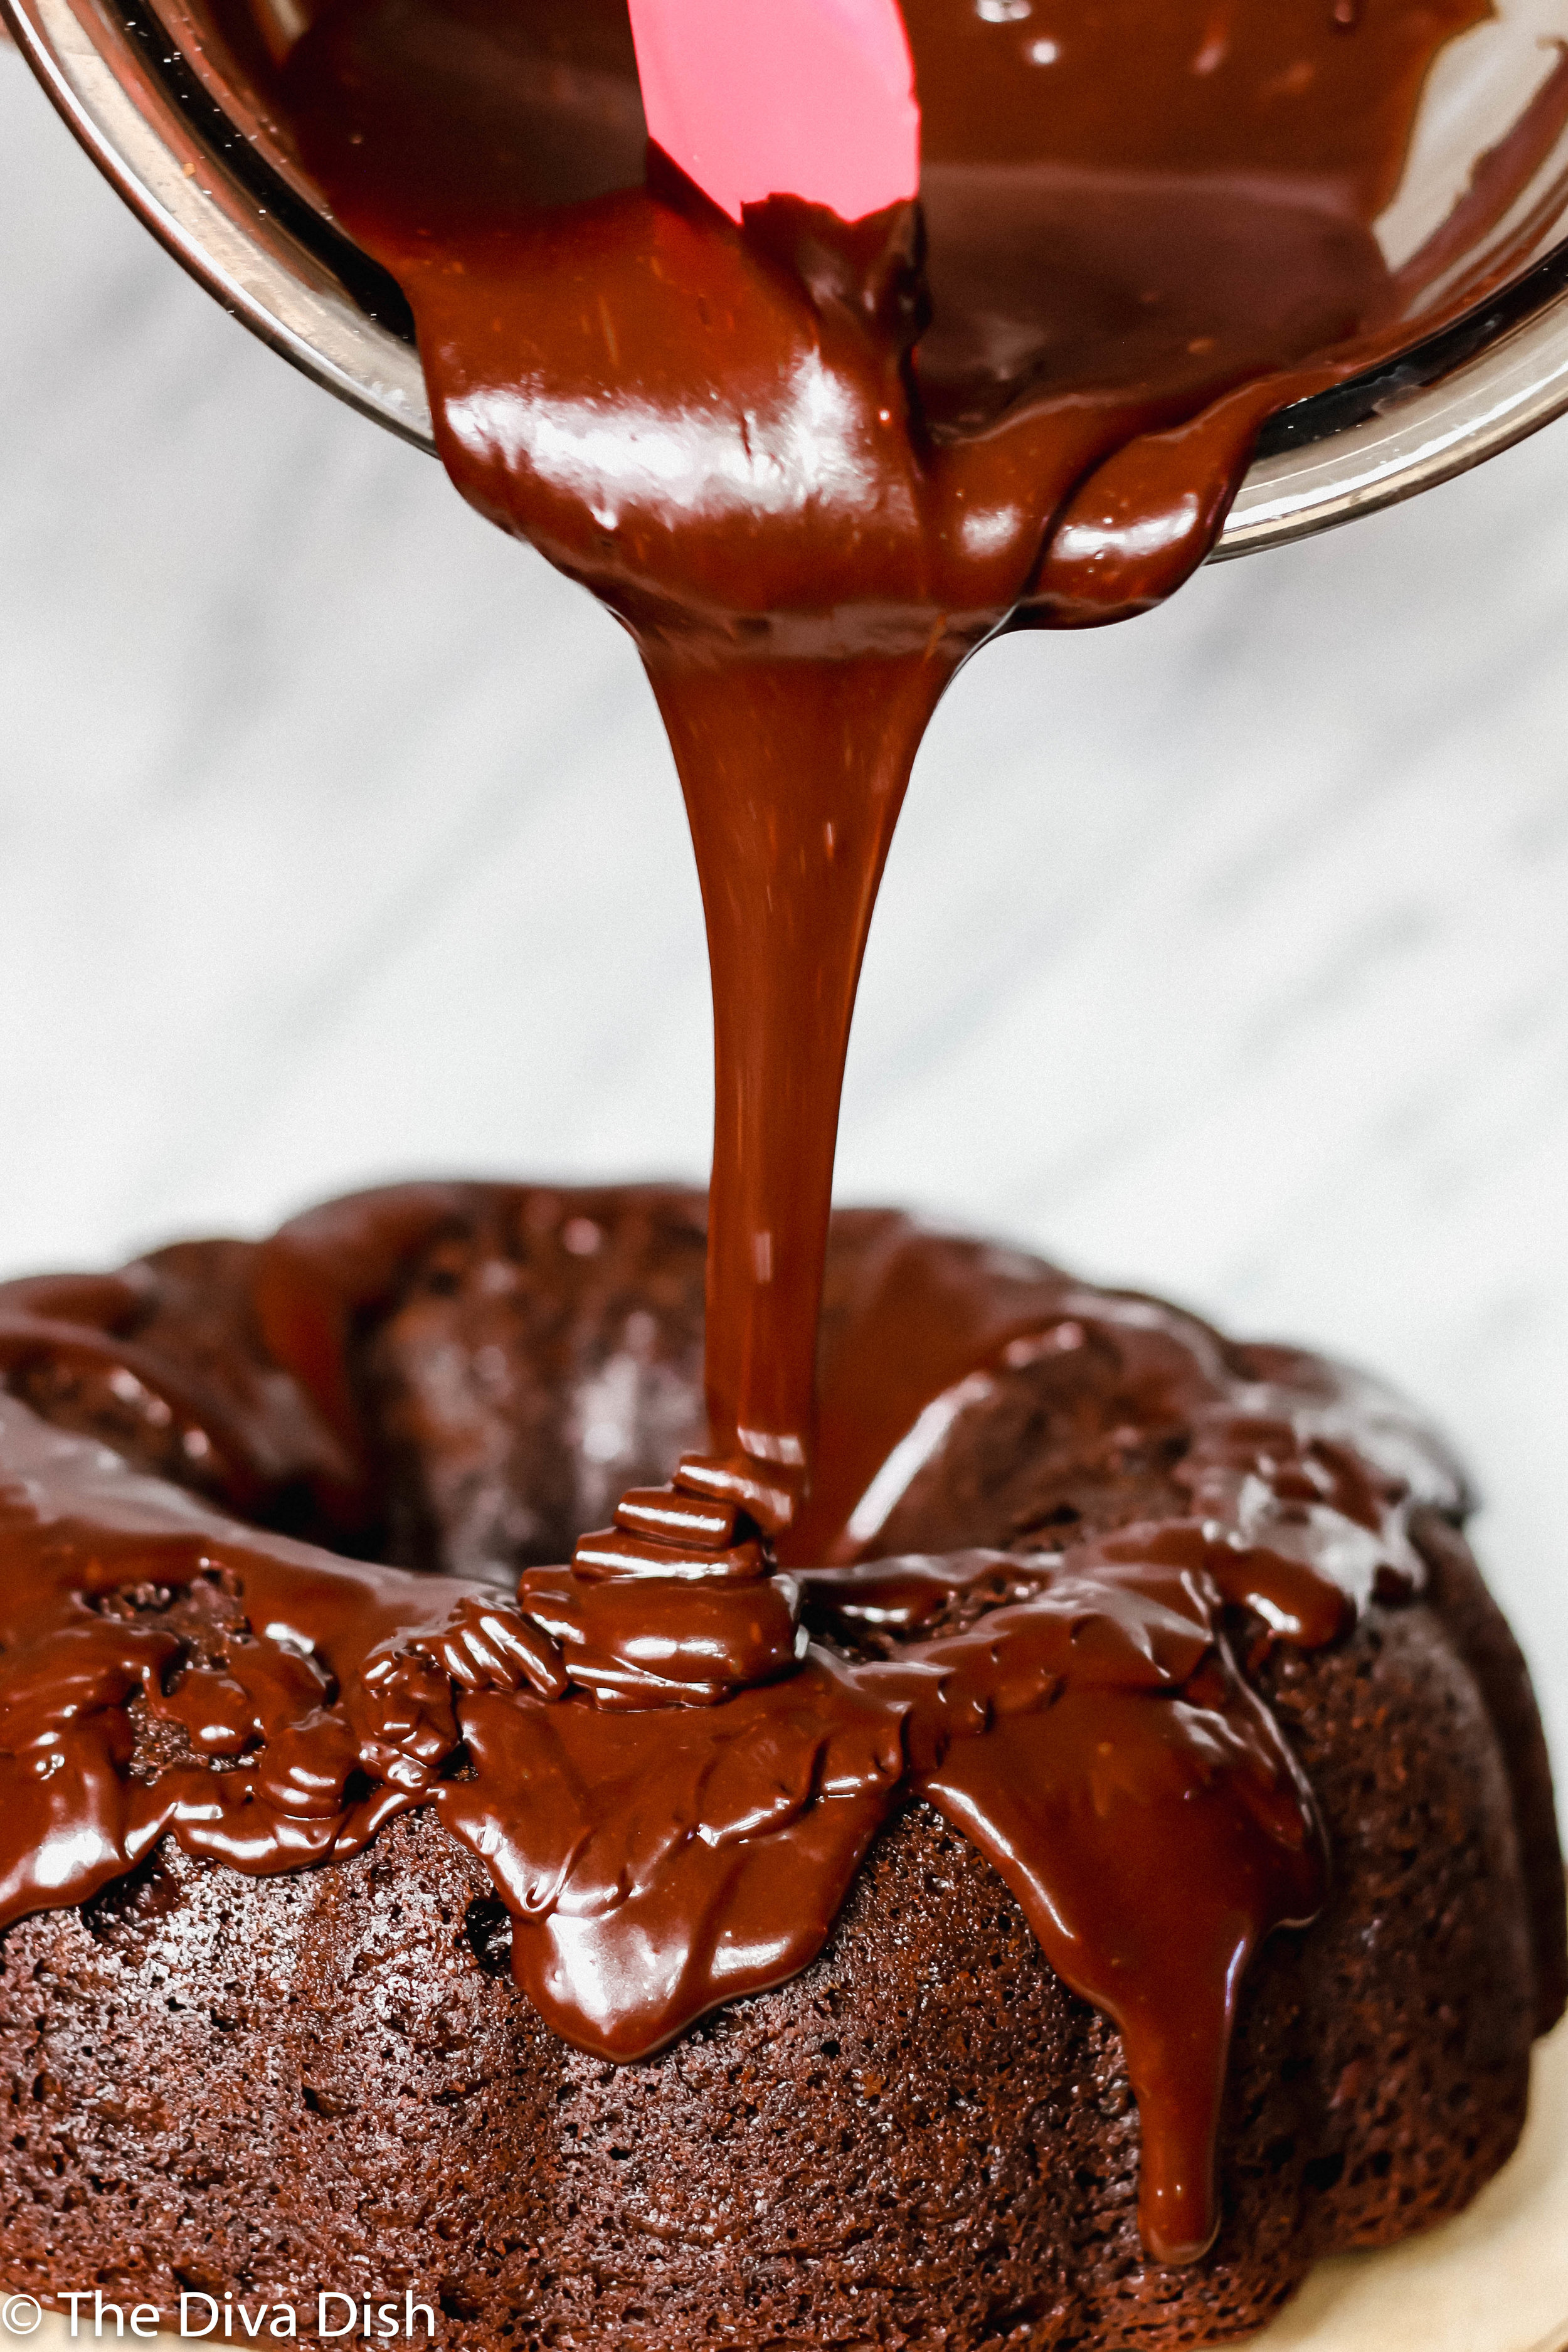
Let cool completely. Then remove and place on a cake stand.
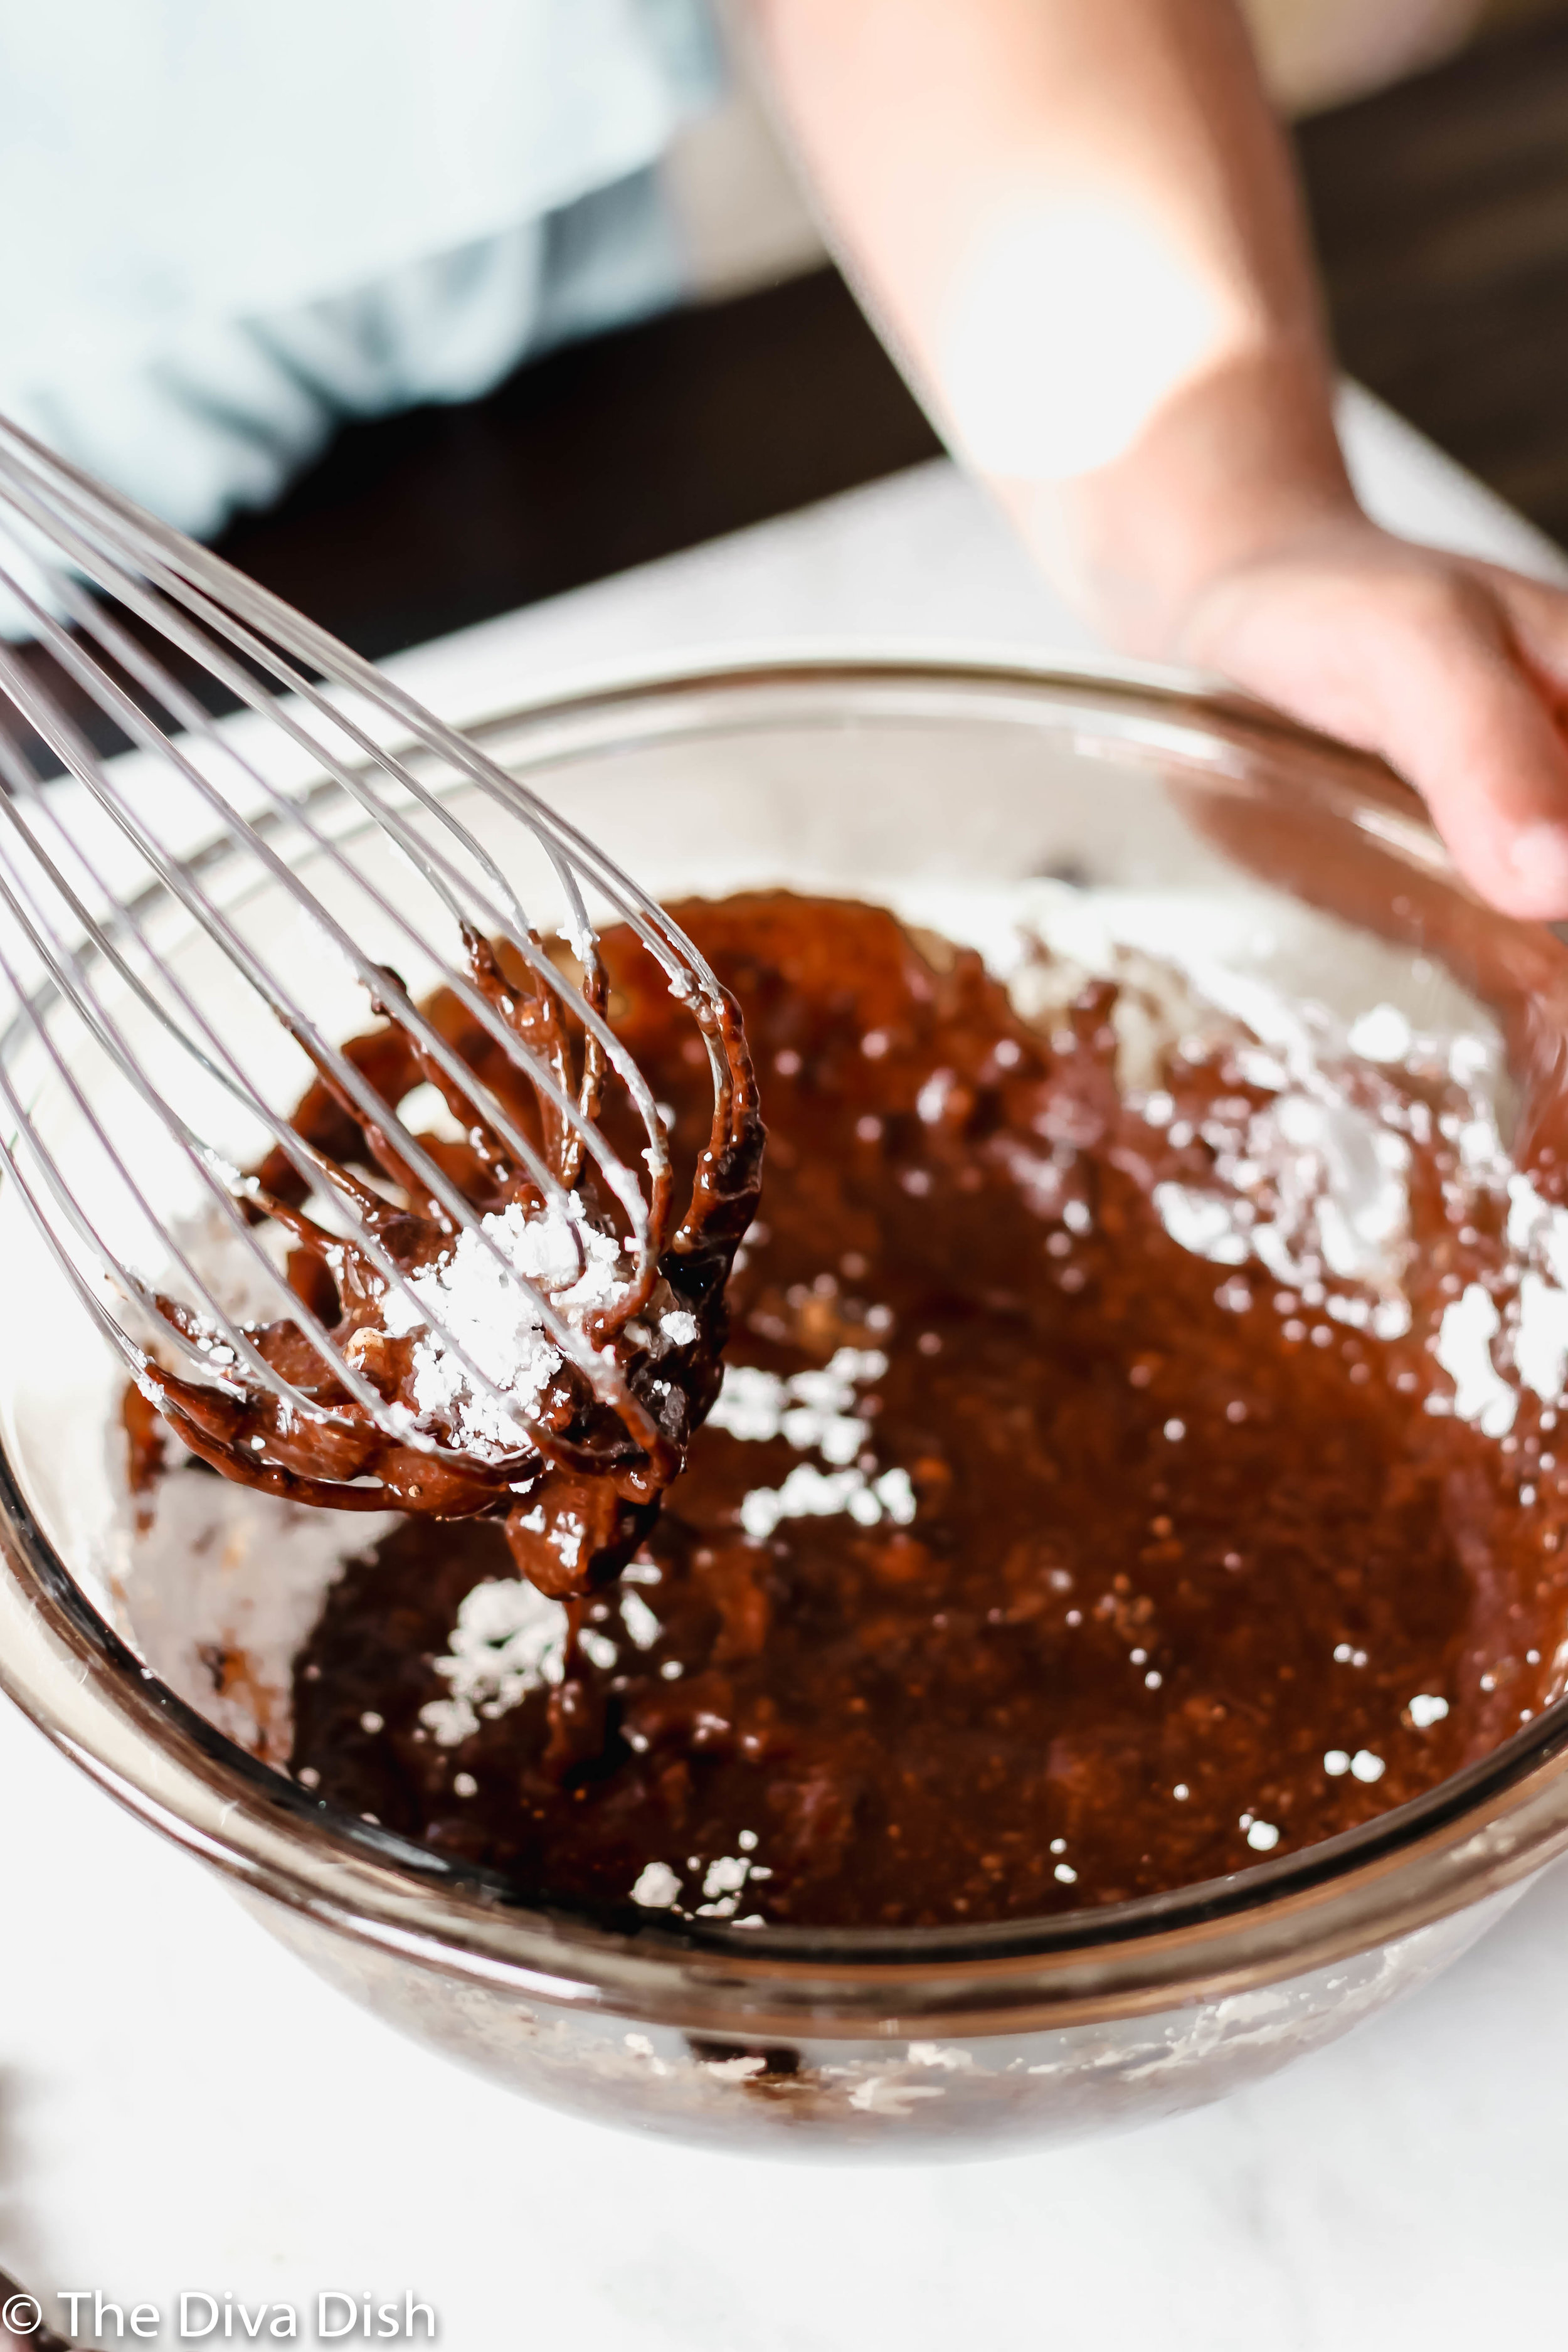
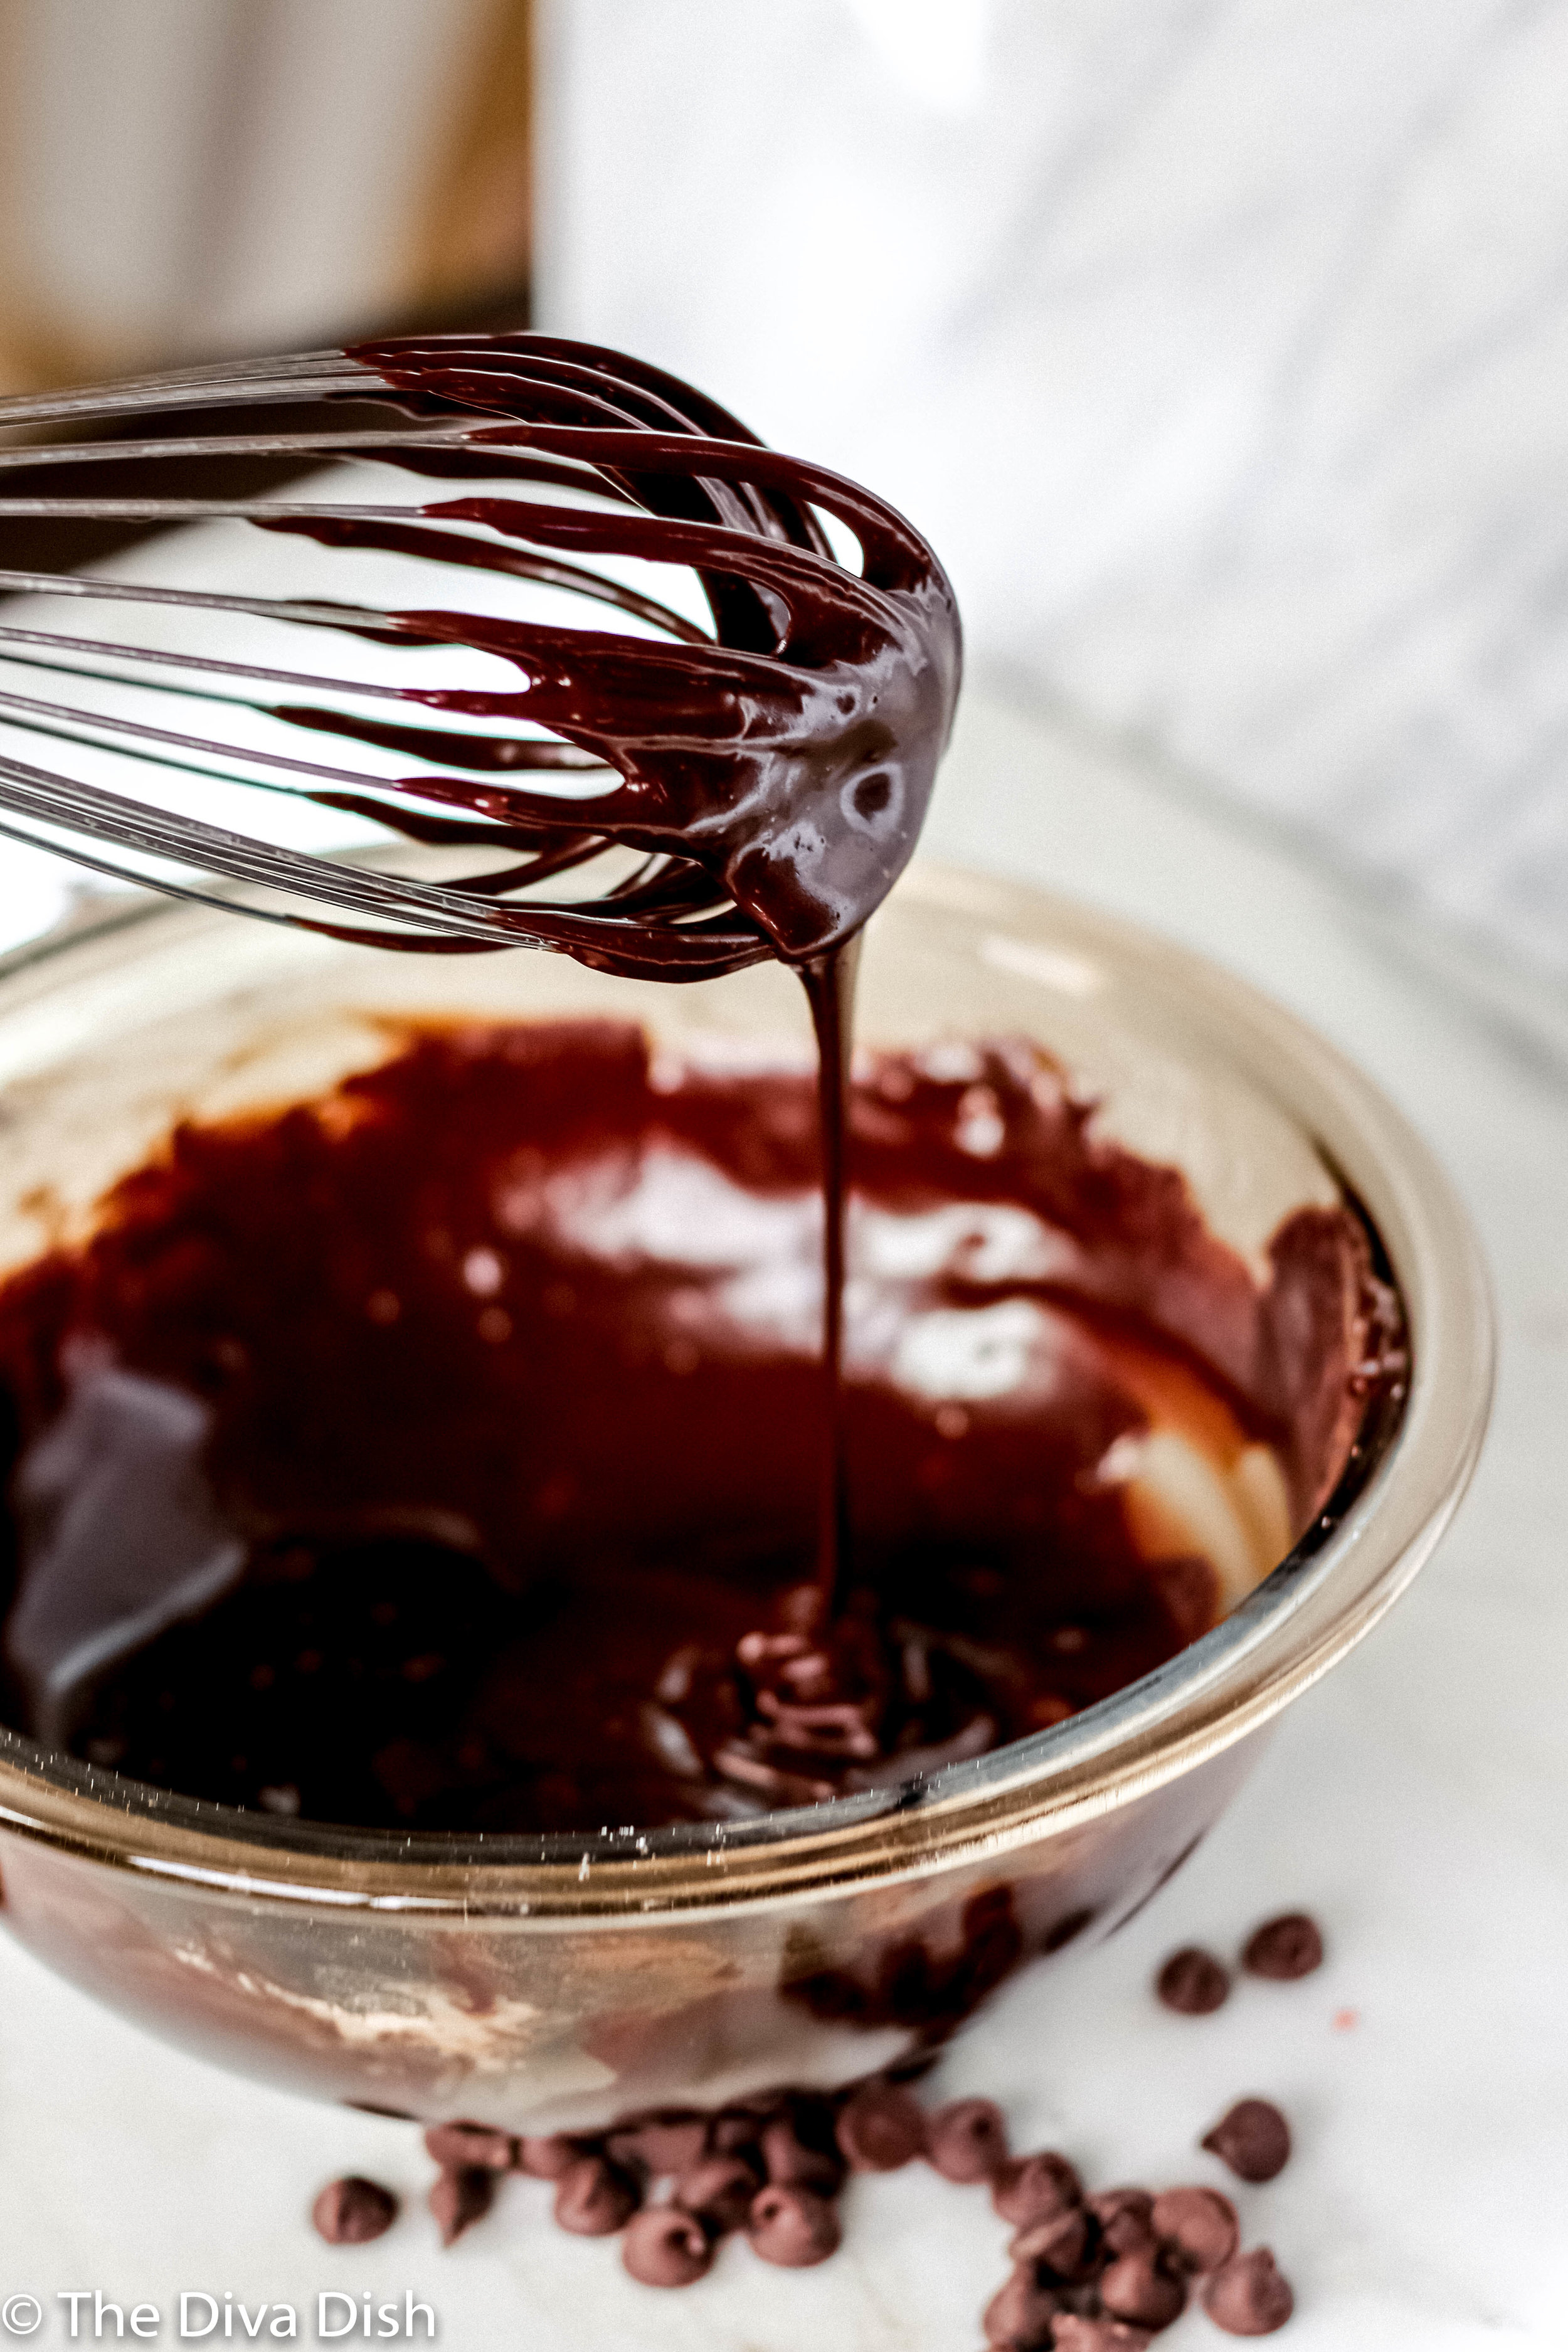
To make the glaze, add all ingredients minus the chocolate chips into a bowl and whisk together until smooth. Immediately pour the glaze evenly over the bundt cake. Use all the glaze :). Top the bundt cake with chocolate chips. Enjoy!
Keep the cake covered in a sealed cake container or wrapped in plastic wrap or foil up to 2 days. Best served fresh or the next morning with a big glass or milk :)!
Alfajores have a special place in my heart, and my belly.
My grandma is from Argentina, but moved to the US in her twenties. She would travel back to Argentina every summer and when she would come home she would bring home boxes of Alfajores. I loved them, and looked forward to them every year.
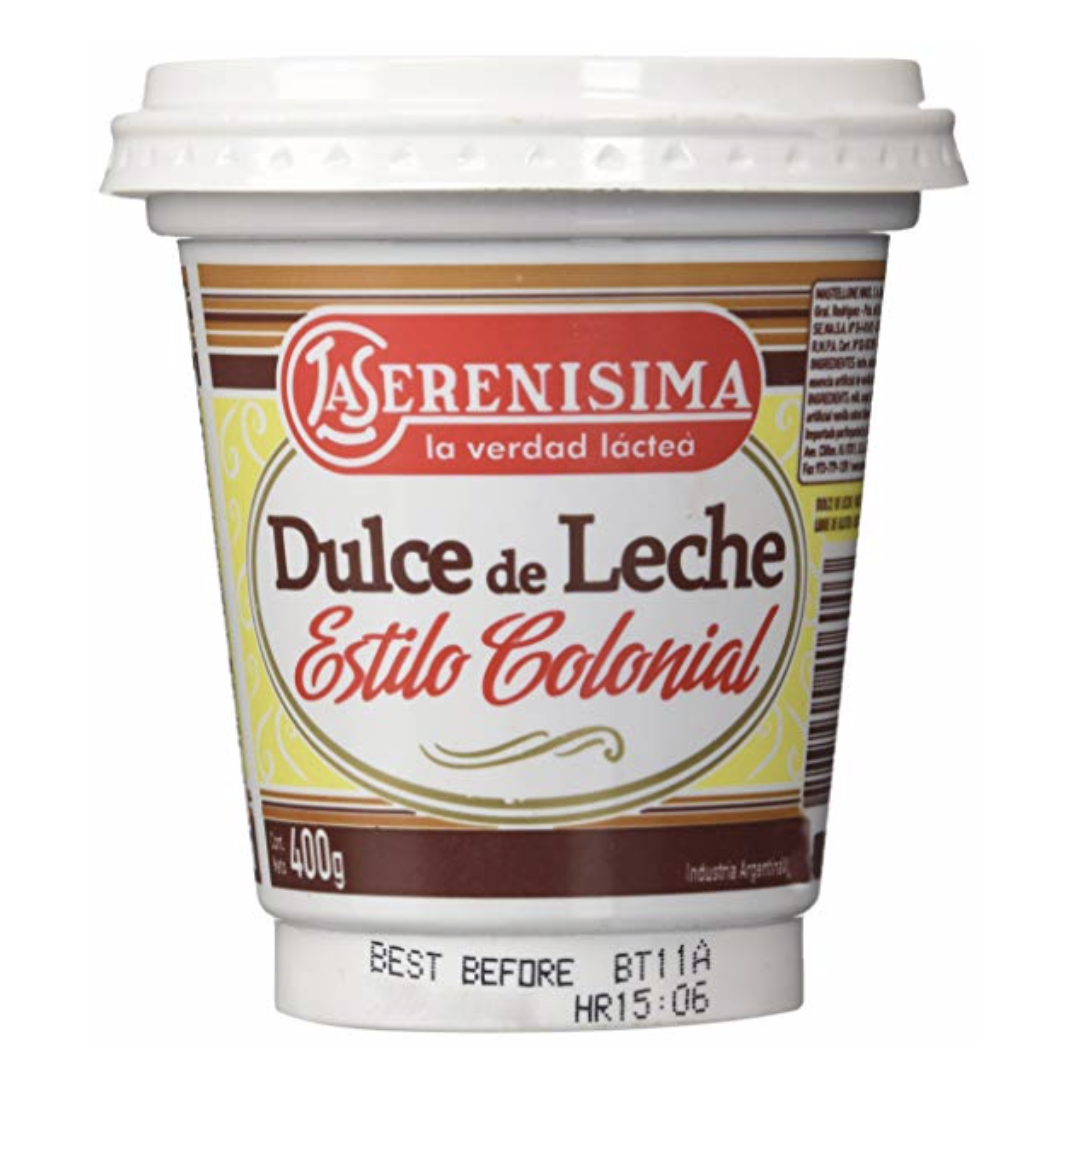
If you’ve never had an Alfajor, imagine a buttery cookie sandwiches between layers of dulce de Leche. Dulce de Leche is a similar texture and taste to caramel but in my opinion SO much better!! It’s caramelized sugar, but with milk. Then the Alfajor is either covered in coconut, chocolate, or powdered sugar.
As Monica from friends would say….”I KNOW!”
Obviously there are ways to make these completely homemade but whenever I would ask my grandma how to make them she would just tell me to do this recipe. I’ve made it for years, specifically I remember making it in Elementary school for a project I did on Argentina.
So if you want a super QUICK dessert that comes together in minutes that taste delicious and looks super fancy…
There was a time before I had my first child…8 years ago!!! I was a hard core vegan, but sometimes a vegetarian because I really love ice cream. Anyways, I lived in San Diego about 15 minutes from the beach and I was living that coastal California lifestyle. I would walk the beach, shop at the farmers markets, and drink the most delicious locally made green drinks. I’d check out raw food restaurants and vegan bakeries looking for the most delicious earth made meals.
I loved it!
But as always when you have children, things change. We could no longer afford that coastal California lifestyle so we headed to Las Vegas. Back then it was hard to find anything close to vegan in the middle of the desert, and the produce at our neighborhood grocery store was so depressing. NOTHING grows in the desert. So, slowly but surely I weaned back into a non-vegan lifestyle. Although that is something of the past, I still find myself eating vegan/vegetarian for the majority of my meals.
There is a huge part of my life though that still involves veganism and that is my family. My entire family are vegans. Parents, brothers, sister-in-laws! SO anytime we have a big family dinner we always have to make sure there is an abundance of vegan friendly things so that everyone has something.
Which brings me to this cake!
I wanted something that you could bring to any party or dinner that would wow those that have often missed out on the delicious things at gatherings. This cake is by NO MEANS a health food, which has kind of been a trend on here lately haha!
Either way, this is the cake you make for special occasions! The cake that will make a vegan question whether or not it really doesn’t have any eggs or melted butter in it.
It does have sugar though…. ;)
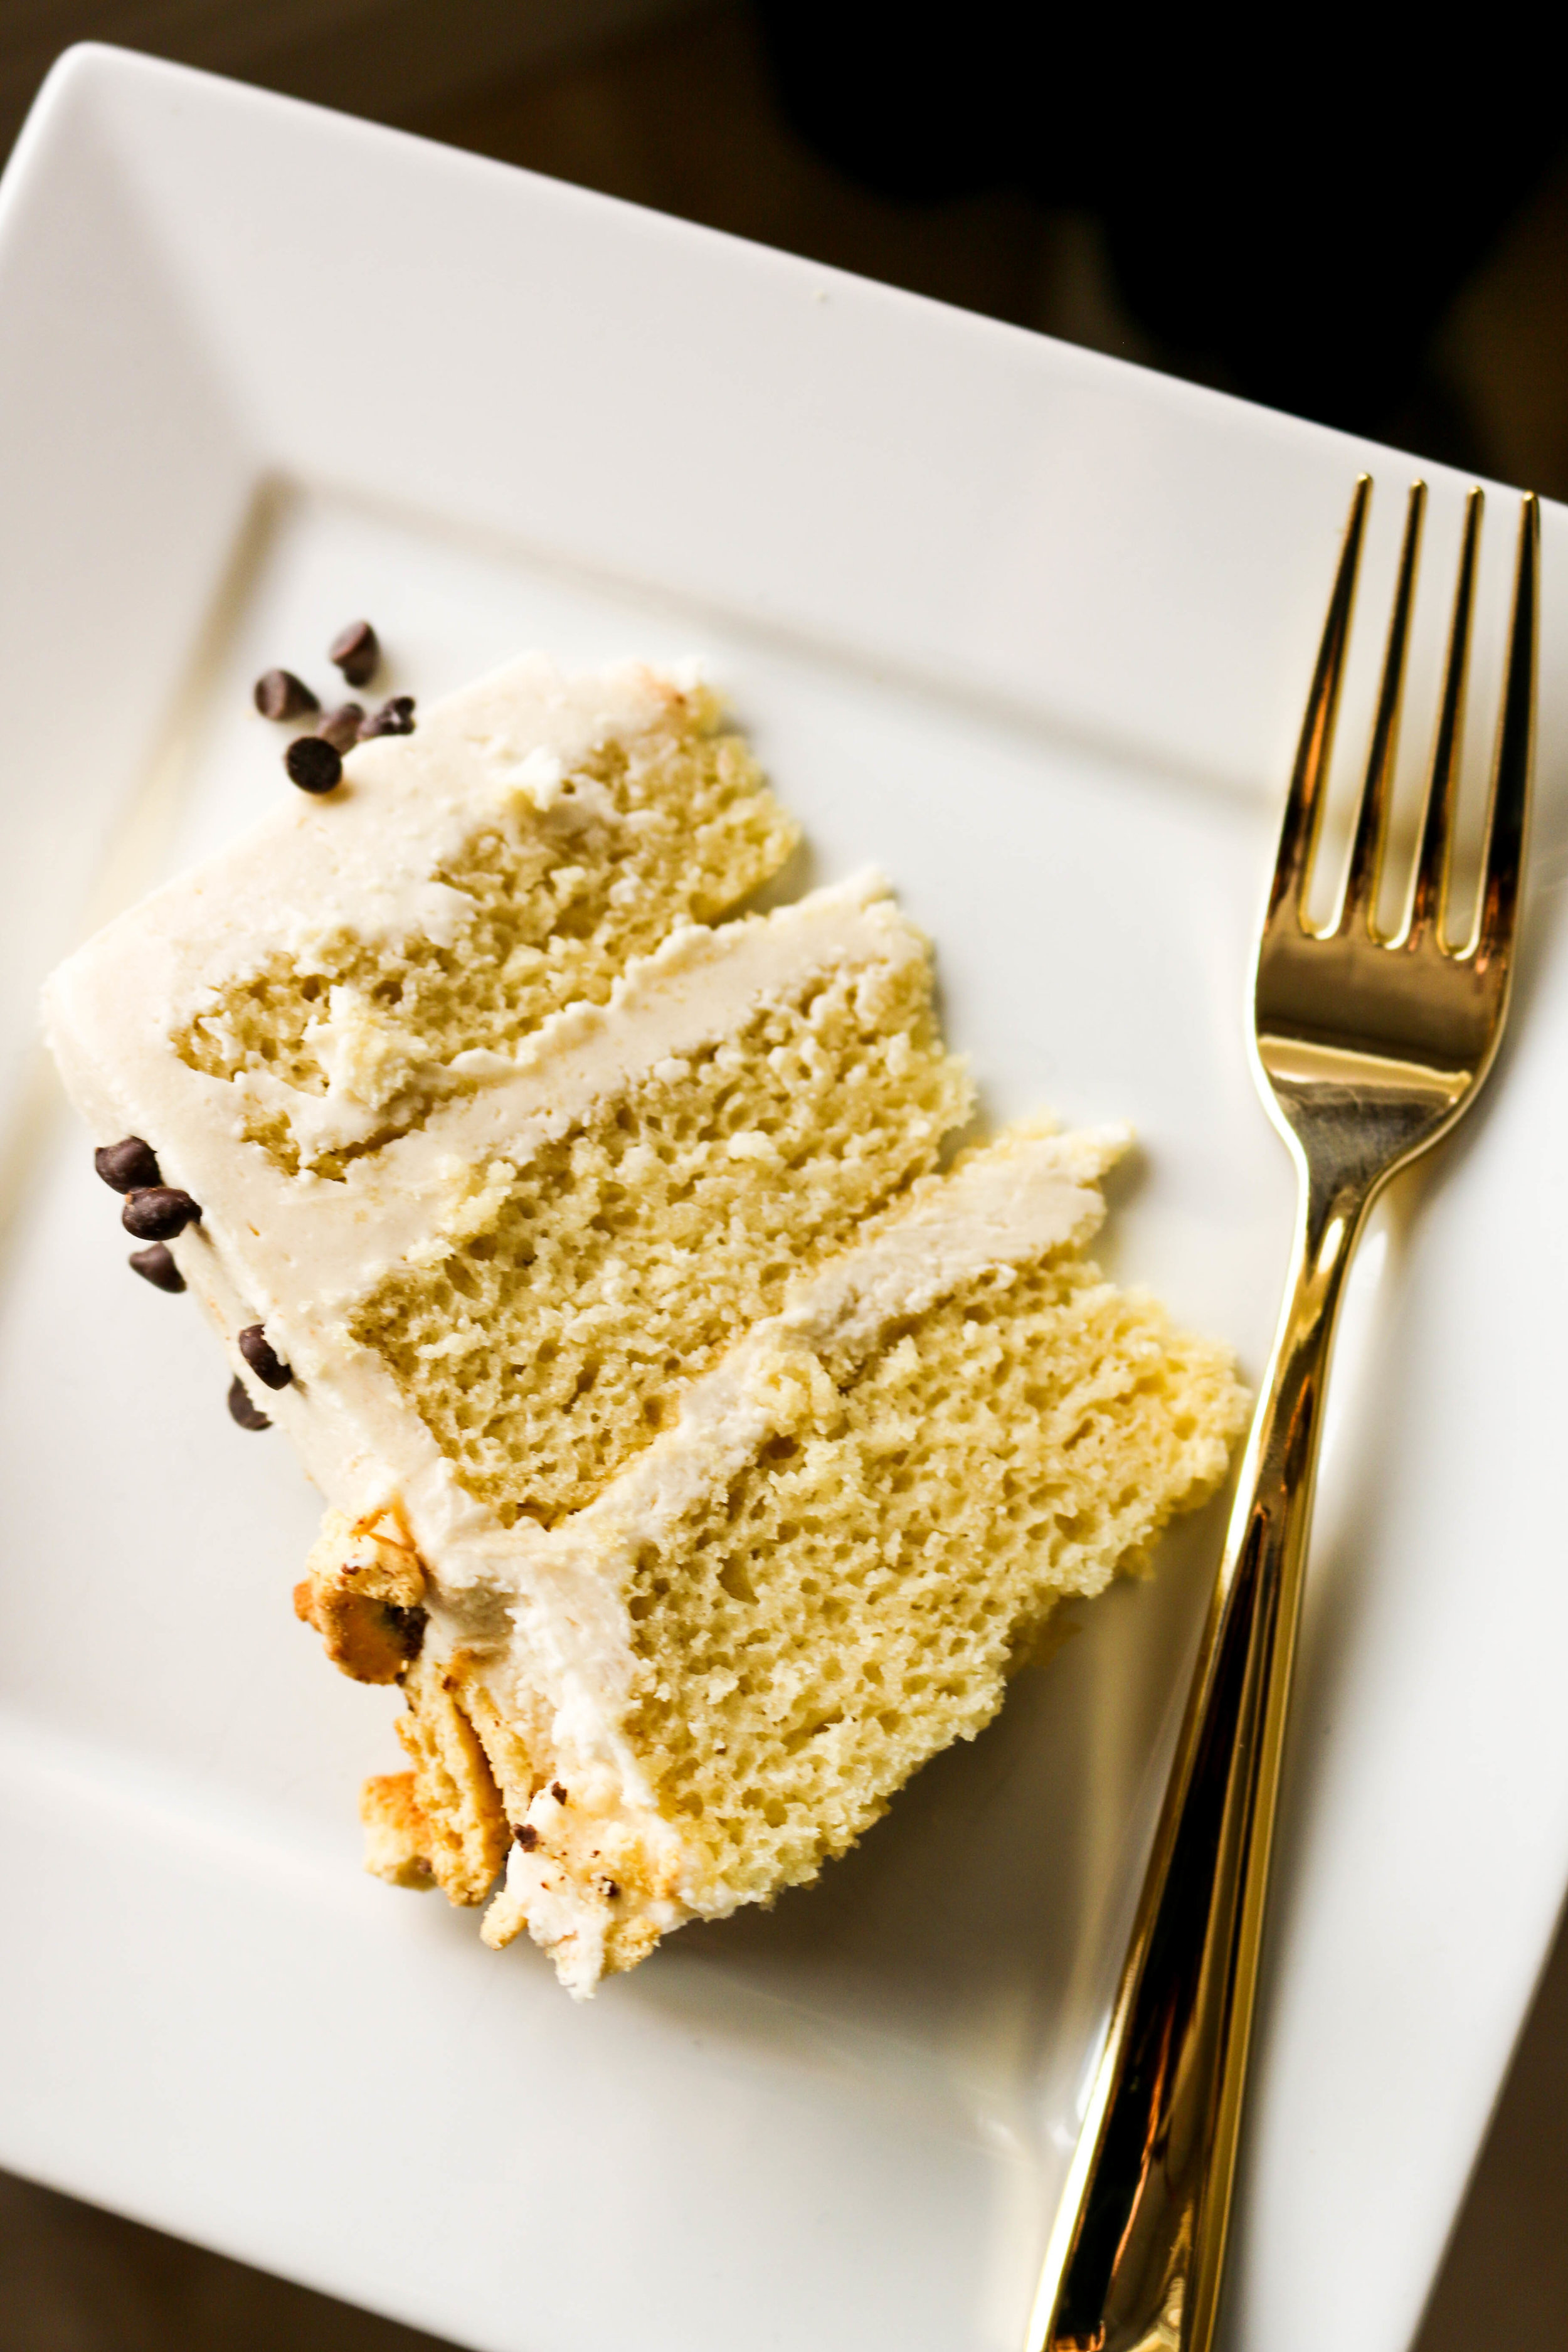
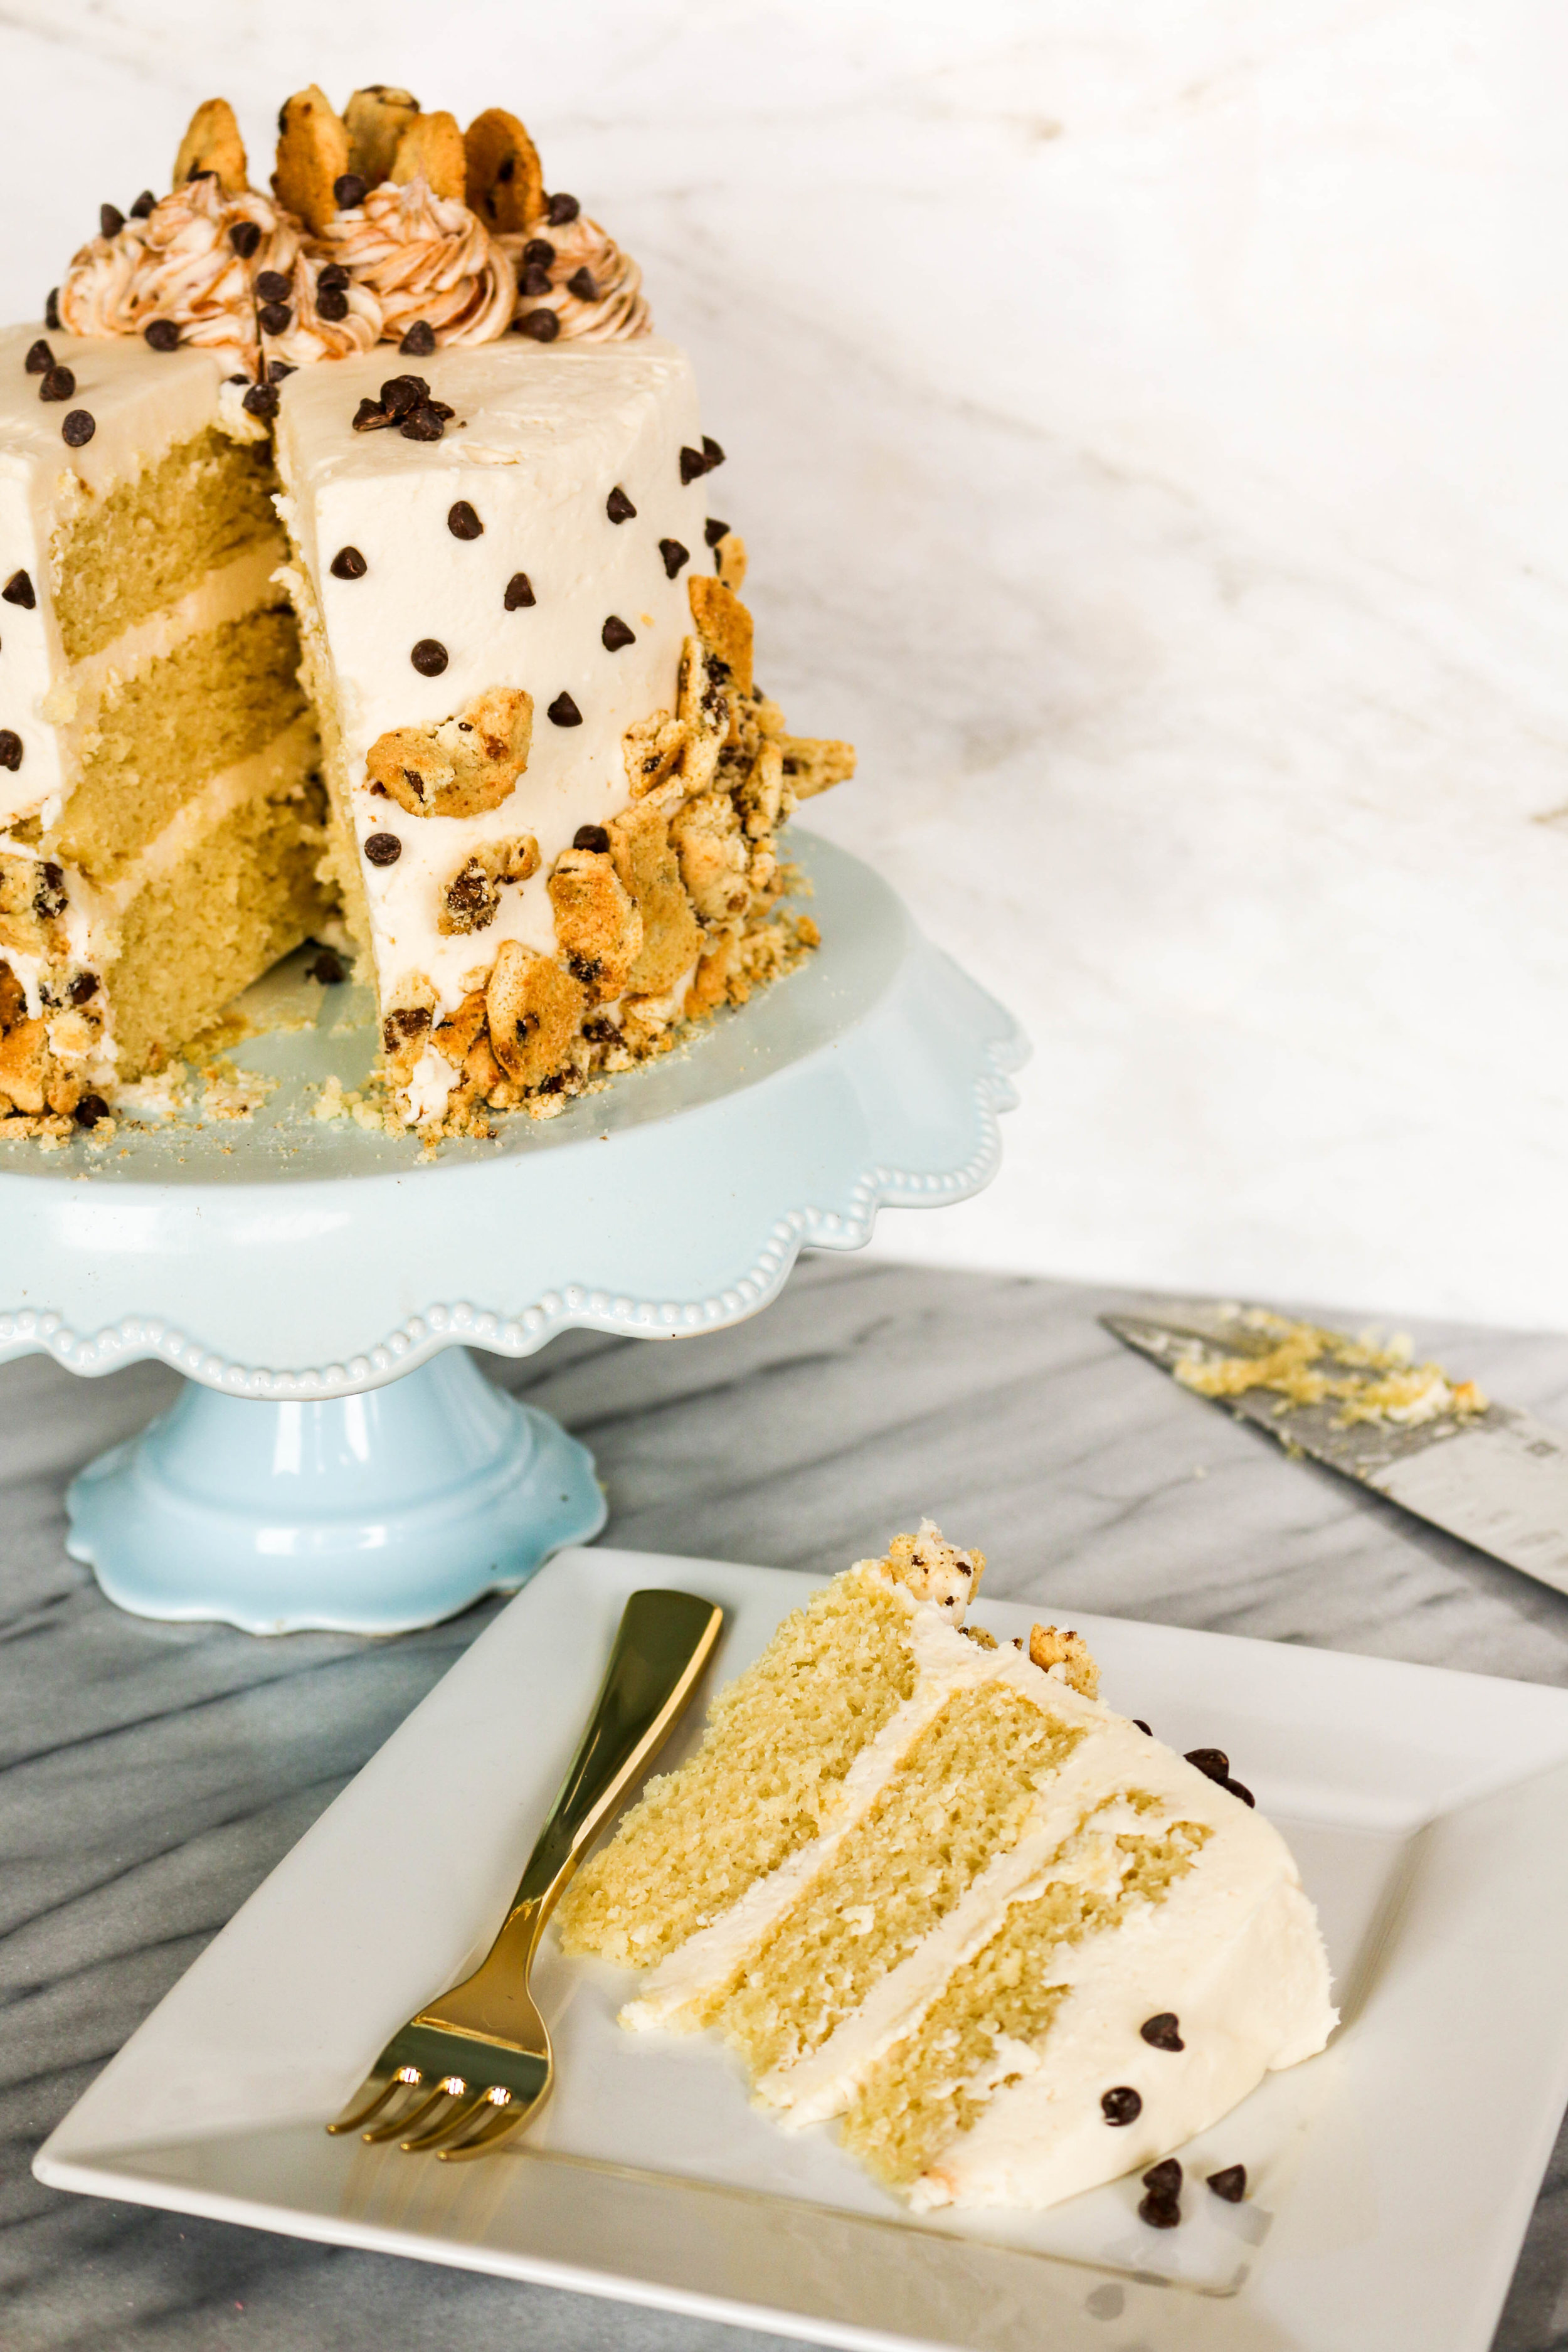
Vegan Vanilla Cake with Vegan Cookie Dough Frosting
Ingredients (For the Cake)
1 cup unrefined sugar
1/2 tsp. salt
2 cups unbleached all purpose flour
2 1/2 tsp. baking powder
1/2 tsp. baking soda
1 1/2 cups non dairy vanilla milk
3 TB. unsweetened applesauce
1 tsp. fresh lemon juice
2 TB. pure vanilla extract
1/4 cup canola oil
Ingredients (For the Frosting)
3 sticks Earth Balance Vegan Butter Sticks, softened and room temperature
1/4 cup brown sugar
2 pounds powdered sugar
2 TB. vanilla extract
dash of sea salt
non dairy vanilla milk (1-2 TB.)
Directions: (For the cake)
Preheat the oven to 325 degrees. In a large bowl add the sugar. Then sift in the flour, baking powder, baking soda, and salt. Stir until combined.
In a separate bowl, combine the milk, applesauce, lemon juice, vanilla, and oil. Mix the wet and dry ingredients with a whisk. Mix until combined, be careful not to over mix.
Grease 3 six inch pans. Add batter in equal amounts to the pans. Bake for 20-25 minutes, or until cooked all the way through. I like to wrap my cakes tightly in plastic wrap after they have cooled completely and place them in the fridge until they are ready to be frosted. This makes it easier to assemble the cake so it’s not so delicate.
Let cool before frosting the cake.
Directions: (For the Frosting)
In a bowl fitting with a whisk attachment, add your butter. Whip the butter until creamy. Scrape down the bowl, and then add your brown sugar. Whisk until combined. Next add in the vanilla and a dash of sea salt, plus 1 TB. of non dairy milk.
Sift in the powdered sugar, and then cover the mixer with a cloth and turn the mixer on so the frosting can come together. Whip it until it’s nice and creamy. If needed, add a little more milk to get desired consistency. You want it to be thicker because you will be decorating the cake with this, and it needs to be firm enough to hold it together.
Stack and fill the cakes, and then frost the rest of the cake how ever you desire. I topped mine with chopped vegan chocolate chip cookies and vegan chocolate chips.
Enjoy!!!
To store, I wrapped my cake in plastic wrap tightly and kept it in the fridge. You can let it come to room temperature when you are ready to serve it.
I had so much fun making this cake! Let me know if there are any other flavors you would love to see VEGAN-IZED!!
““These links are from Amazon and include Affiliate Links. I receive a small portion when you buy from my site. Thank you so much for supporting The Diva Dish!””
This MAY be a healthy living blog, but I am a firm believer in doing what you love and eating what you love! (I guess within certain limits haha!)
I love to bake…and I love to eat baked goods!
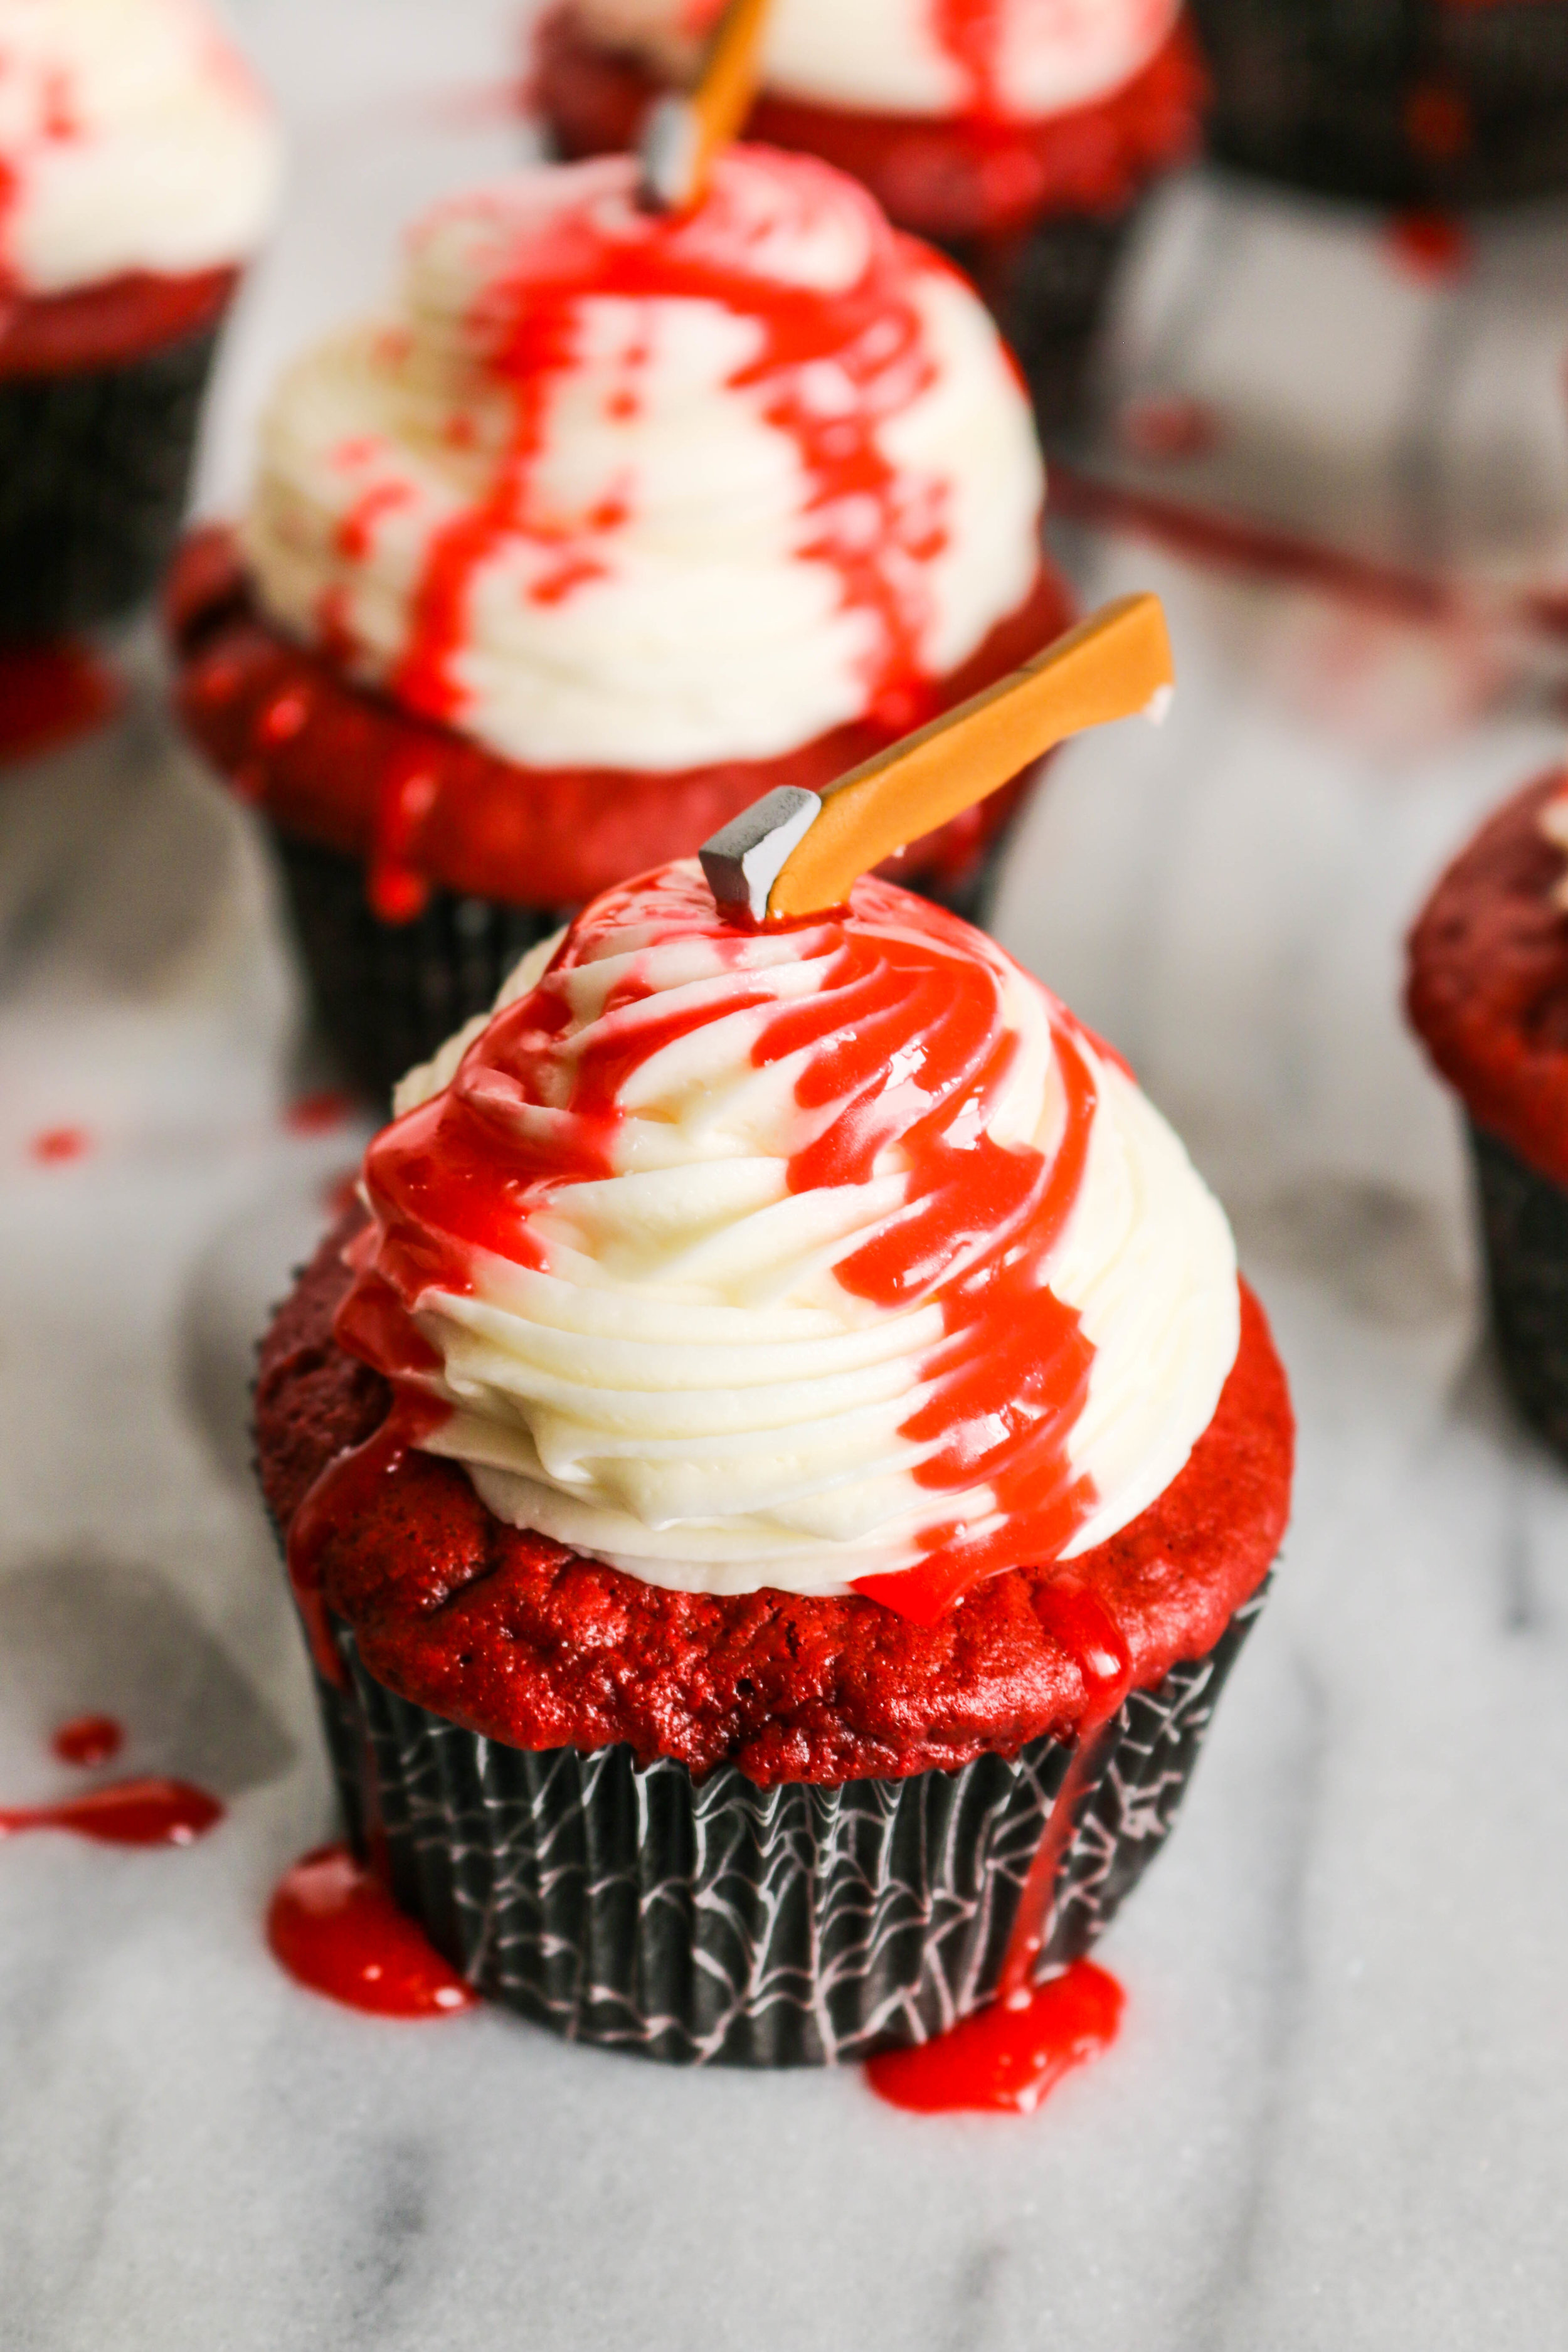
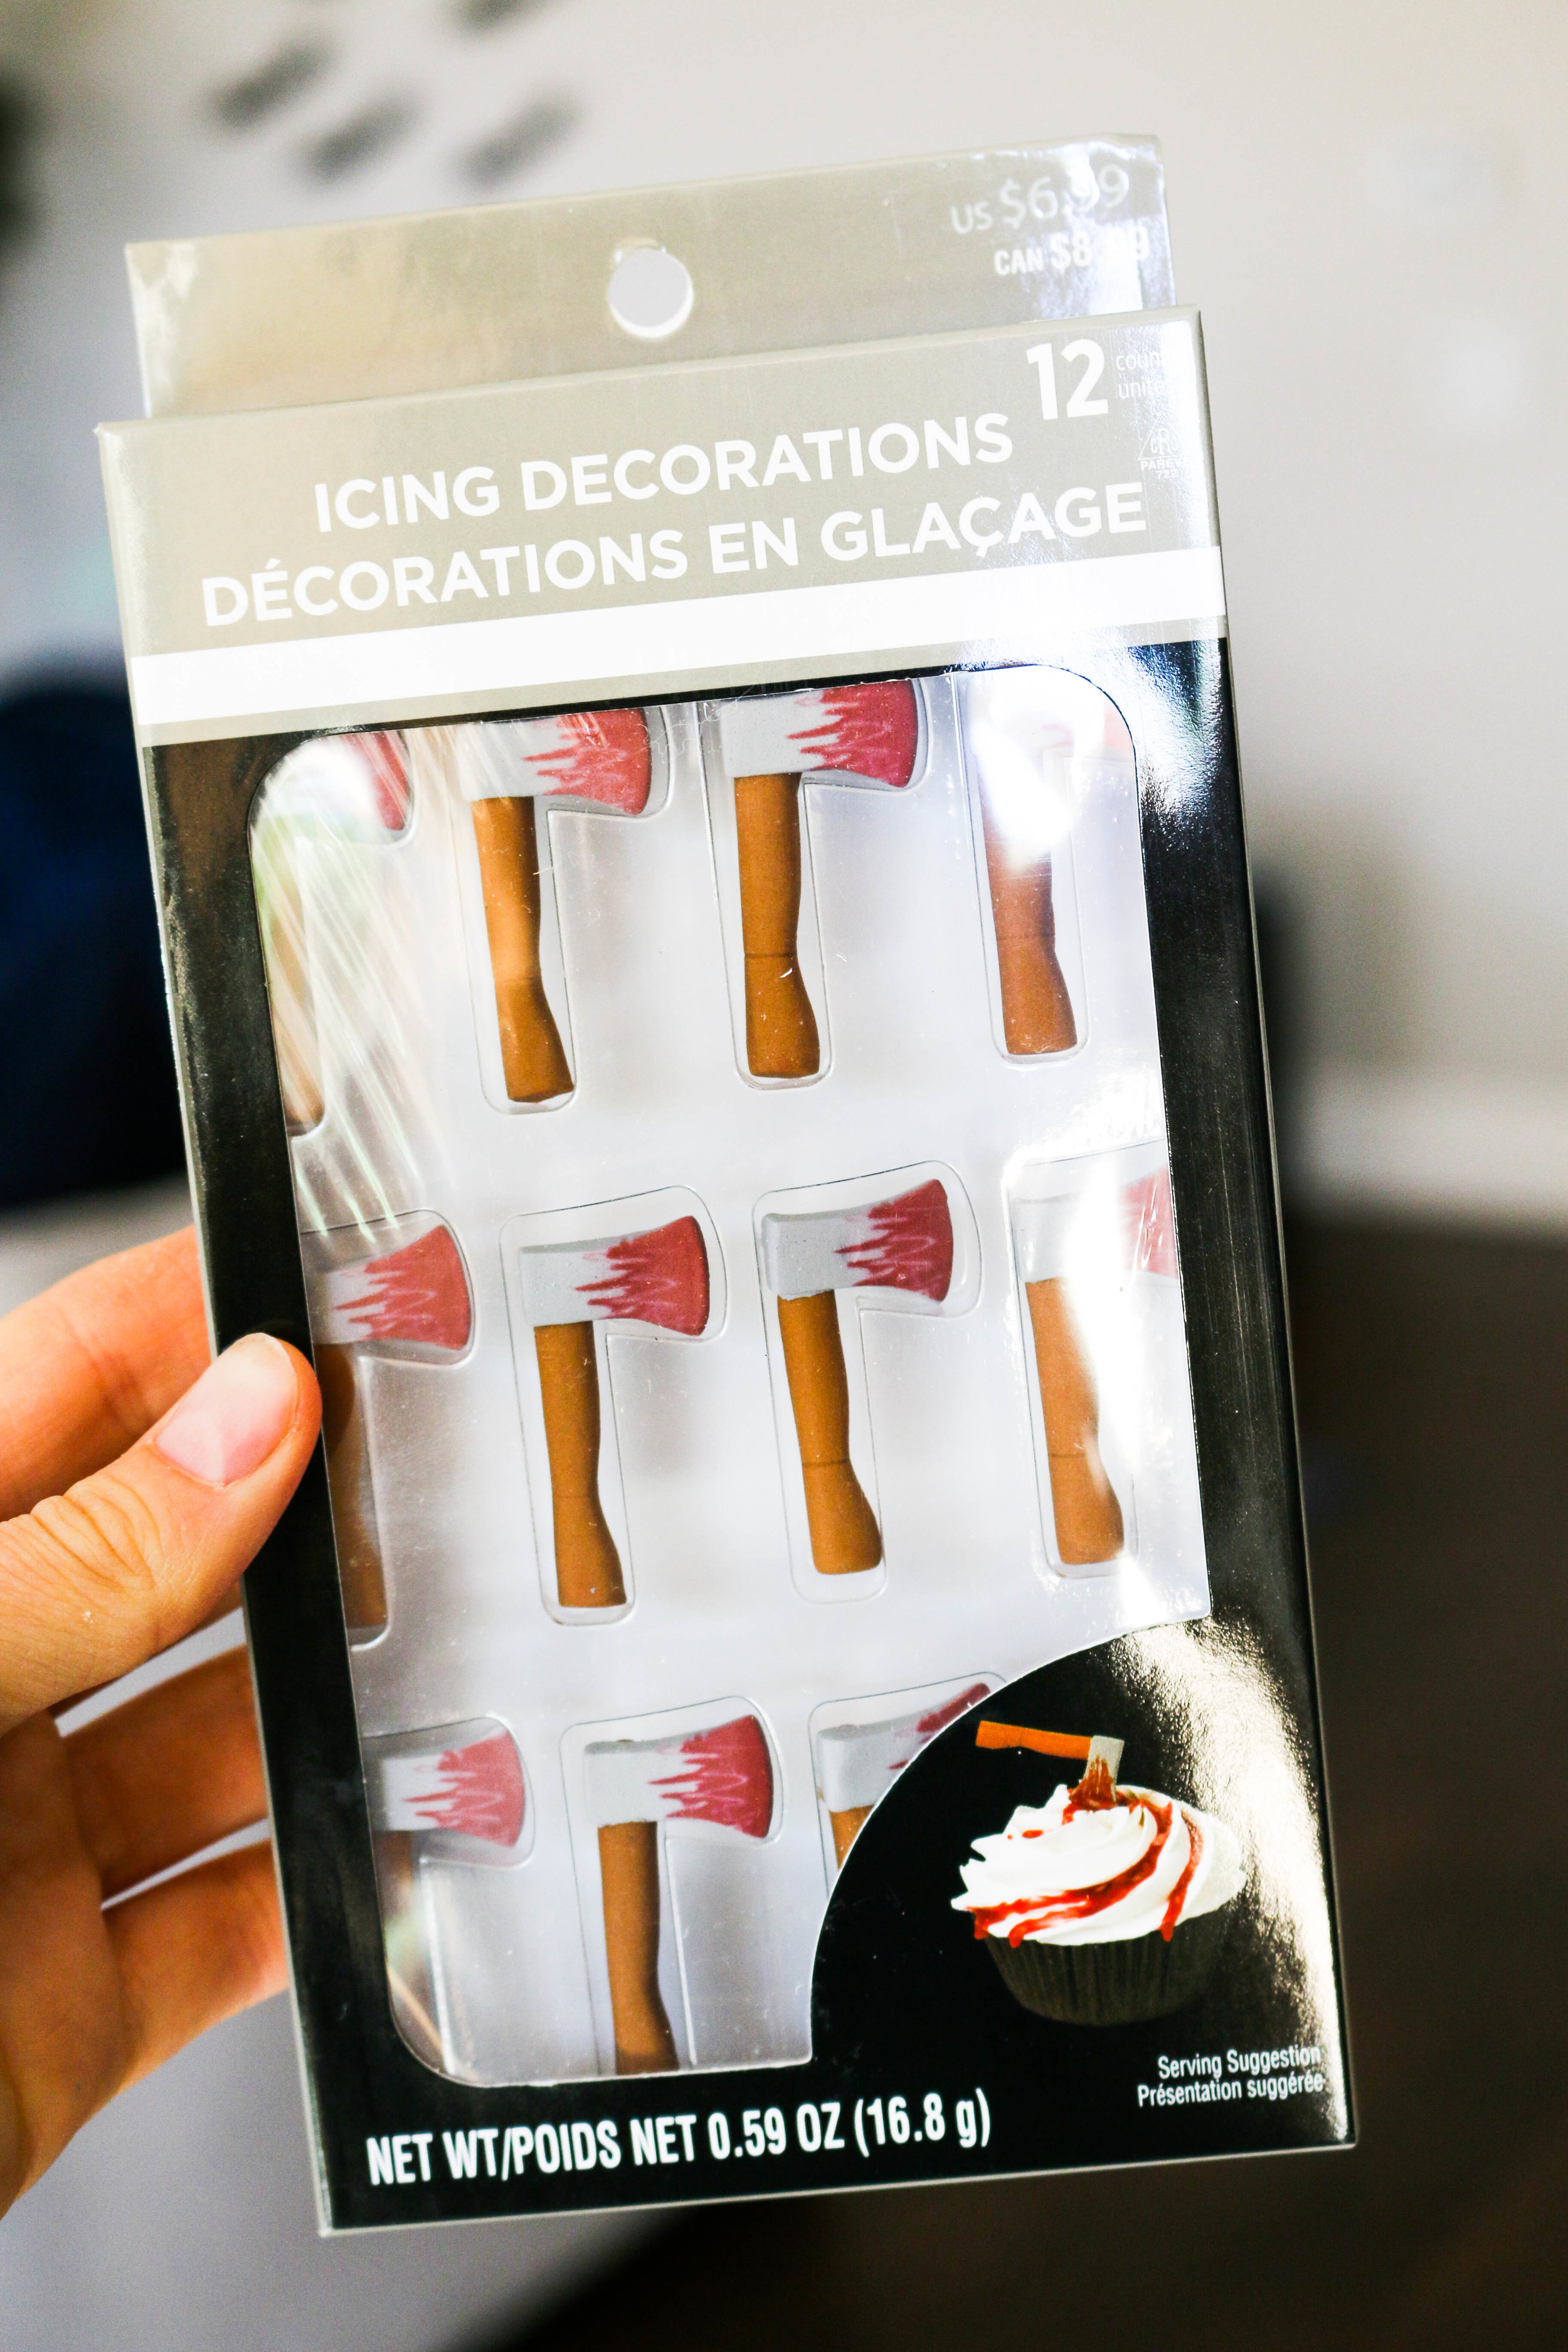
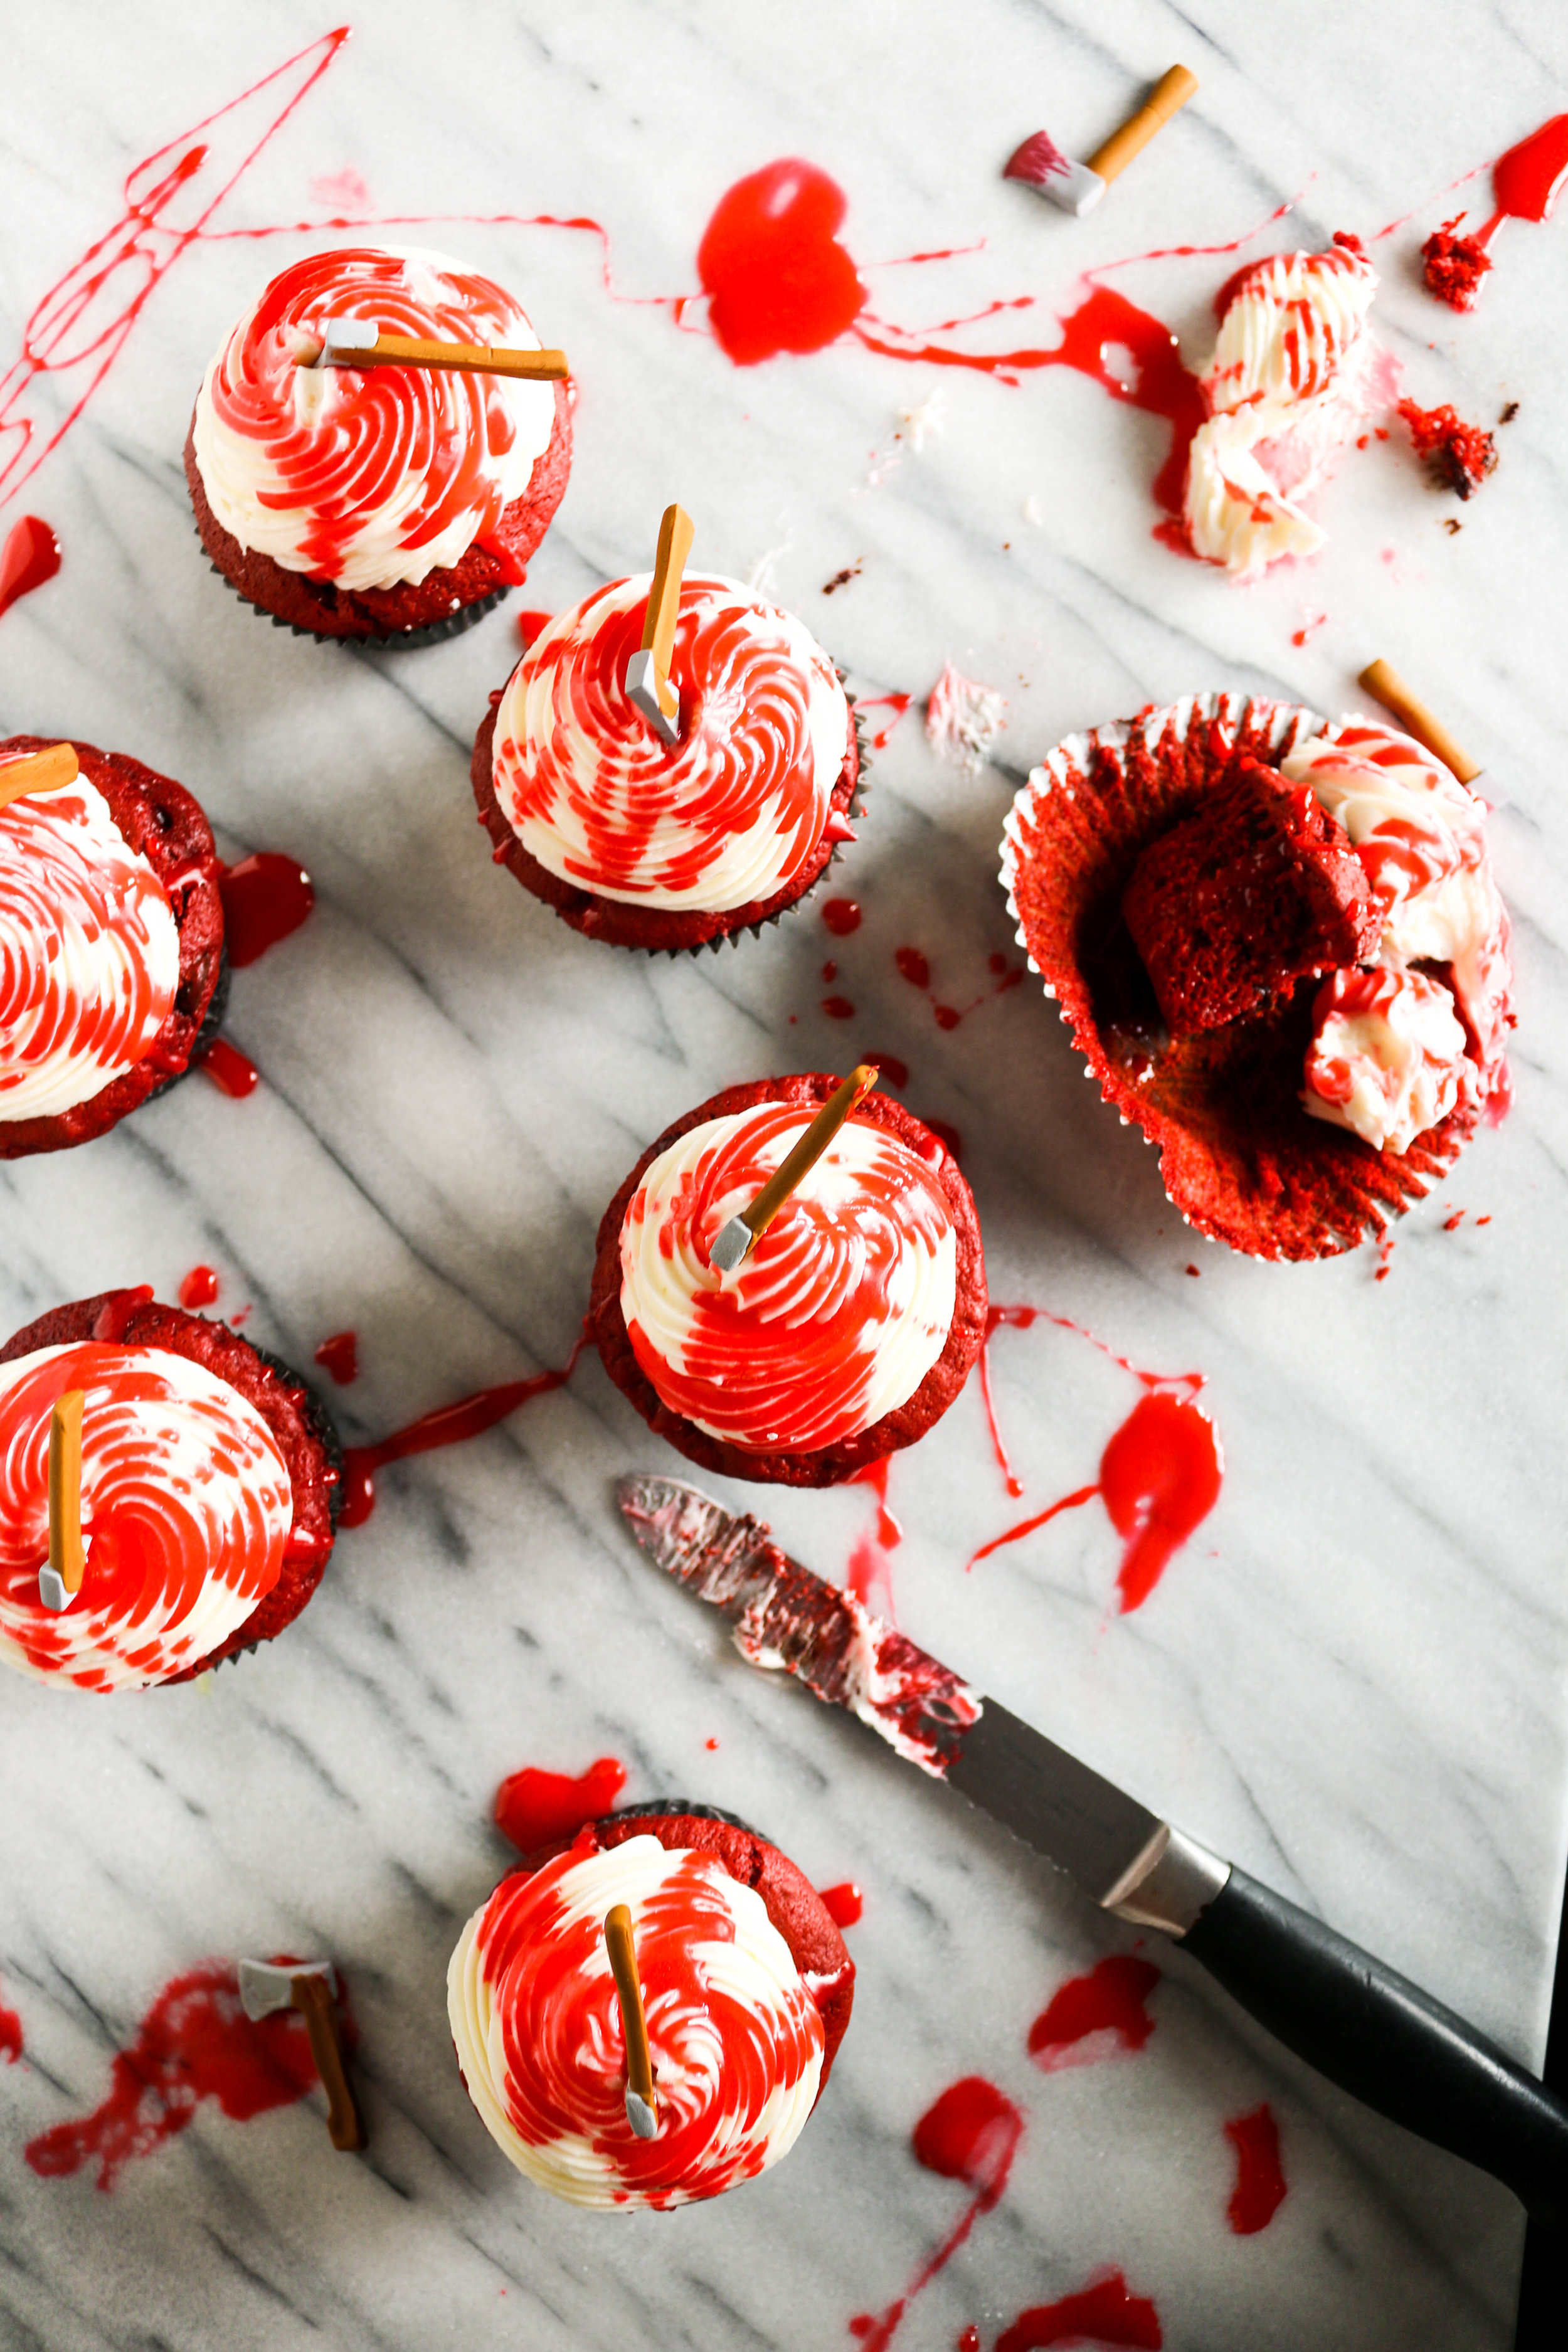
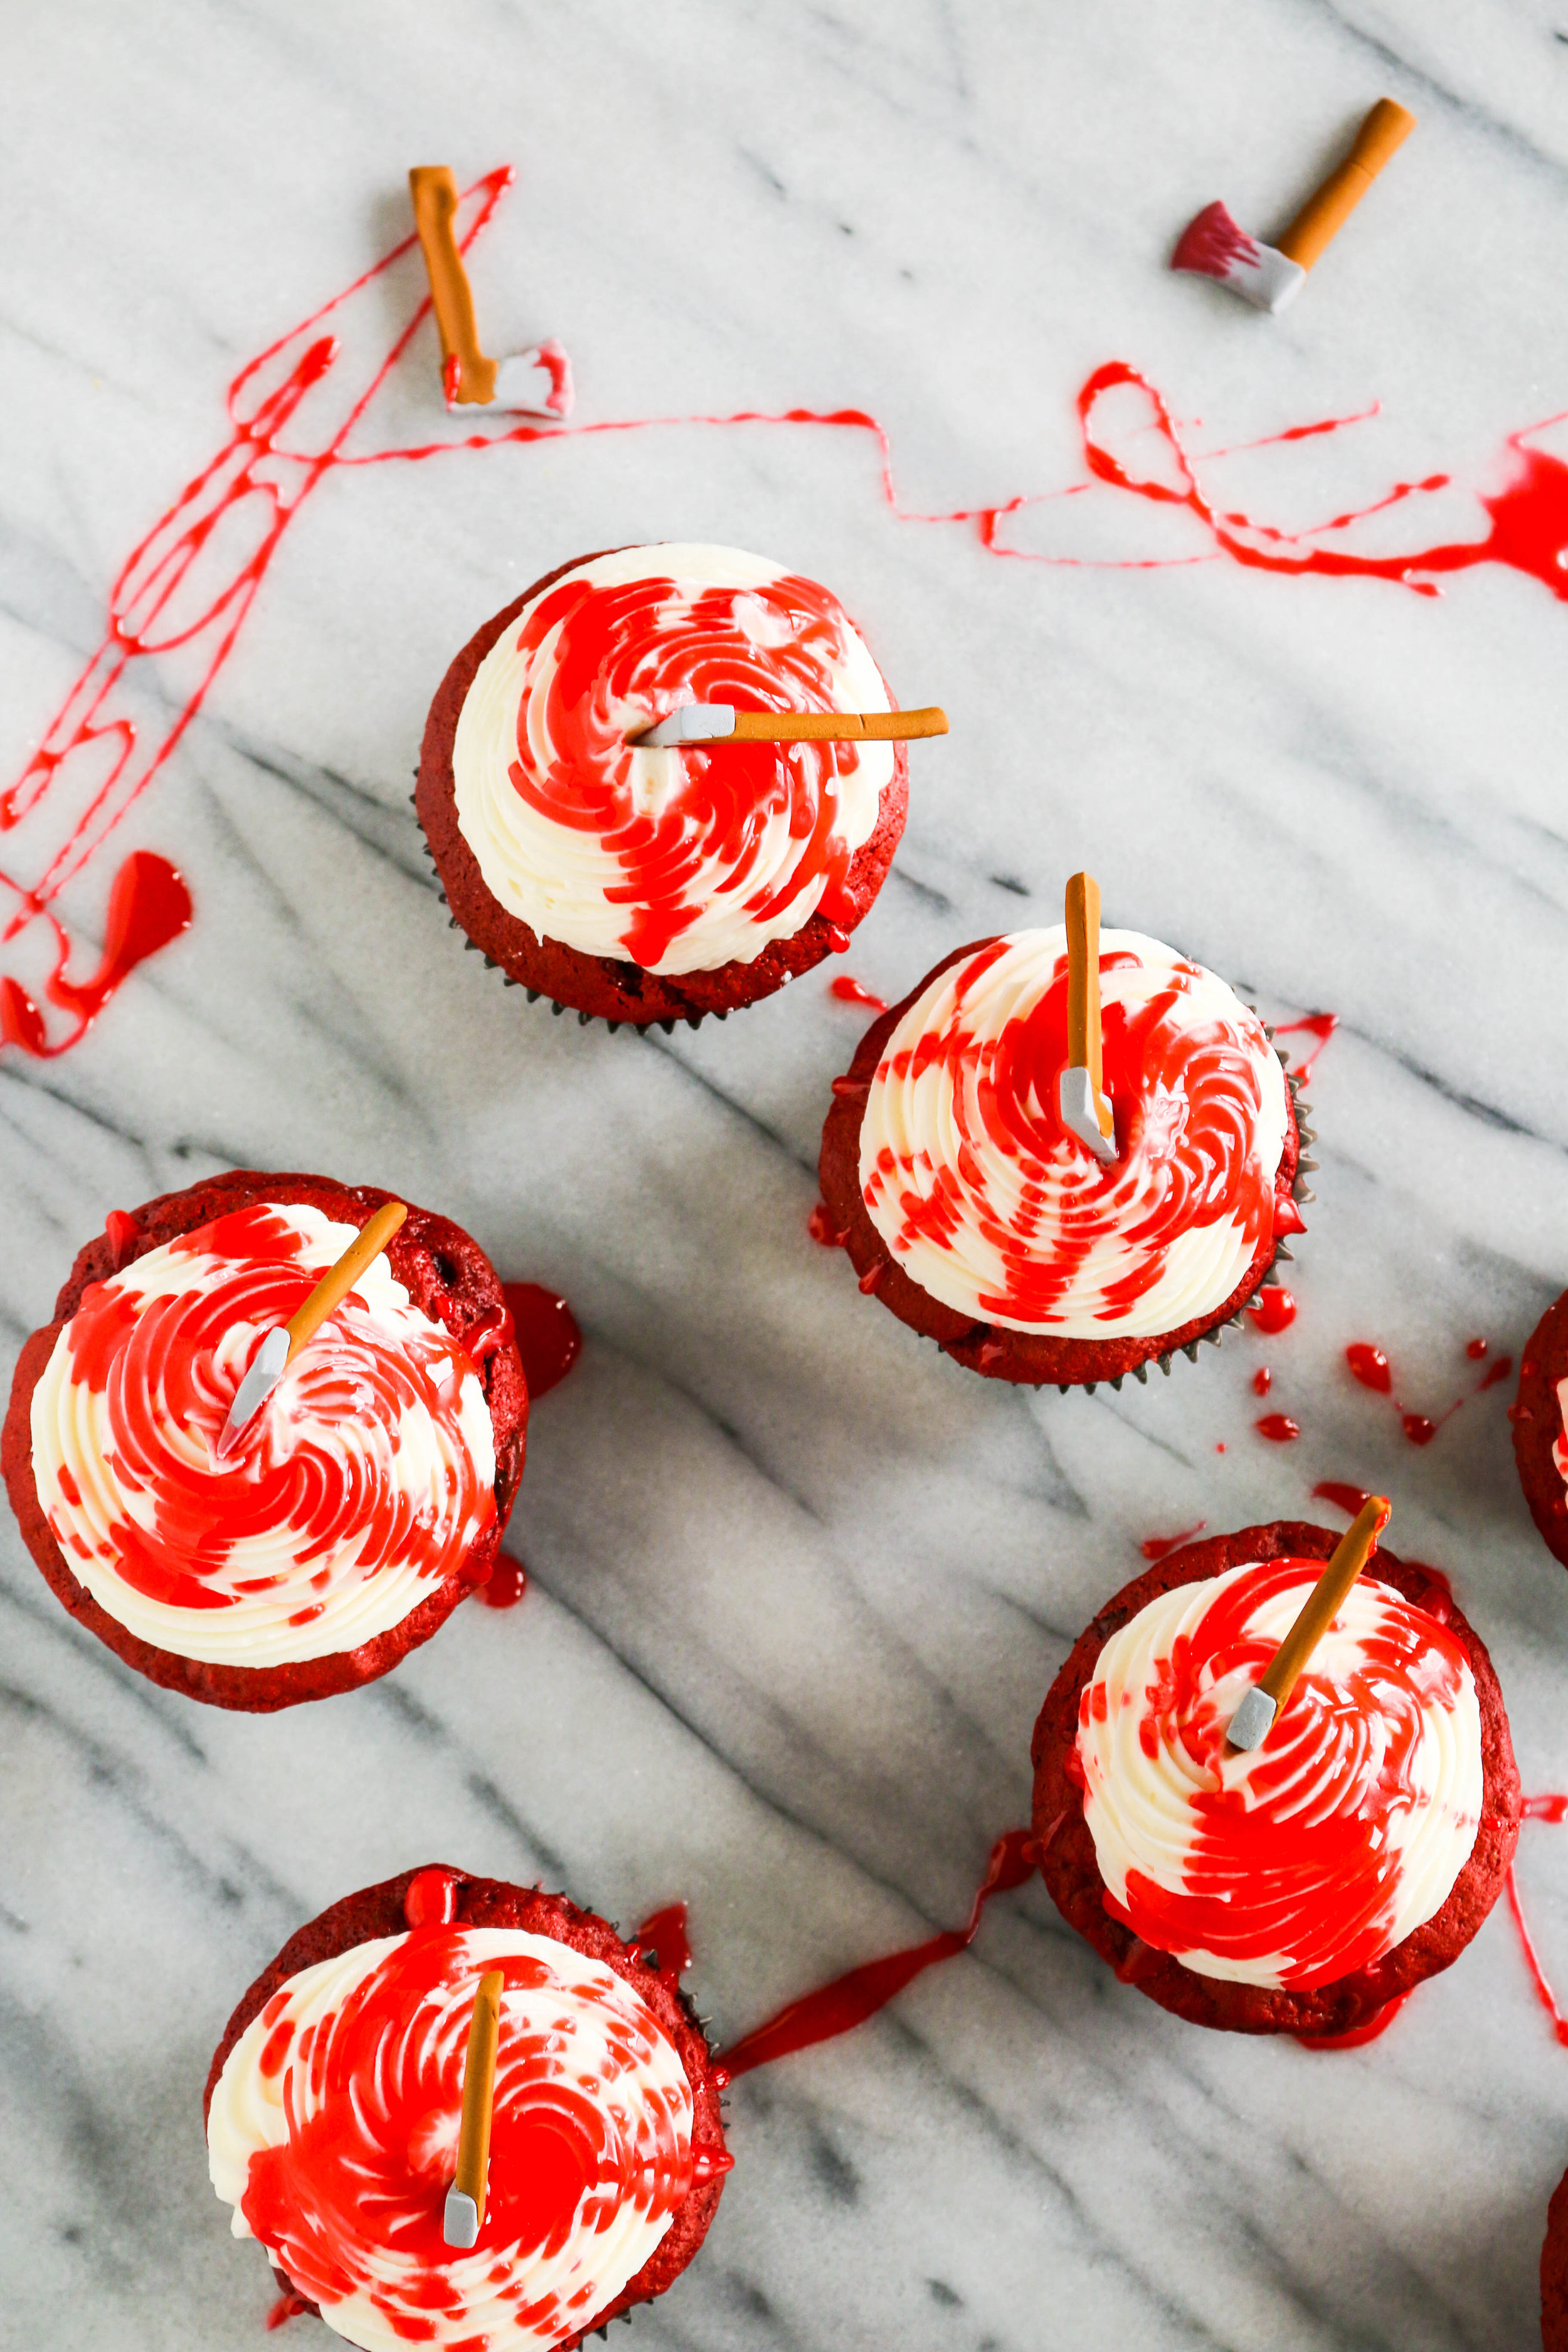
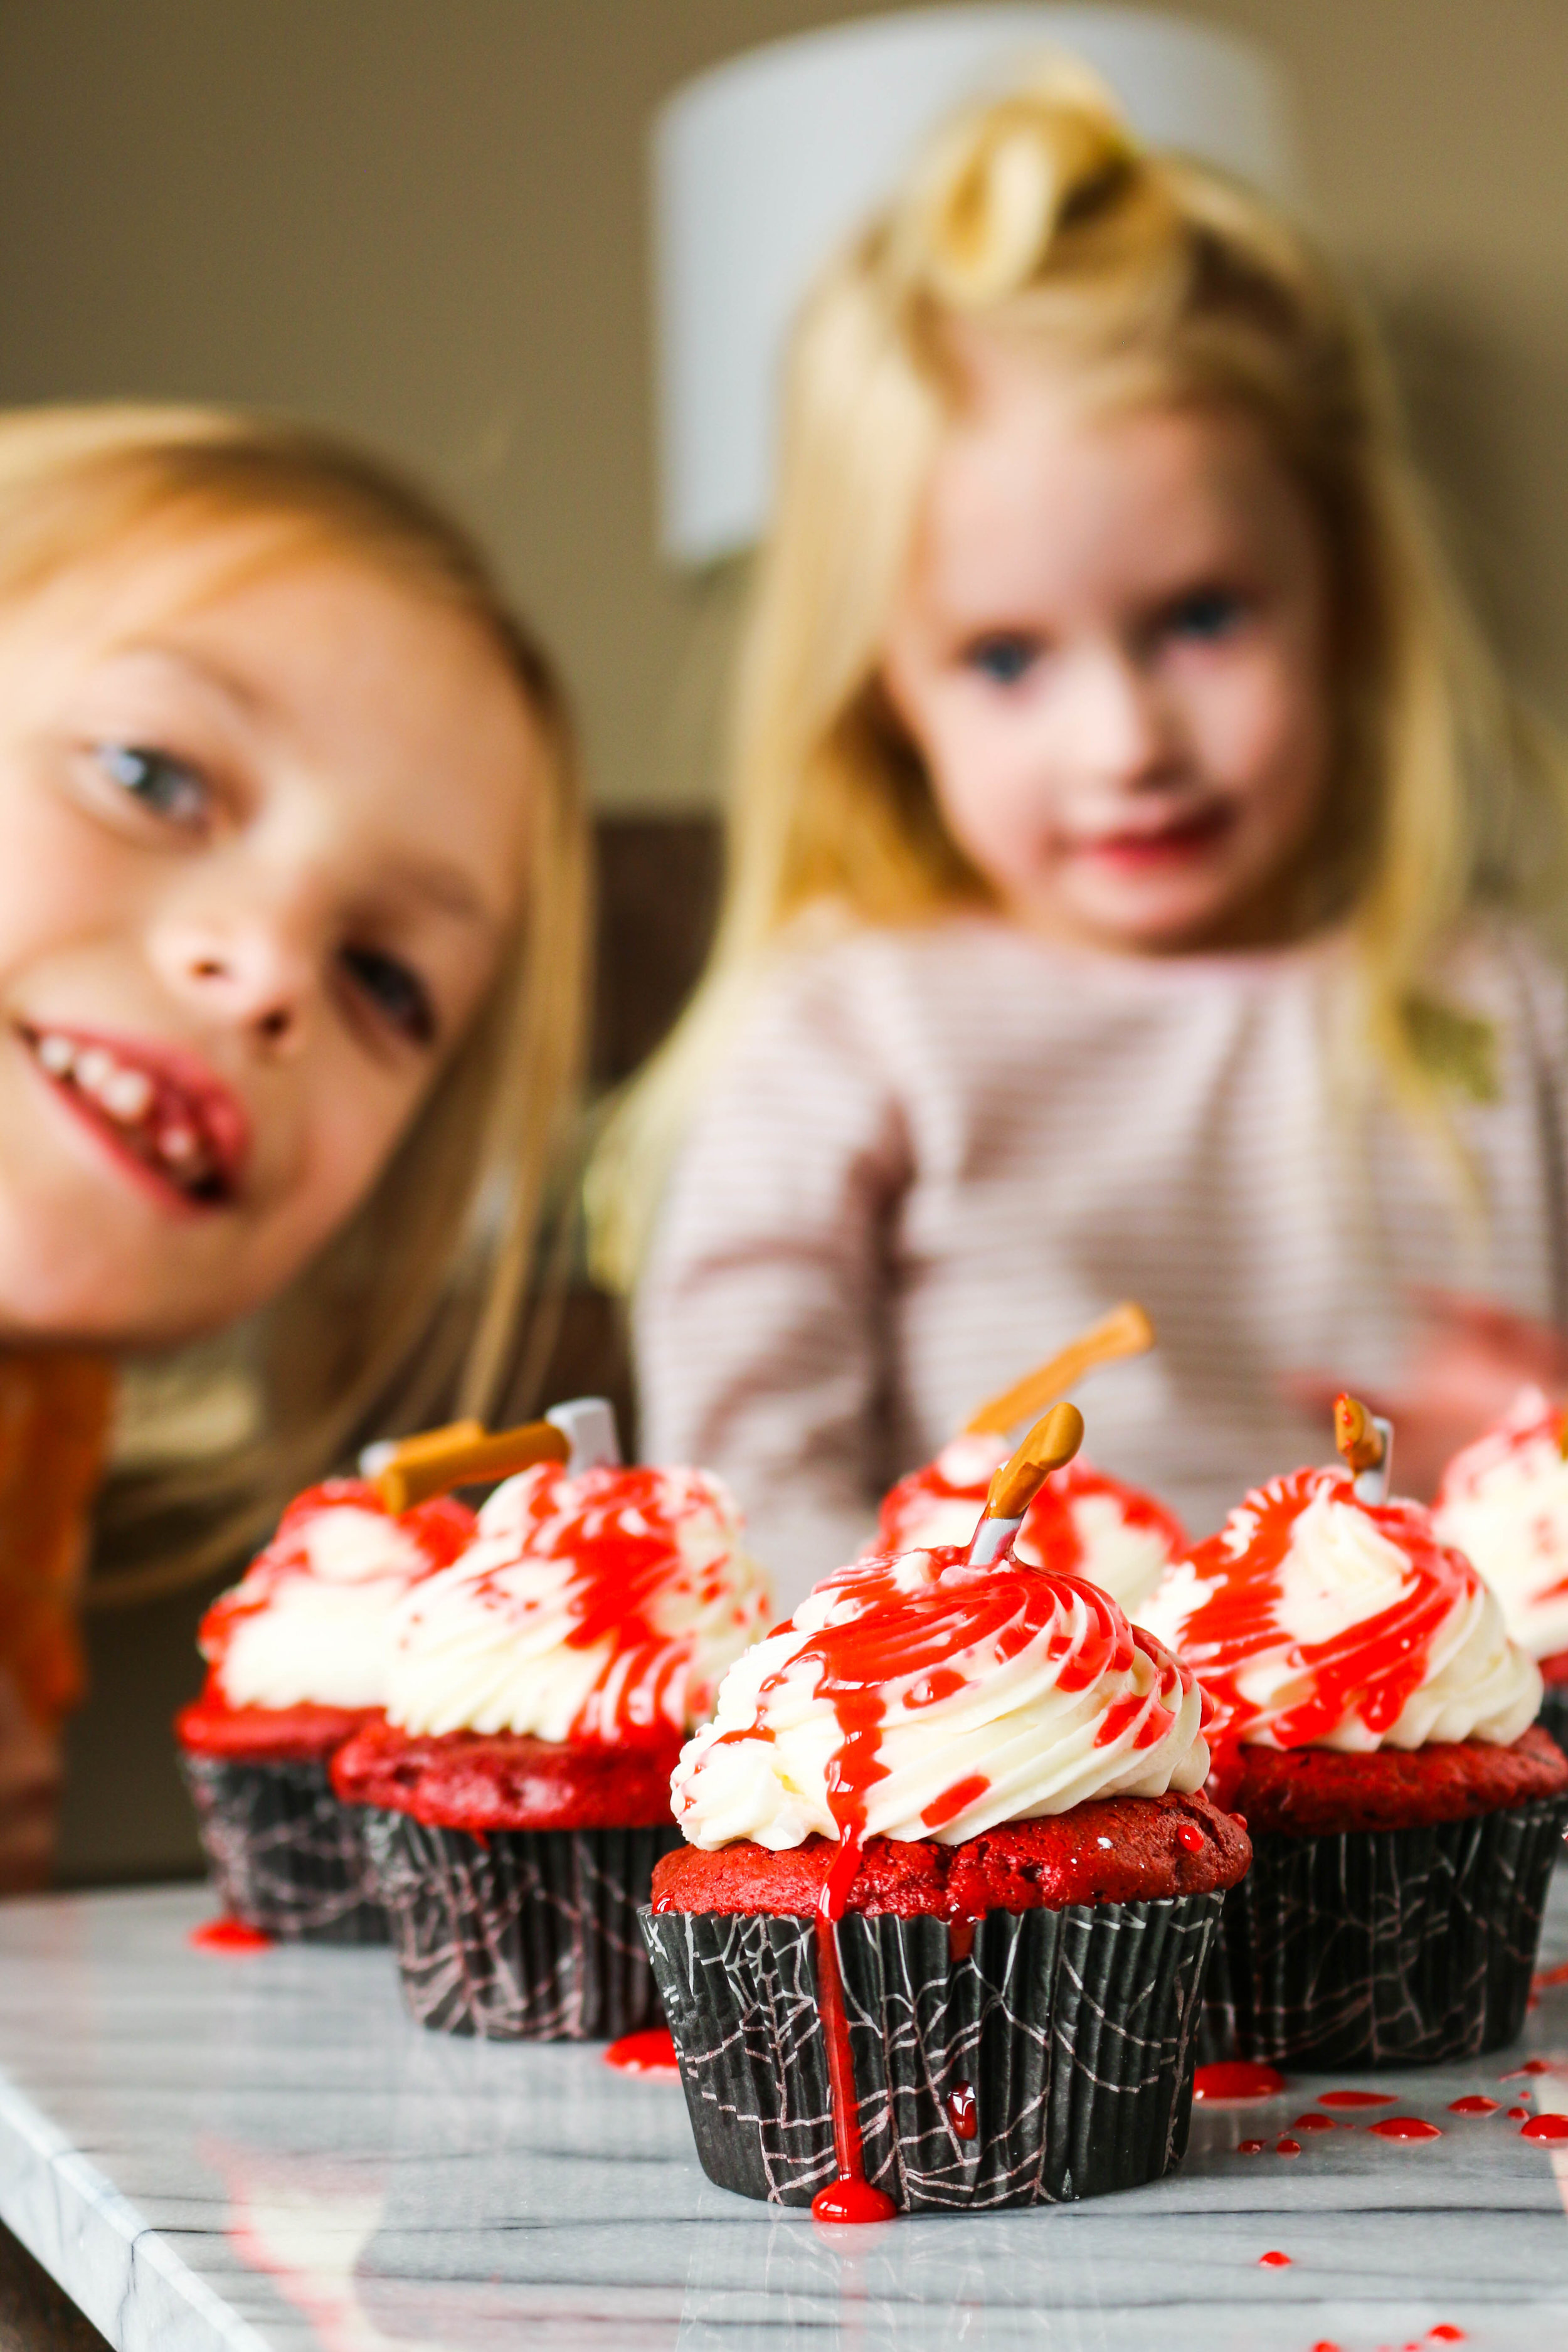
I’ve been making these RED VELVET cupcakes for years! Back when I was baking for parties, weddings, and other fun events these were always a request! I’ve topped them with glittery white flowers and even delicious chocolate ganache.
But today…Today it’s blood.
These are perfect for Halloween or maybe even Valentines Day…
Or maybe a day when you are stressed ;).
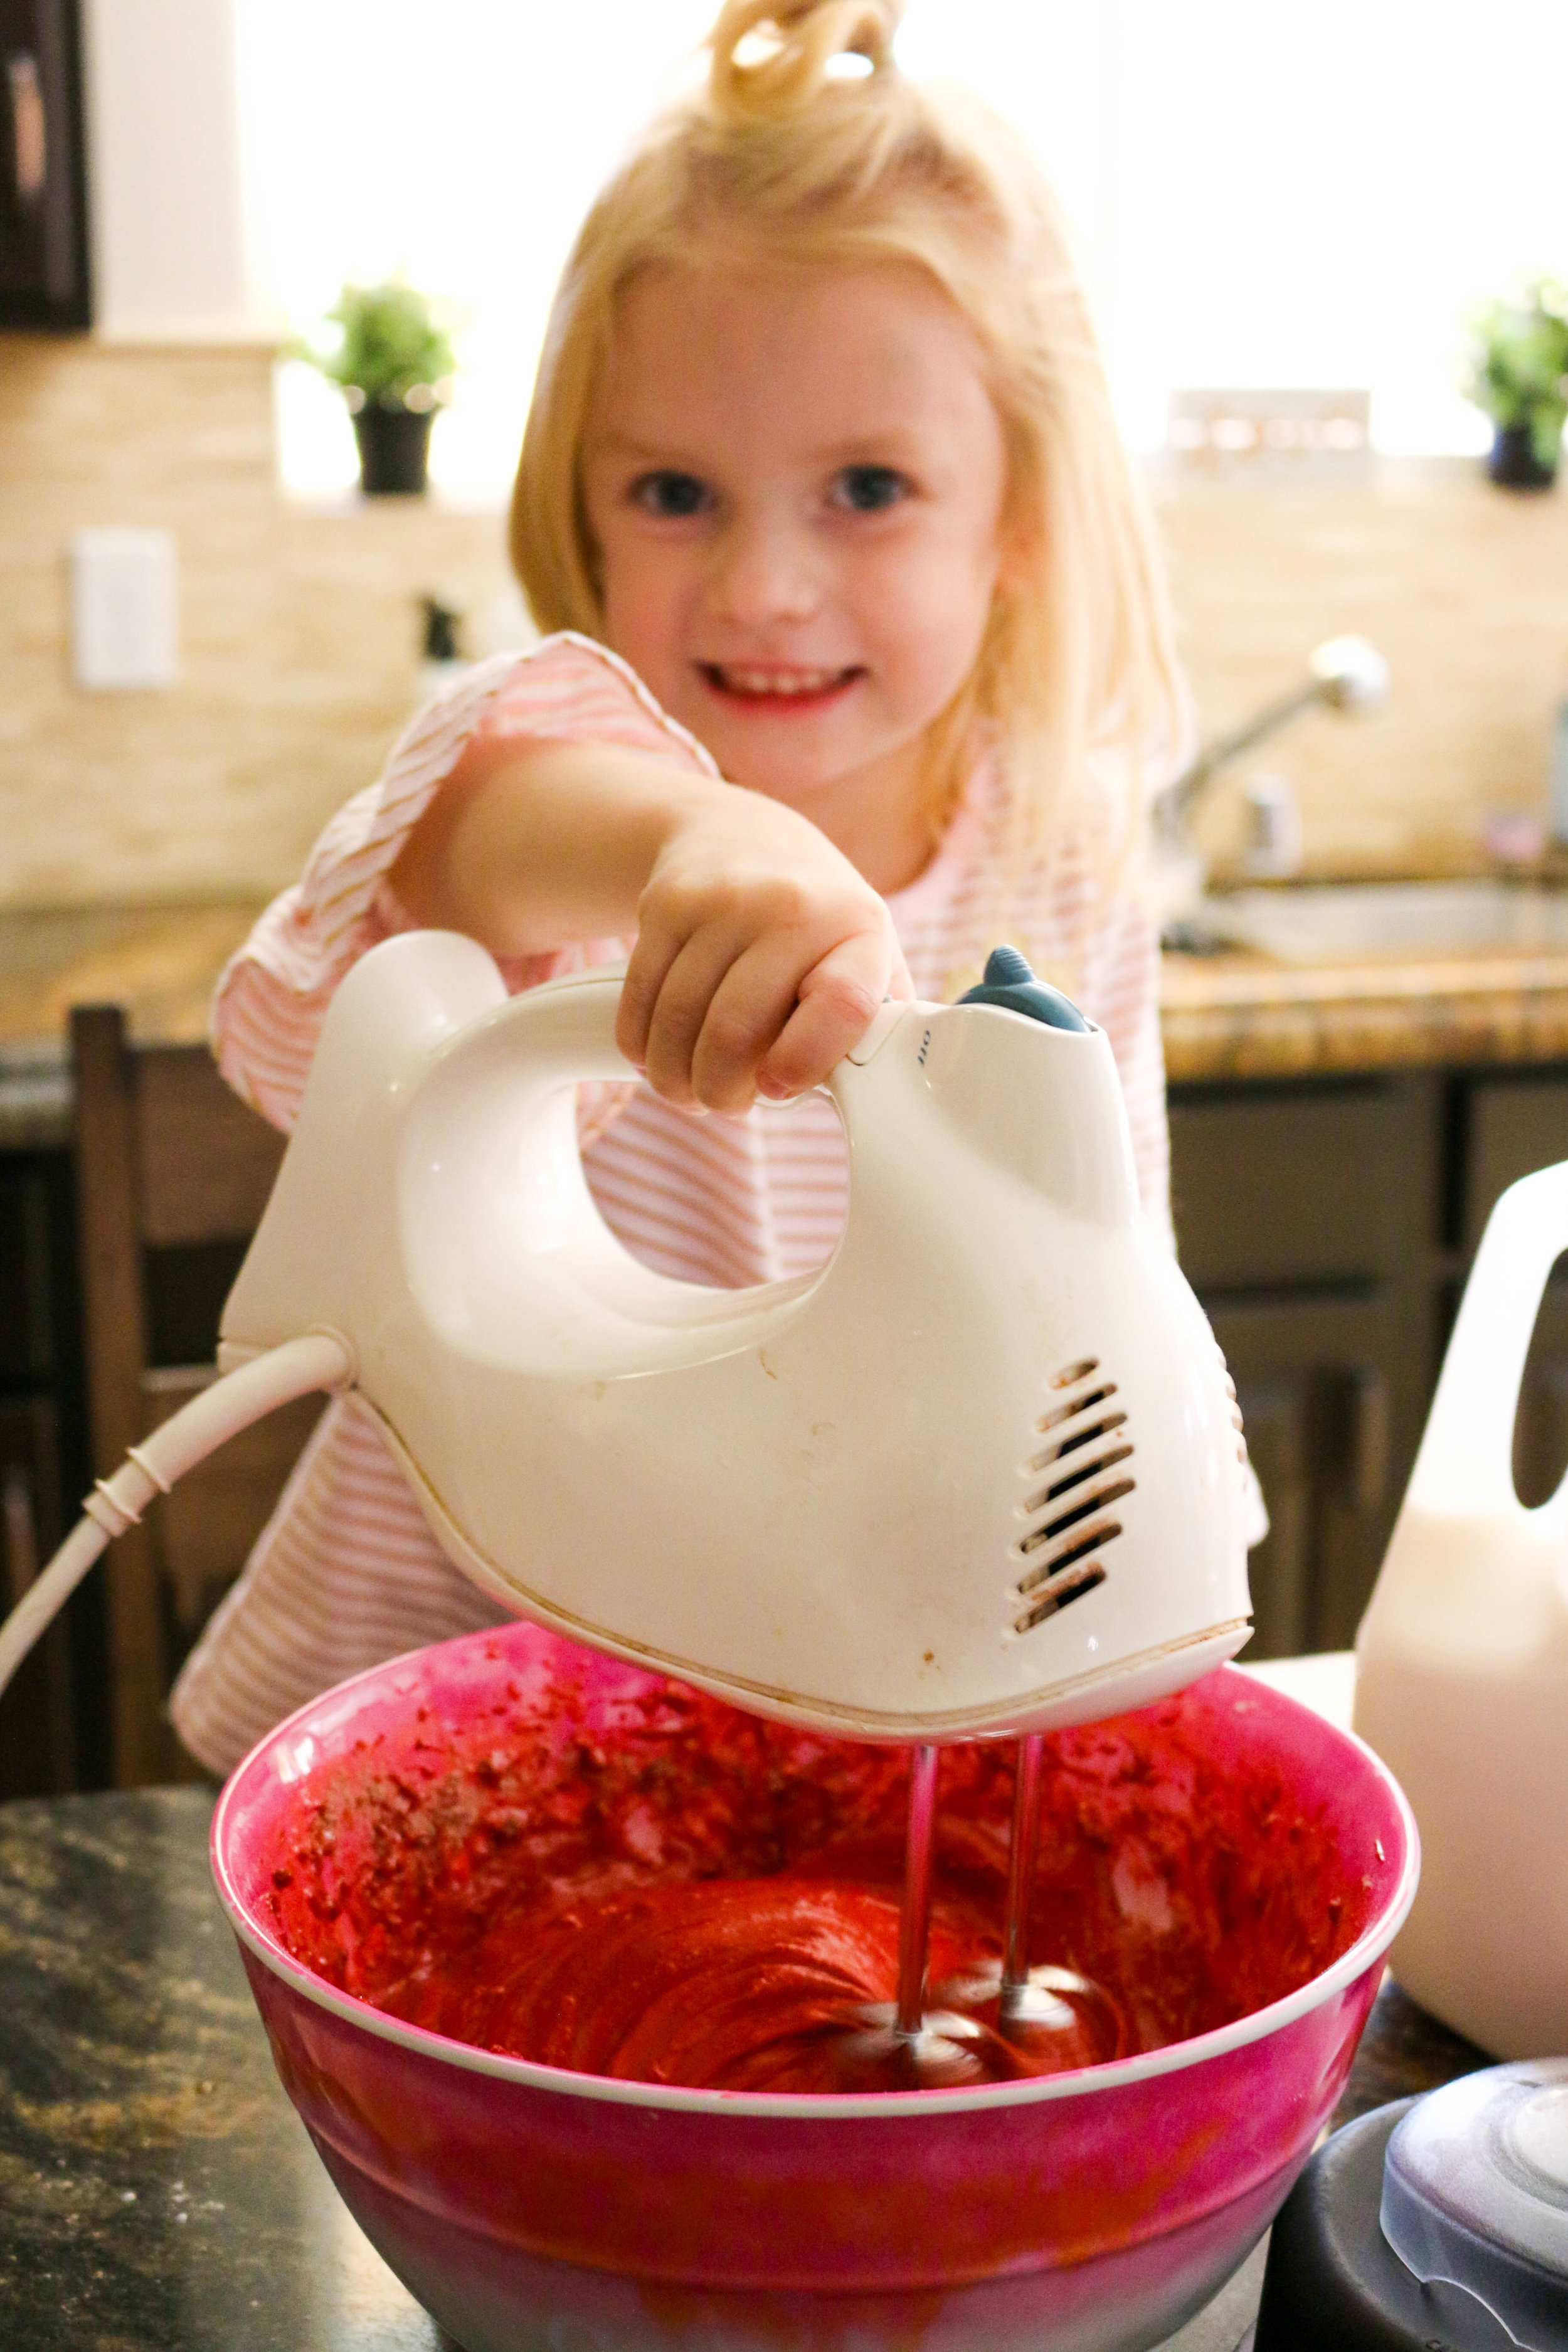
Either way, I love a good Doctored up cake mix because it makes things a little easier, especially when baking with a three year old.
Have you ever been faced with a 3 year old demanding to add 3 cups of flour to a bowl??
None of it makes it in that bowl…Most of it ends up on the floor. ;)
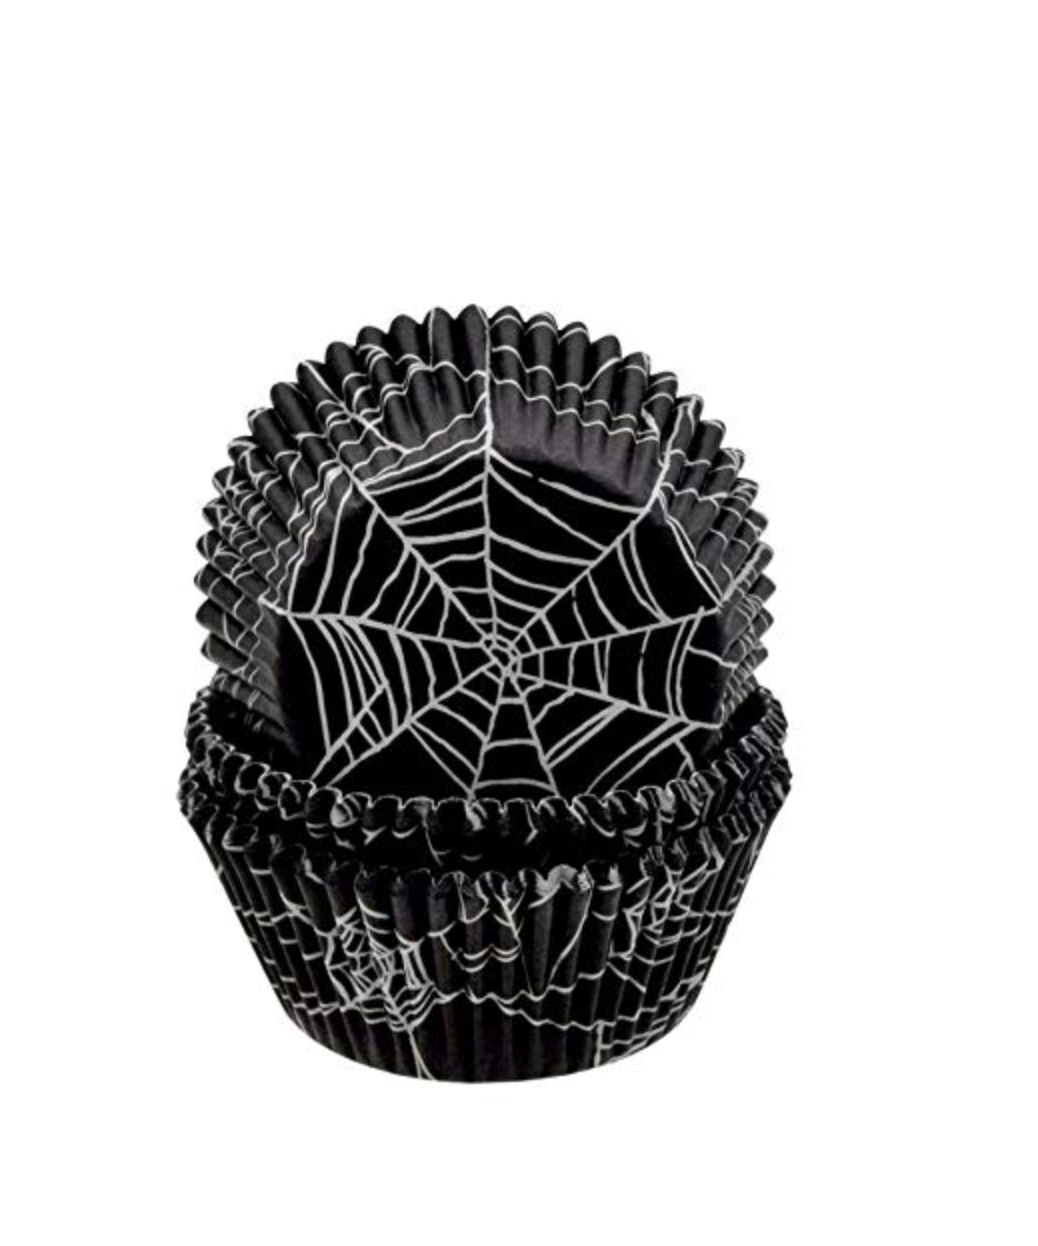
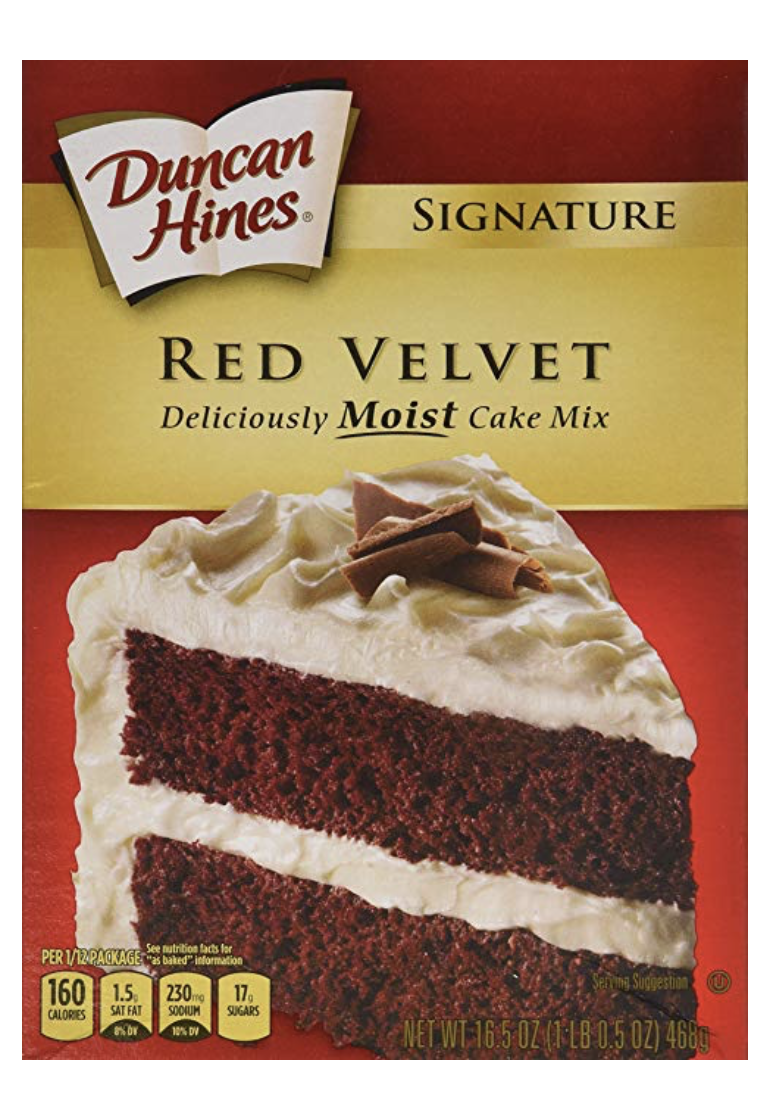
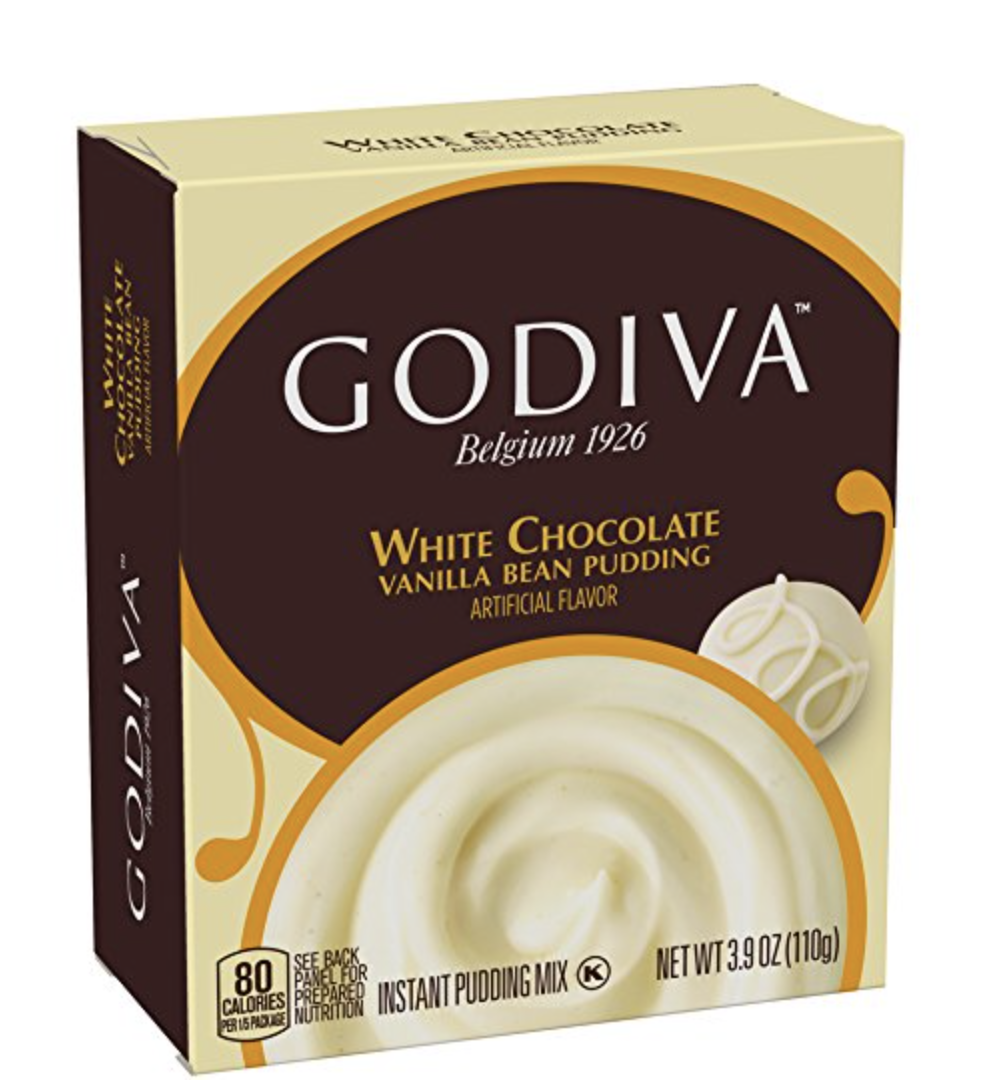
{Doctored-Up} Red Velvet Chocolate Chip Cake
Yields 24 cupcakes
Ingredients:
1 box Duncan Hines Red Velvet Cake mix
1 box Godiva white chocolate pudding, 3.9 ounce
4 eggs
1 TB. vanilla
1/2 cup + 2 TB. buttermilk
1/2 cup vegetable oil
1/2 cup sour cream
2 cups chocolate chips
Directions:
Preheat the oven to 325 degrees. Line a cupcake pan with cupcake liners.
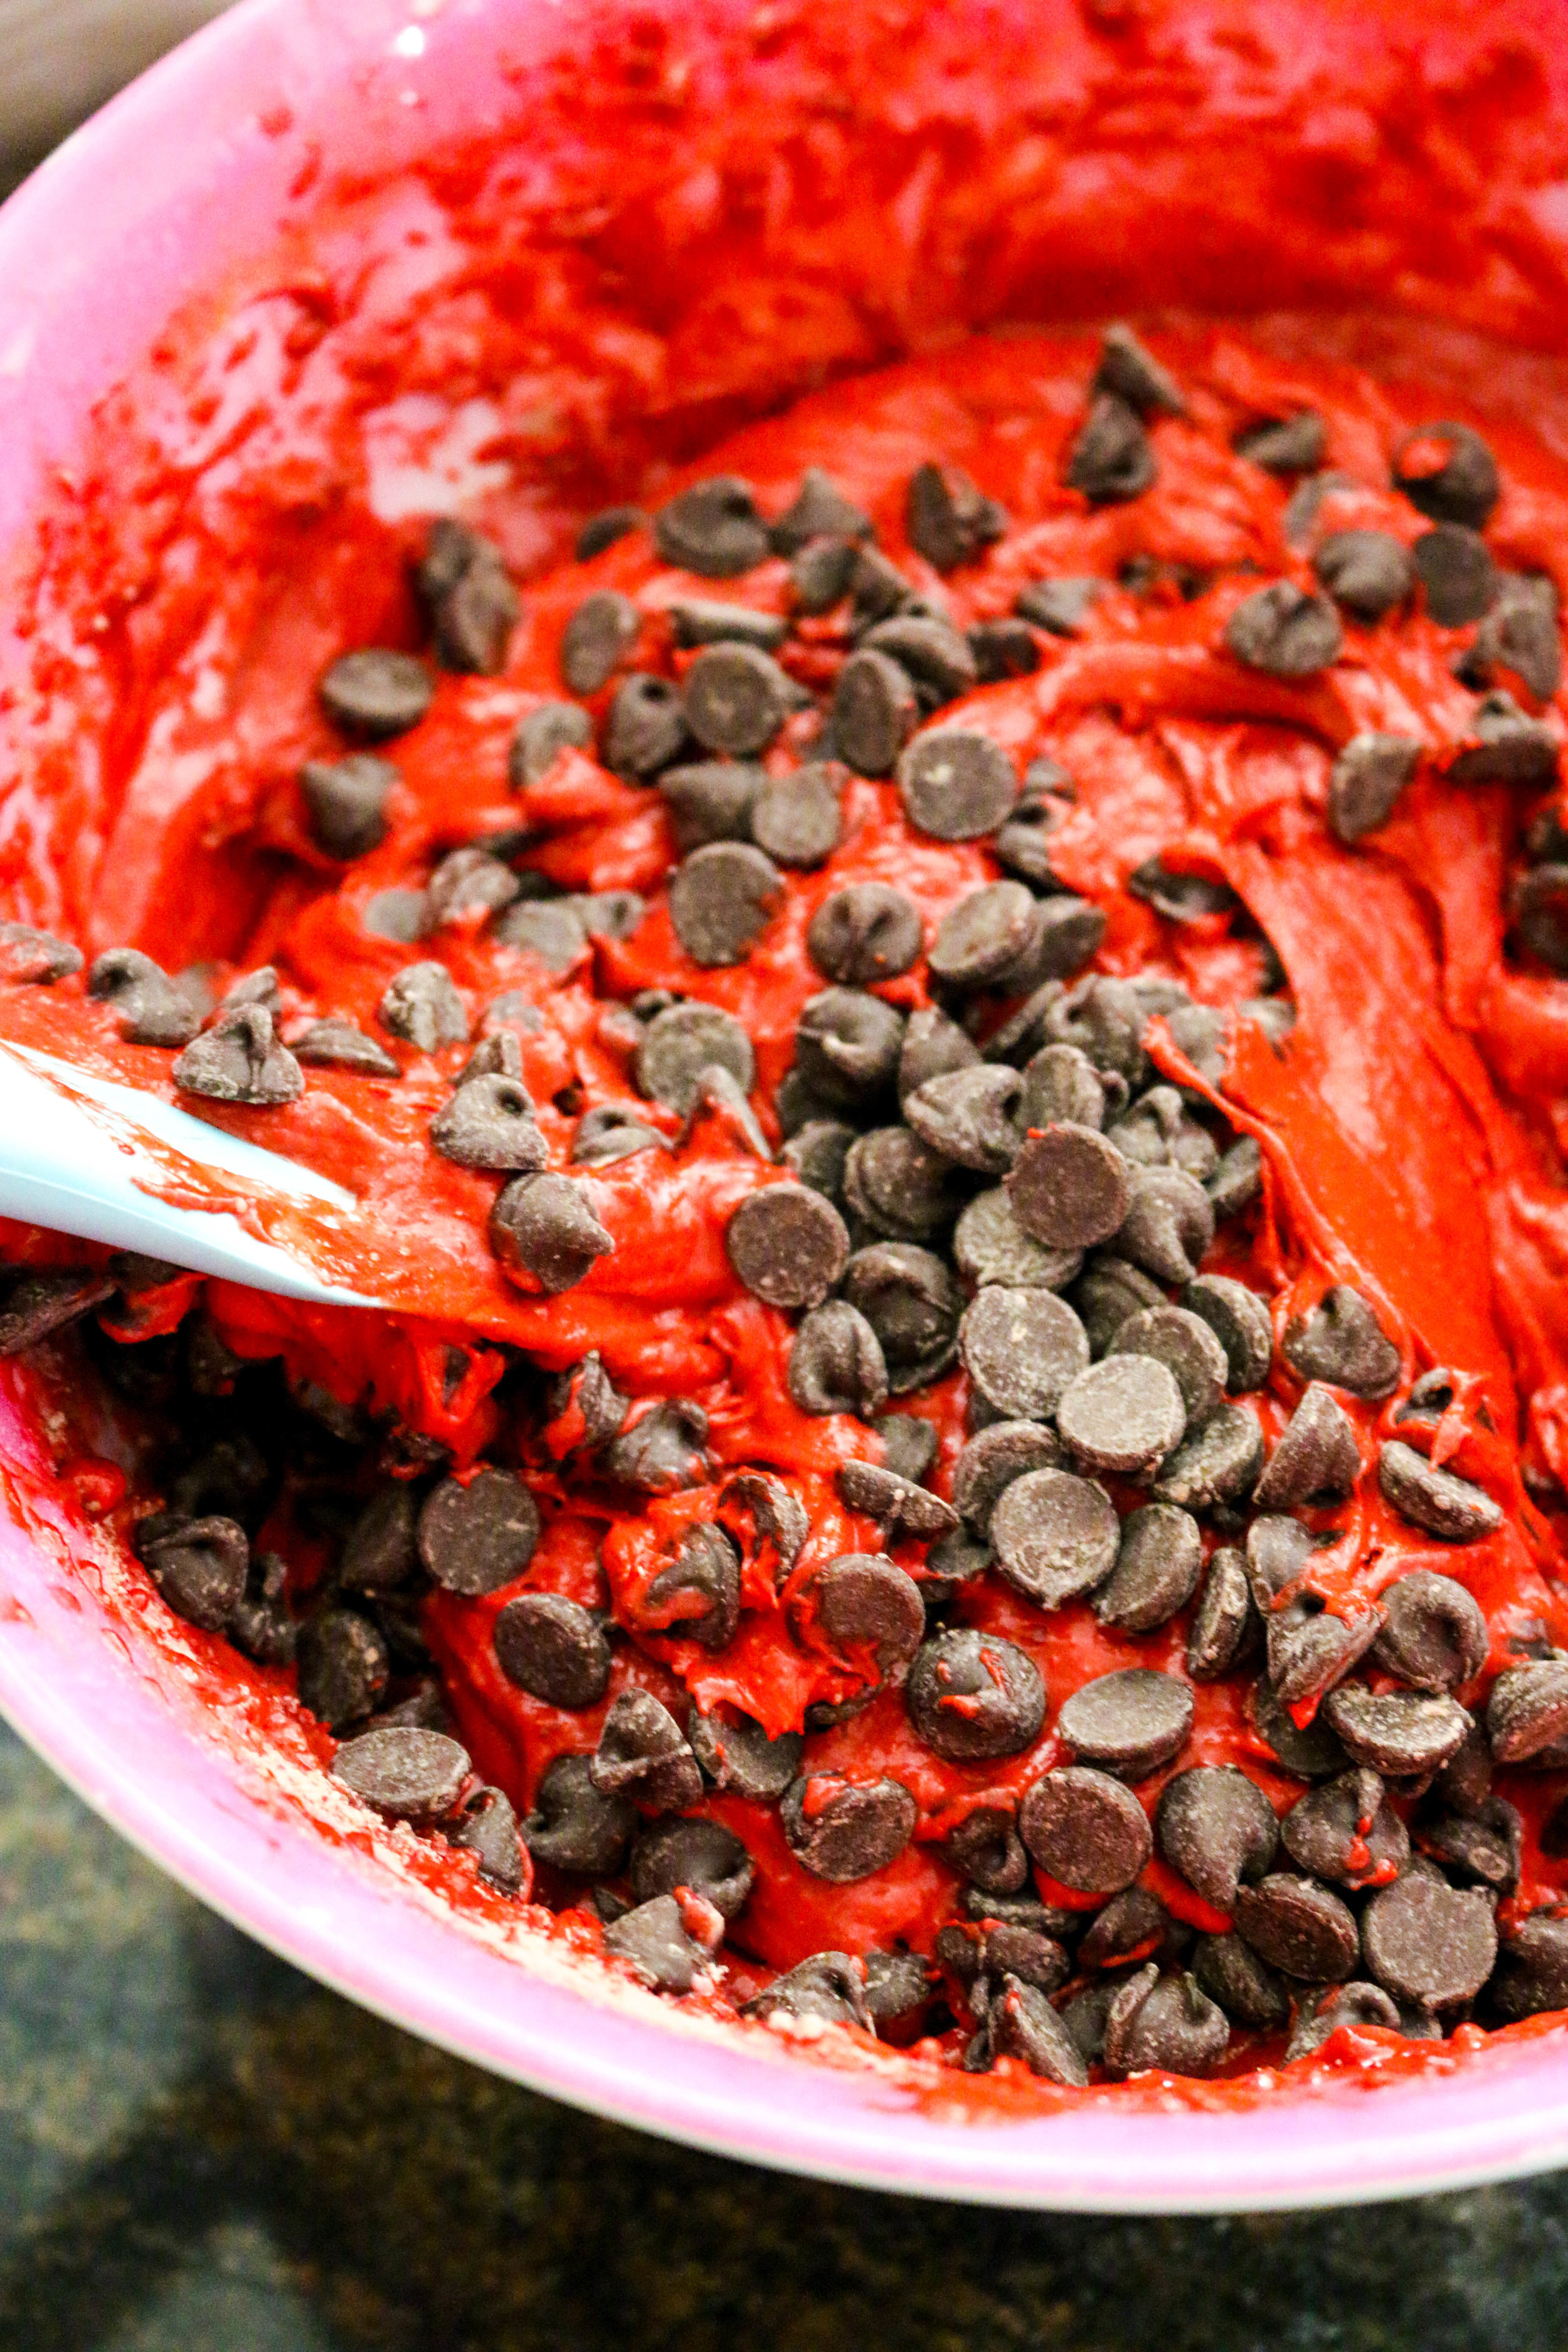
In a mixer bowl, add all of your ingredients except the chocolate chips. Mix until combined, but do not overmix.
Fold in the chocolate chips.
Using a cookie scoop, add batter to cupcake pan and fill liners 3/4 full.
Bake for 15-20 minutes, or until cupcakes have baked all the way through.
Cream Cheese Frosting:
Yields 3-4 cups
Ingredients:
1 block cream cheese, softened
2 sticks salted butter, softened
2-3 TB. heavy whipping cream
1 TB. vanilla Extract
3-4 cups powdered sugar
Directions:
Add the butter and cream cheese to a mixer bowl. Using the whisk attachment, beat together until creamy.
Add the rest of your ingredients and beat until creamy and fluffy! Frost cupcakes when cool. For this recipe I used aFRENCH STAR FROSTING TIP.
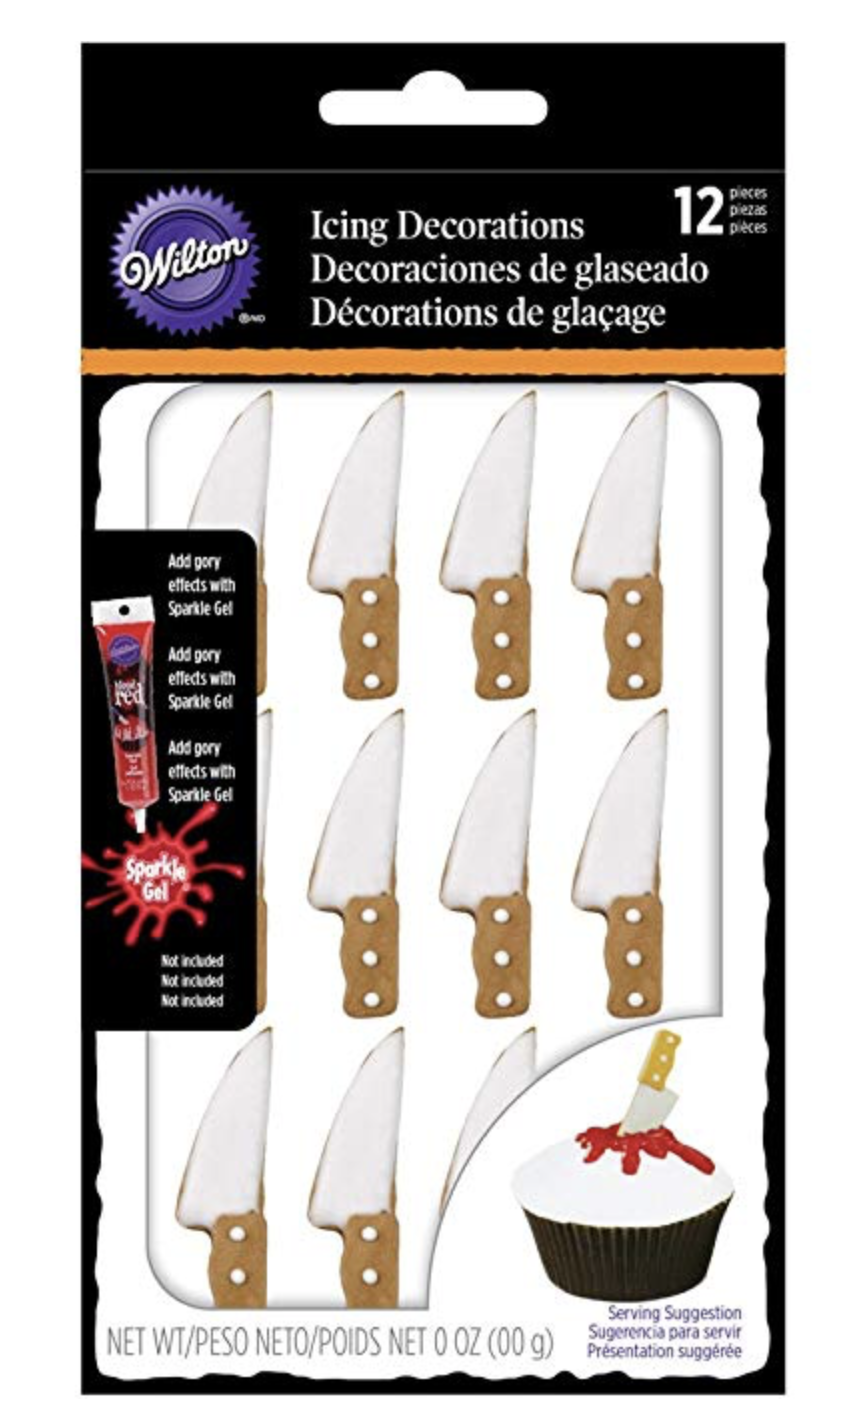
Fake Blood
Yields 1/2 cup
Ingredients:
1/2 cup corn syrup
1 TB. cornstarch
Red Food coloring
Directions:
Mix all ingredients together until combined. Drizzle on top of cupcakes for a bloody look ;).
““These links are from Amazon and include Affiliate Links. I receive a small portion when you buy from my site. Thank you so much for supporting The Diva Dish!””
You have no idea the joy that this time of year brings me! I tend to bake a lot this time of year…and I tend to eat a lot of those baked goods too…
Which brings me to this delicious cake! The flavors are SO on point with this cake! It’s moist, has all the right fall spices, and in my opinion would pair perfectly with a nice scoop of vanilla ice cream! Or plain with breakfast…Or on the go in your car driving your kids to school…Or late at night when you can’t stop crying while watching ‘This Is Us’…
As you can see, there are so many options.
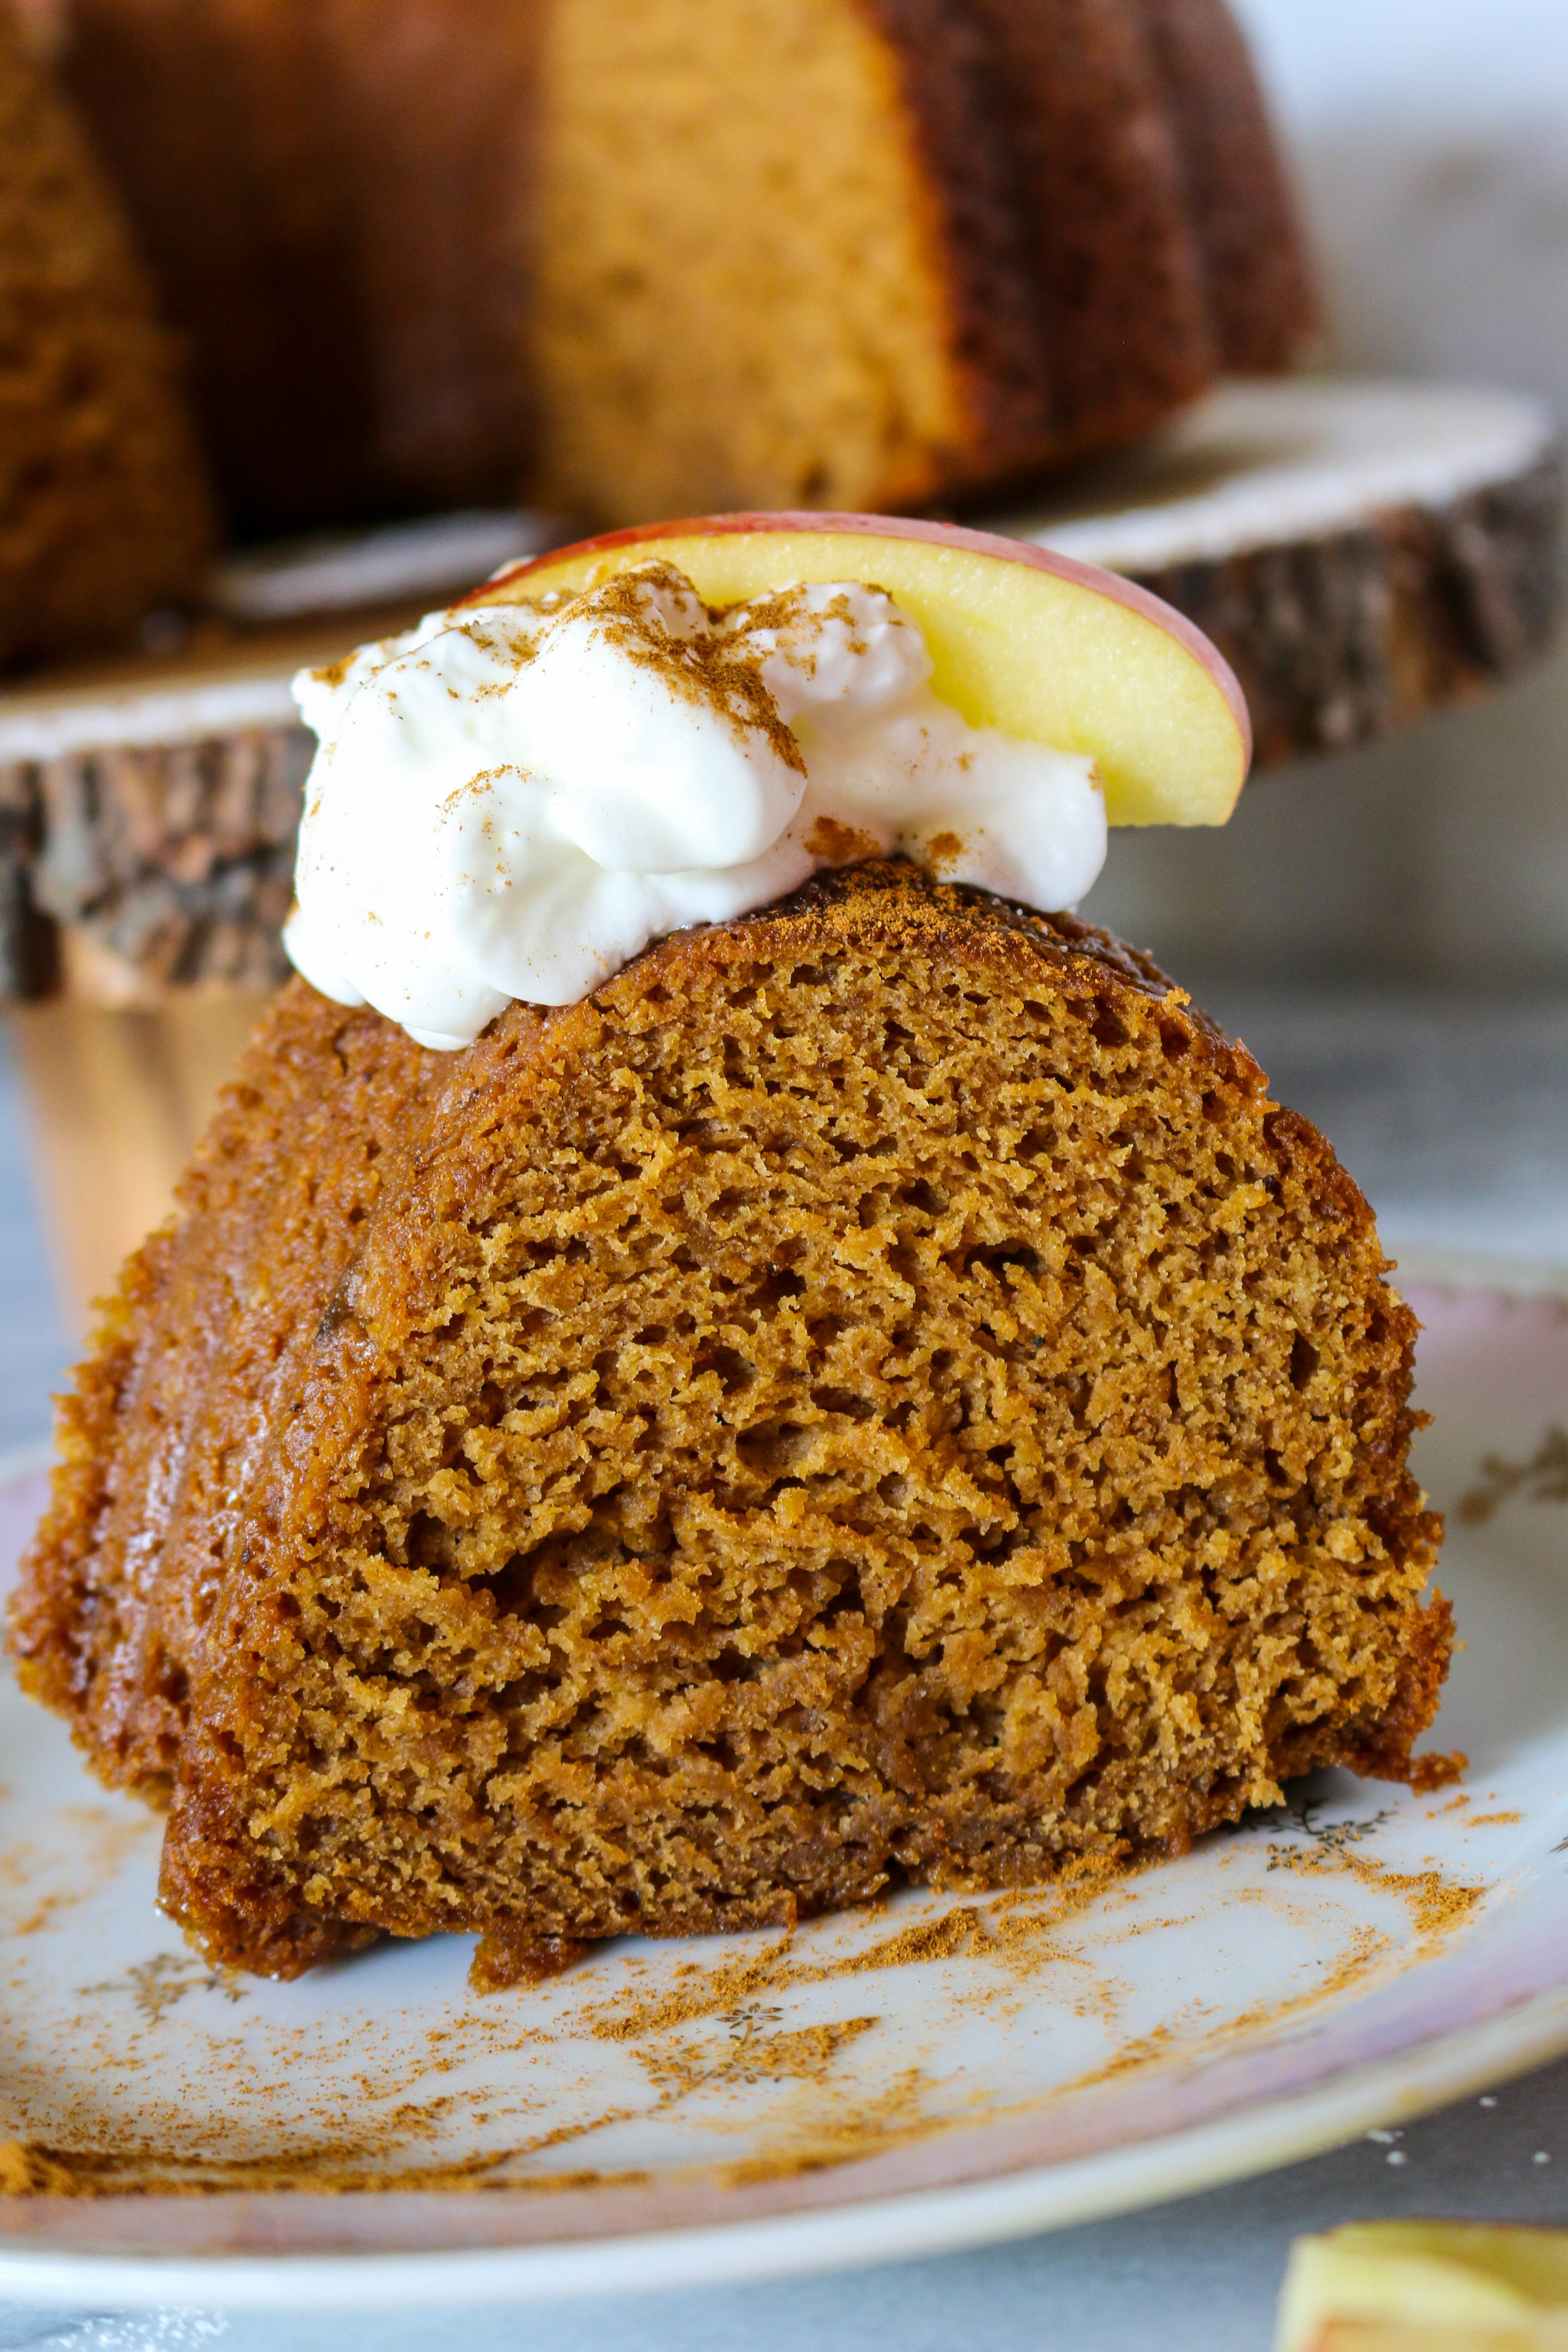
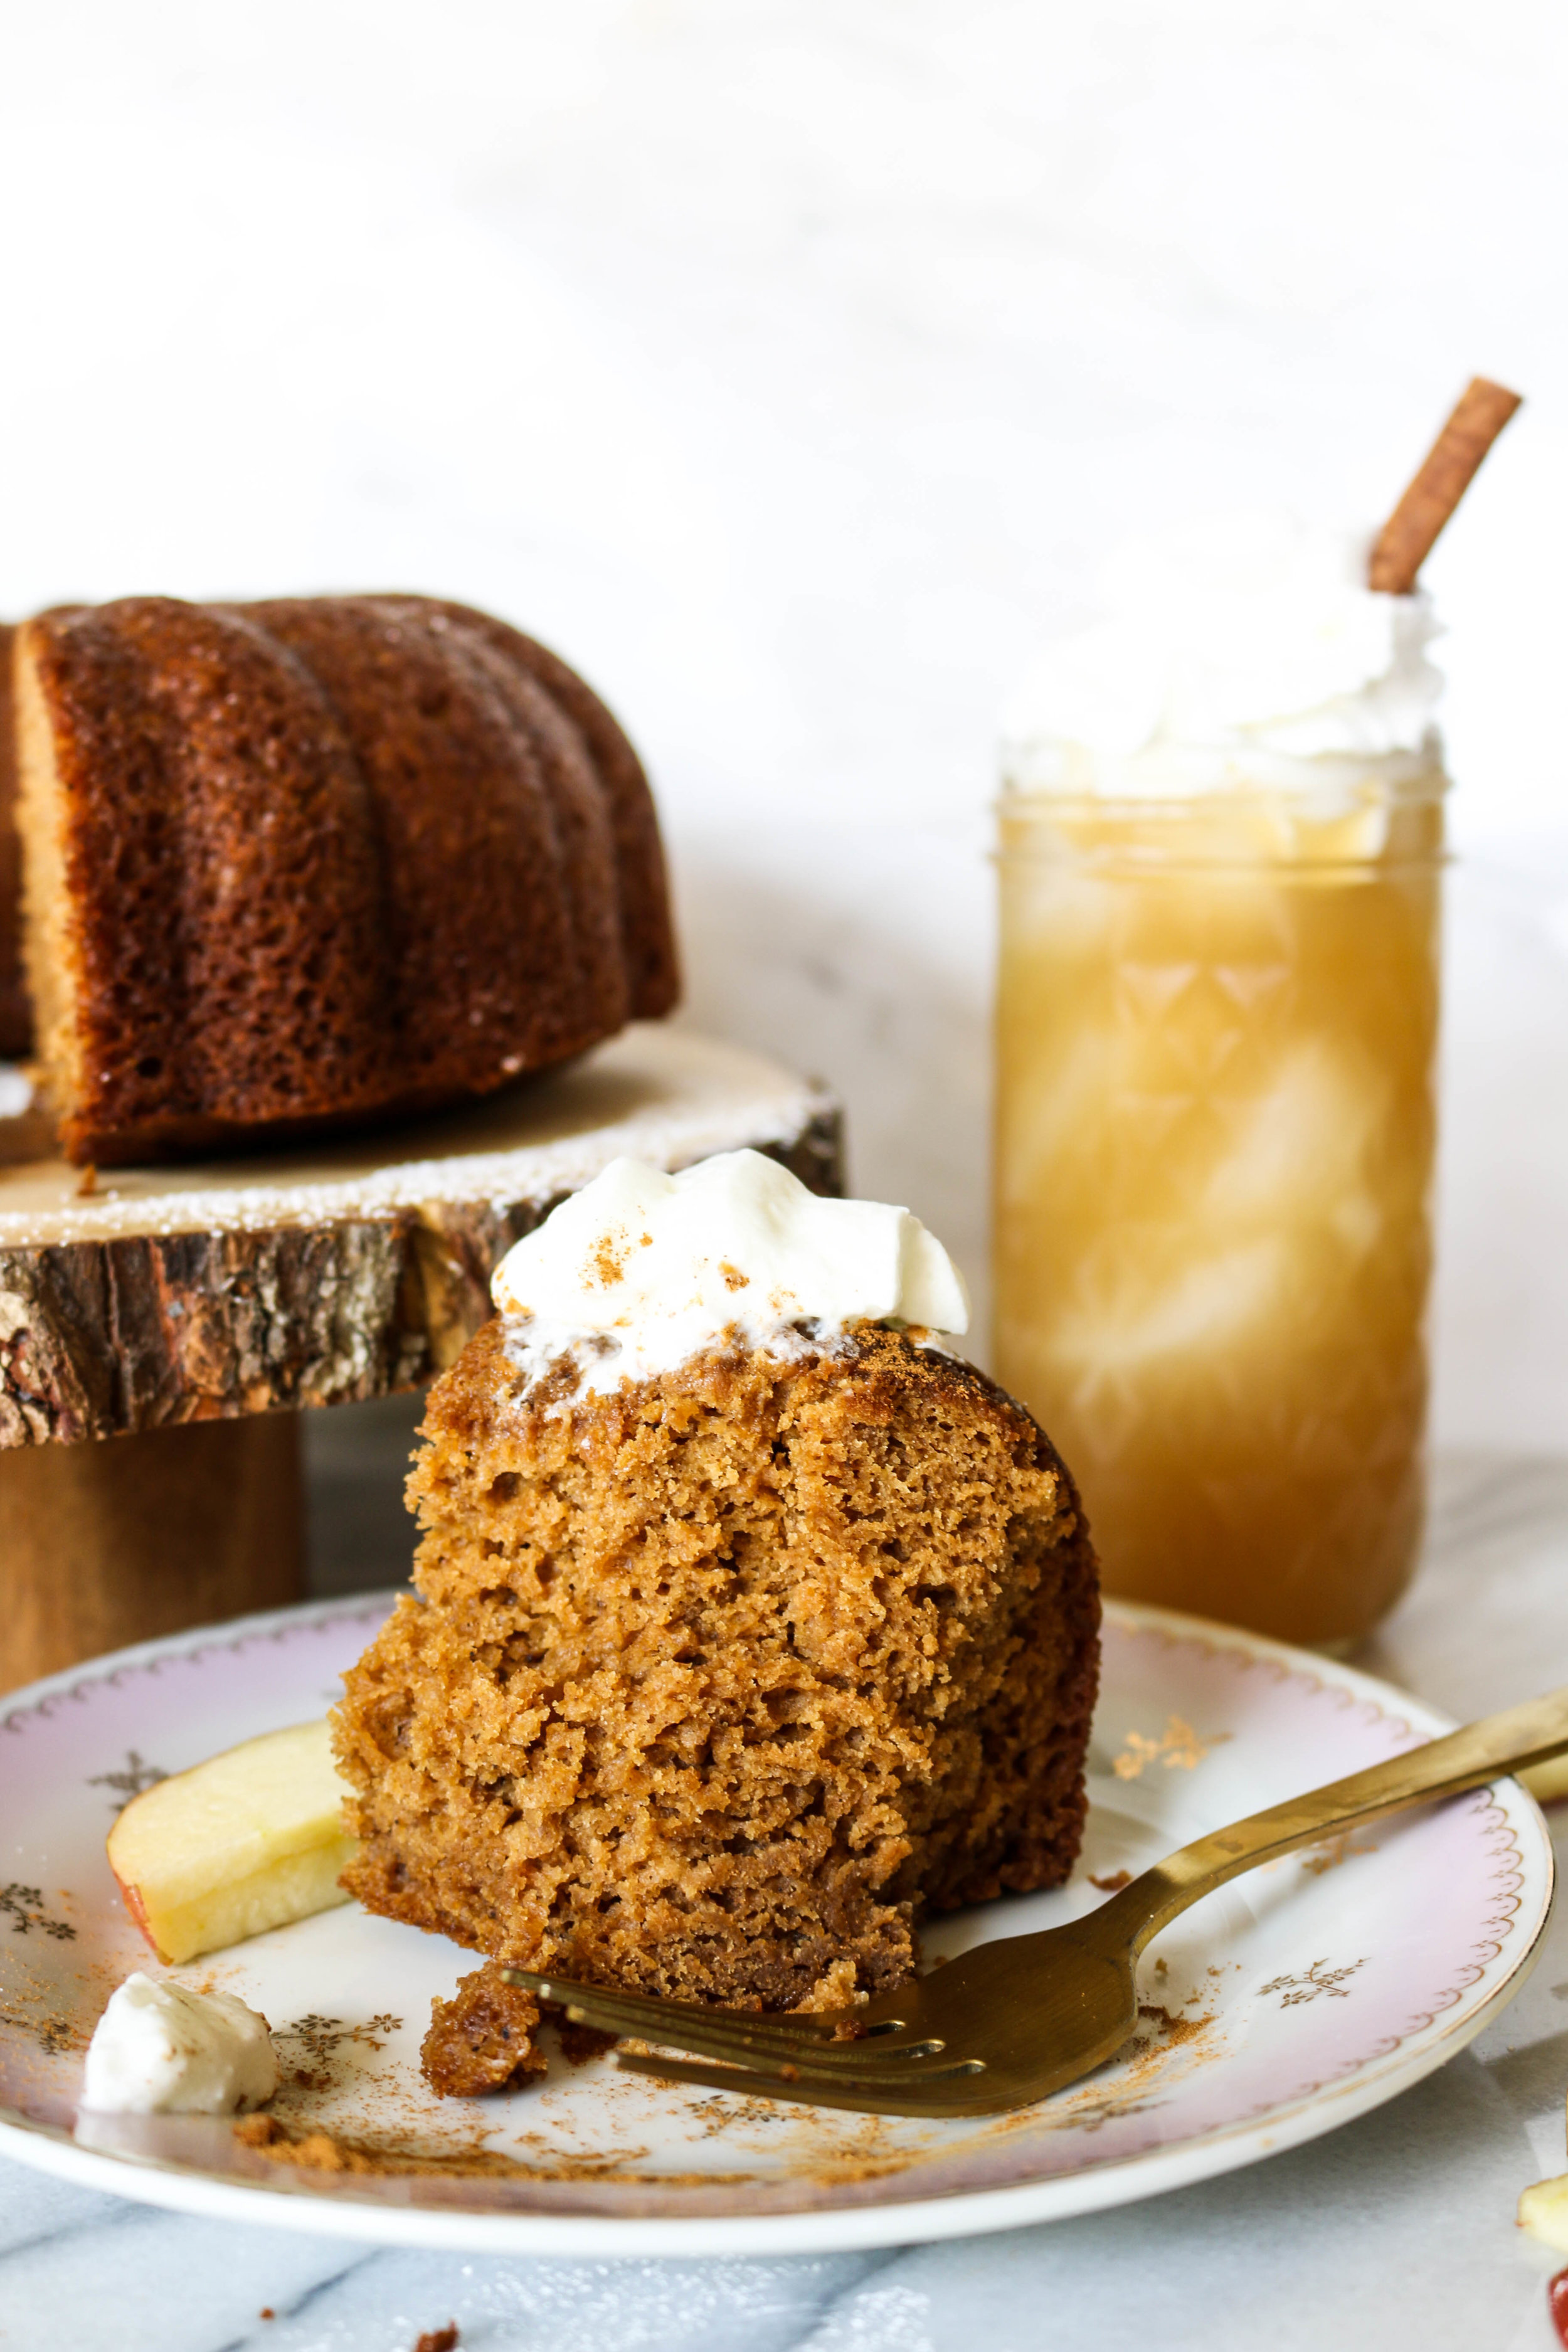
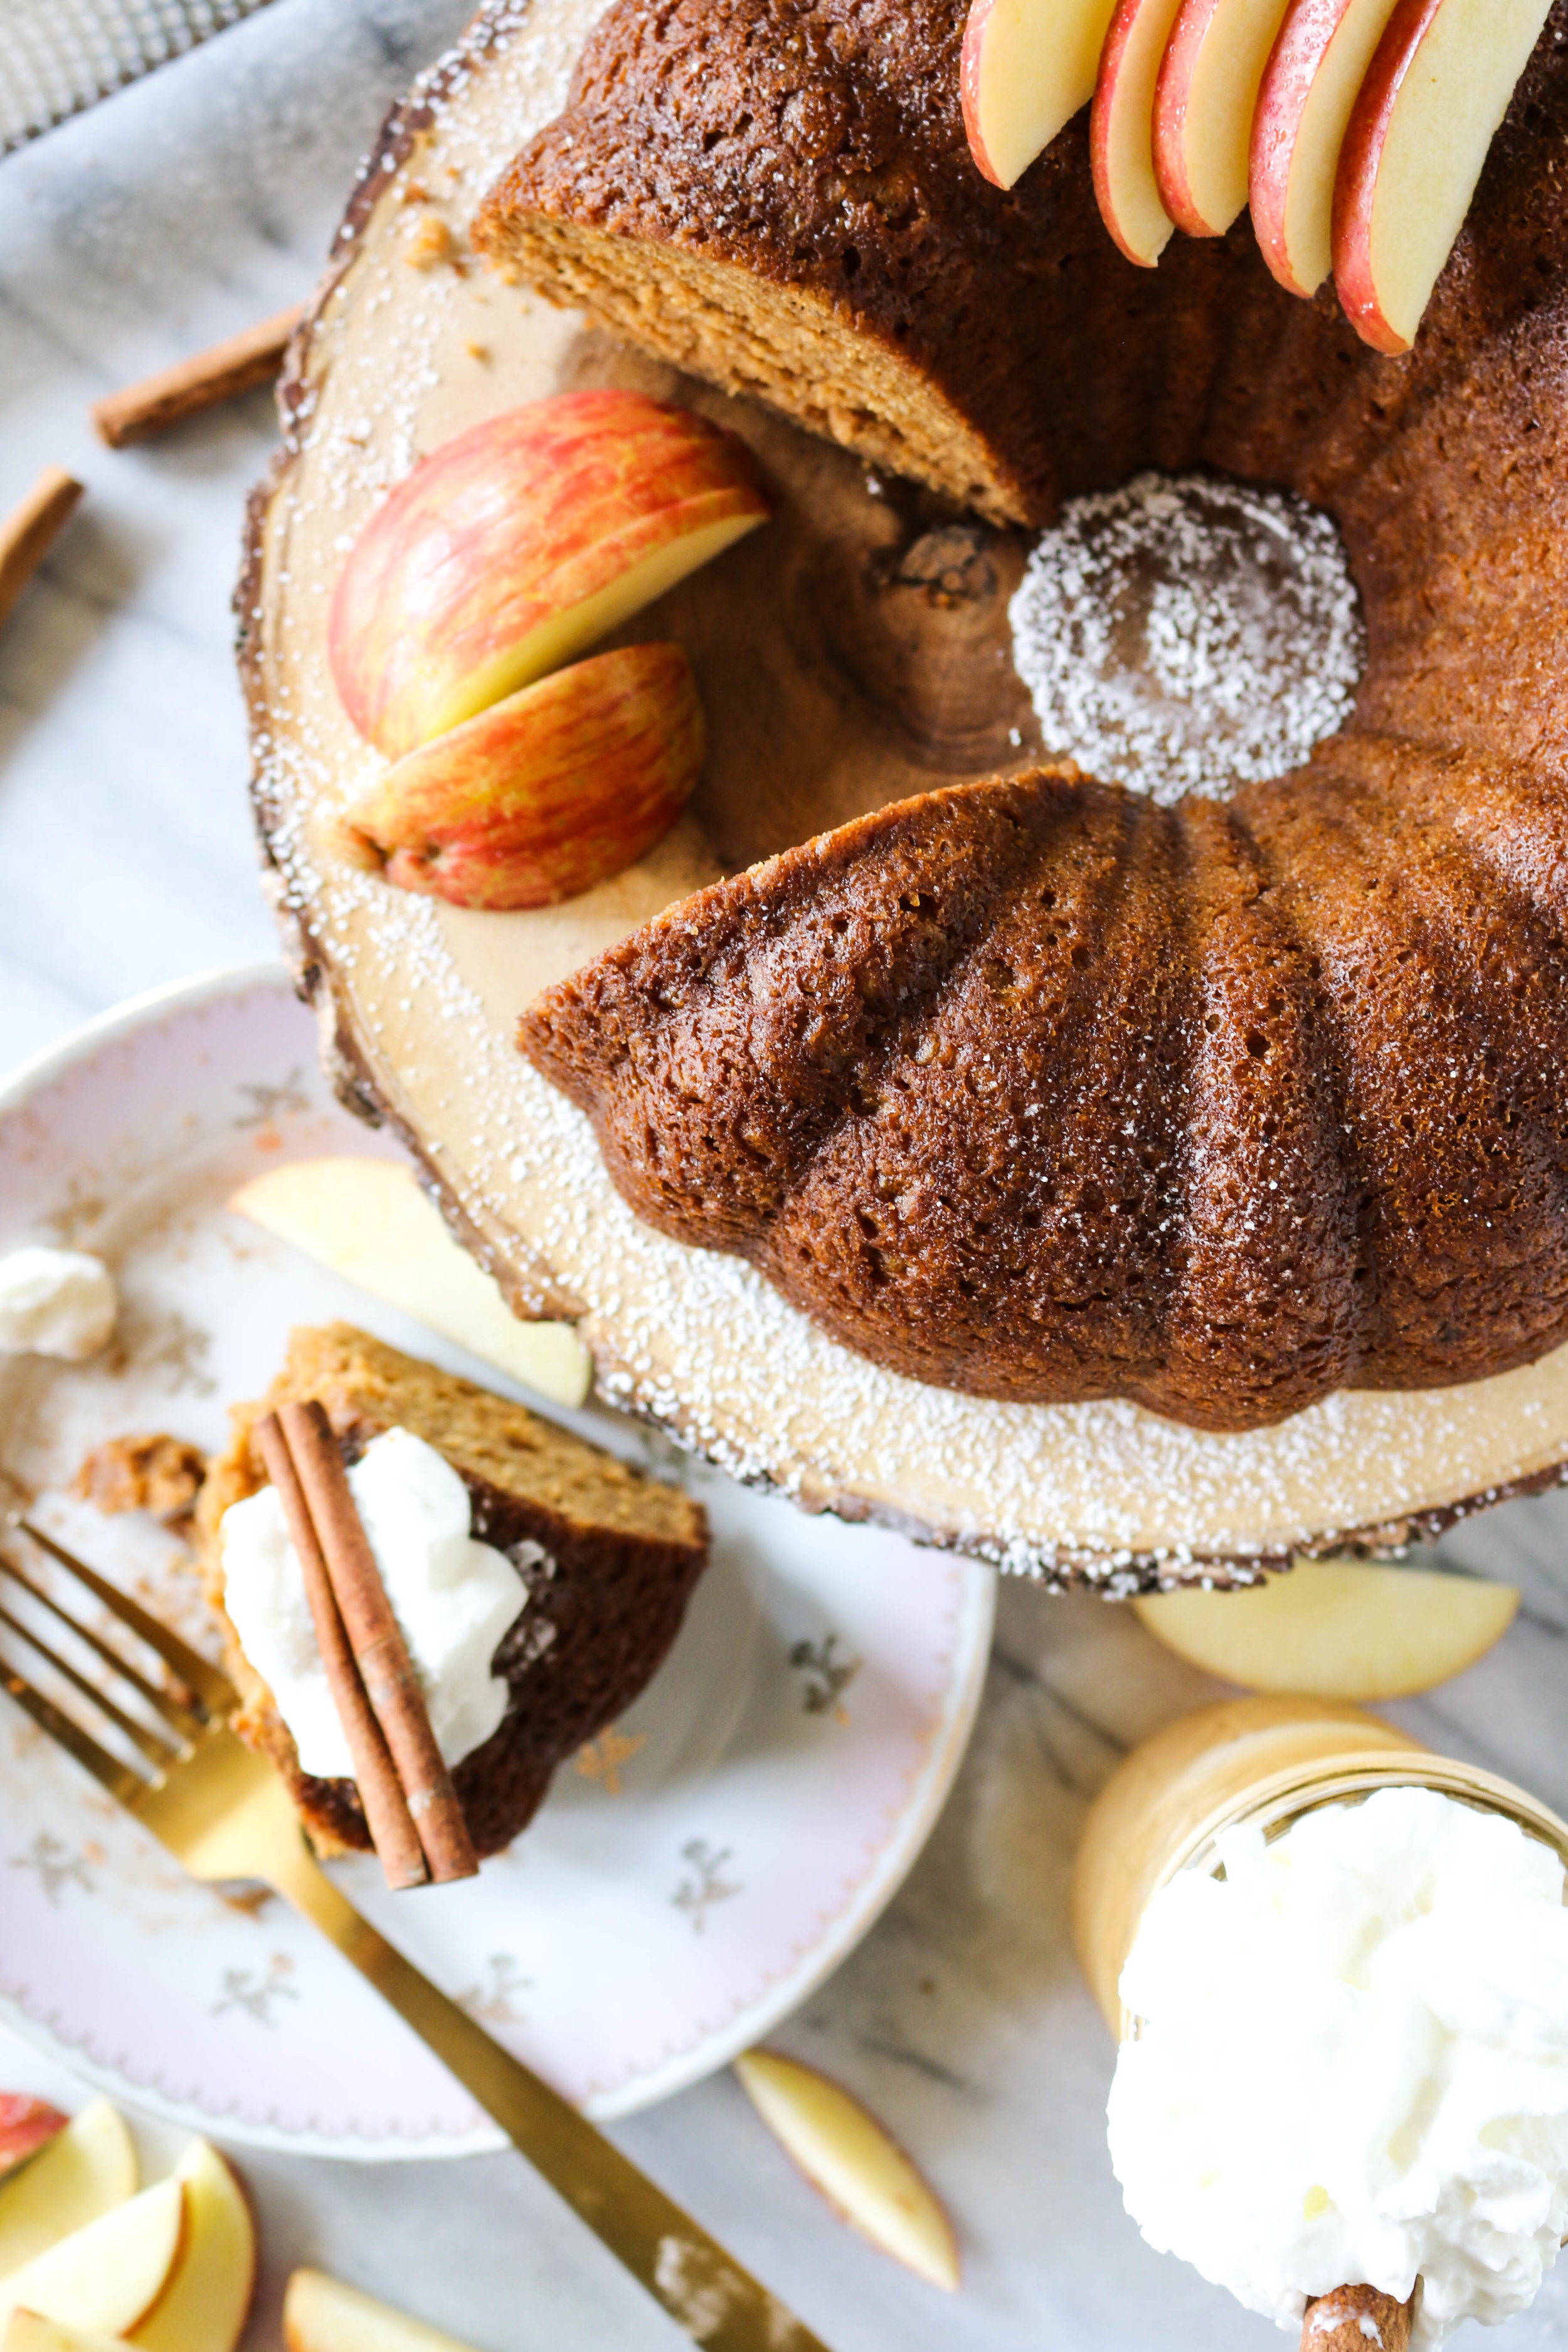
Spiced Apple Cider Bundt Cake
Ingredients:
2 1/2 white flour, or spelt for a healthier version
1 1/2 tsp. baking soda
1/4 tsp. baking powder
1 tsp. salt
1 1/2 tsp. cinnamon
1 tsp. ground cloves
1 tsp. ground allspice
1/4 tsp. ground ginger
1/4 tsp. ground nutmeg
3/4 cups white sugar
3/4 cups brown sugar
1/2 cup canola oil or vegetable oil
1 1/2 cups apple cider, cooked down to 1/2 cup cider. (See notes below for directions)
1 1/2 cups unsweetened applesauce
2 eggs
1 TB. vanilla extract
Directions:
Preheat the oven to 325 degrees.
Add apple cider to a small saucepan. Turn the heat on medium low and continue to cook the apple cider until it has cooked down to 1/2 cup. Continue to whisk while it cooks so it doesn’t burn. In a separate medium bowl, whisk together the flour, baking soda, baking powder, and spices. Set aside.
In another bowl add the cider, applesauce, oil, eggs, sugar, and vanilla. Whisk together.
Combine the wet and dry ingredients and whisk until smooth. Do not over mix.
Spray a bundt pan generously with cooking spray. Pour the batter into the bundt pan.
Bake for 30-50 minutes, depending on your oven and altitude.
Let cool before removing from pan. Dust with powdered sugar/serve with a scoop of vanilla ice cream. Serve and enjoy!
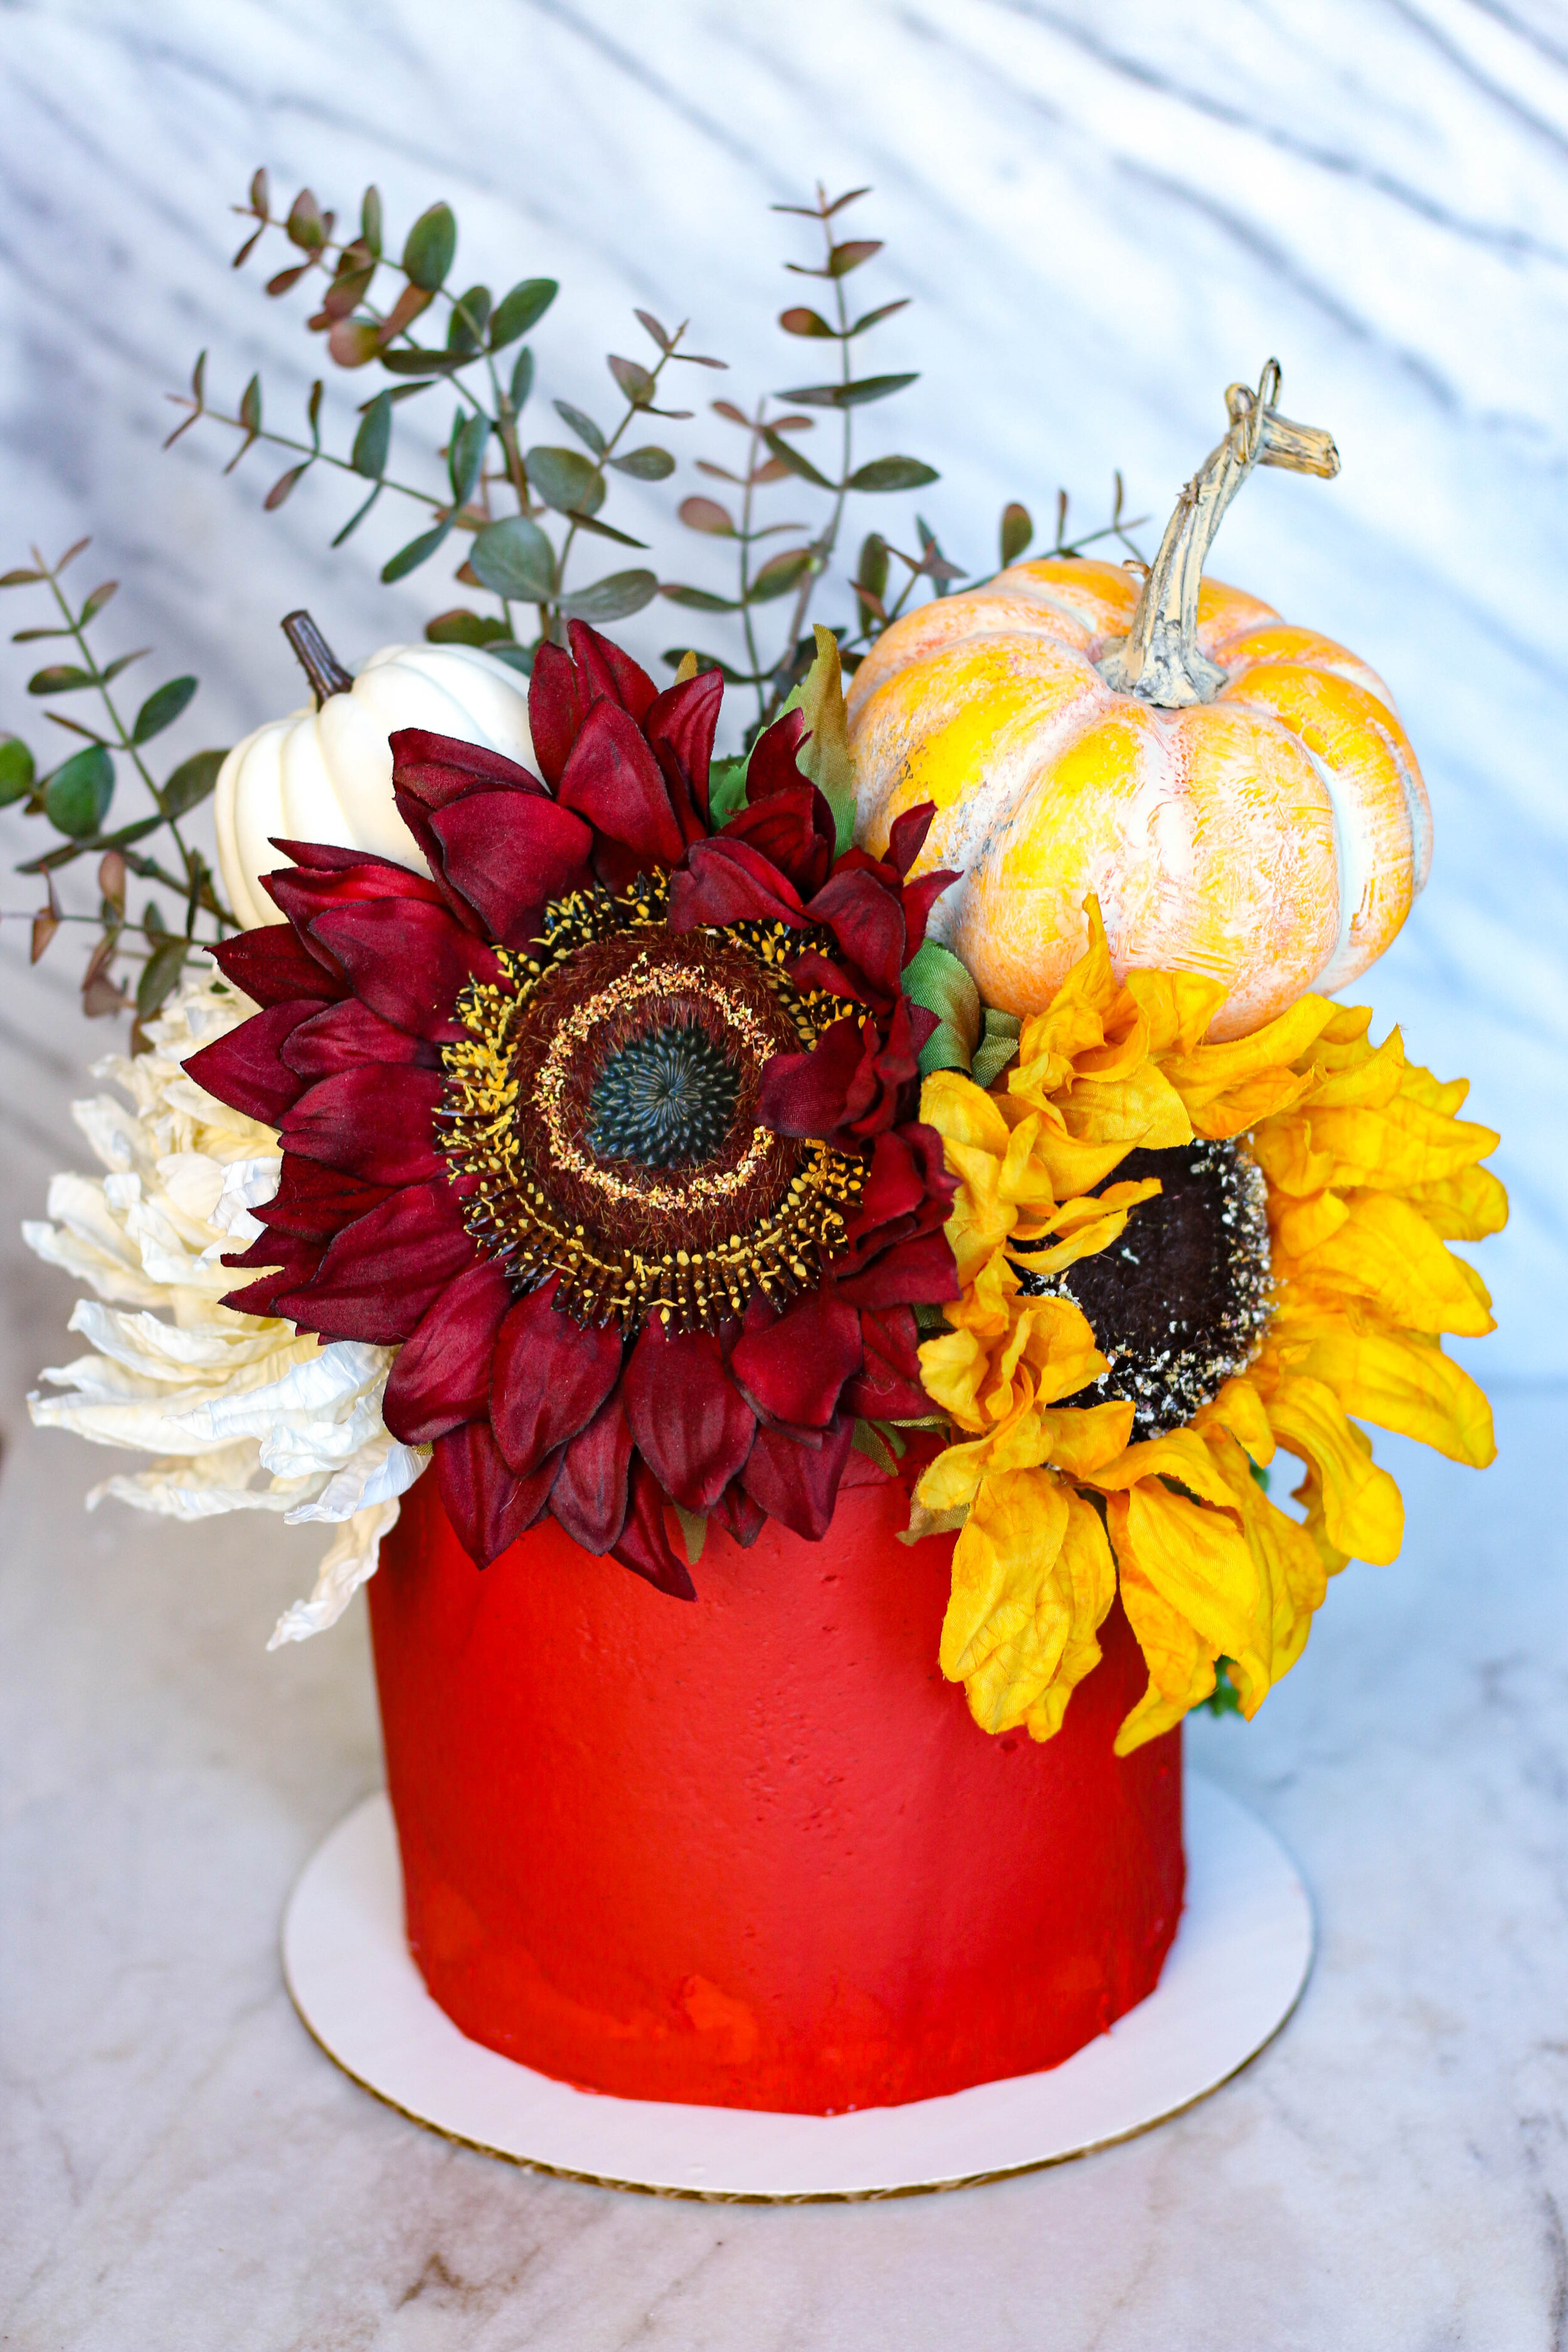
I love the versatility of this recipe because it can be made into a BUNDT cake, a LAYER cake, or a SHEET cake! I made the layer cake version for you today, but feel free to make it into a sheet cake for easier baking. Layer cakes, especially decorating them, can be quite tricky! The only thing you will do differently for a sheet cake is bake in jelly roll pan, and once cool frost with the delicious spiced cream cheese frosting!
Use the same recipe as above. Preheat your oven to 350 degrees.
If making into a layer cake, spray and grease three 6 inch cake pans, and place a circle cut out of parchment on the bottom so it doesn’t stick. Divide batter evenly amoung the three pans. Bake for 25-30 minutes, or until done in the center. Once cooled, wrap cakes up nicely and freeze before frosting. Frozen/cold cakes frost much easier than warm/room temp cakes do.
For a sheet cake, spray and grease a jelly roll pan. Pour batter into pan and bake for 20-25 minutes, or until cake has cooked all the way through. Allow to cool before frosting.
8 ox brick cream cheese, softened to room temperature
2 lb bag powdered sugar
1 1/2 TB. vanilla extract
1 tsp. cinnamon
1 tsp. allspice
1/4-1/2 cup heavy whipping cream
Directions:
Add your butter and cream cheese to a stand mixer. Mix on medium speed until light and fluffy. Add in the rest of your ingredients and start with 1/4 cup of heavy whipping cream. Beat on medium until the frosting comes together. If it is too thick, drizzle in a little bit more heavy cream. Beat until light and fluffly, but never on high speed. You dont want TOO much air bubbles in the frosting, so take it slow as you are mixing and bringing your frosting together. Feel free at this point to add in your food coloring of choice.
Frost your cakes however you desire, whether it be a layer cake or a sheet cake! Flowers on top of the cake shown above are fake and from my local craft store.
“These links are from Amazon and include Affiliate Links. I receive a small portion when you buy from my site. Thank you so much for supporting The Diva Dish!”
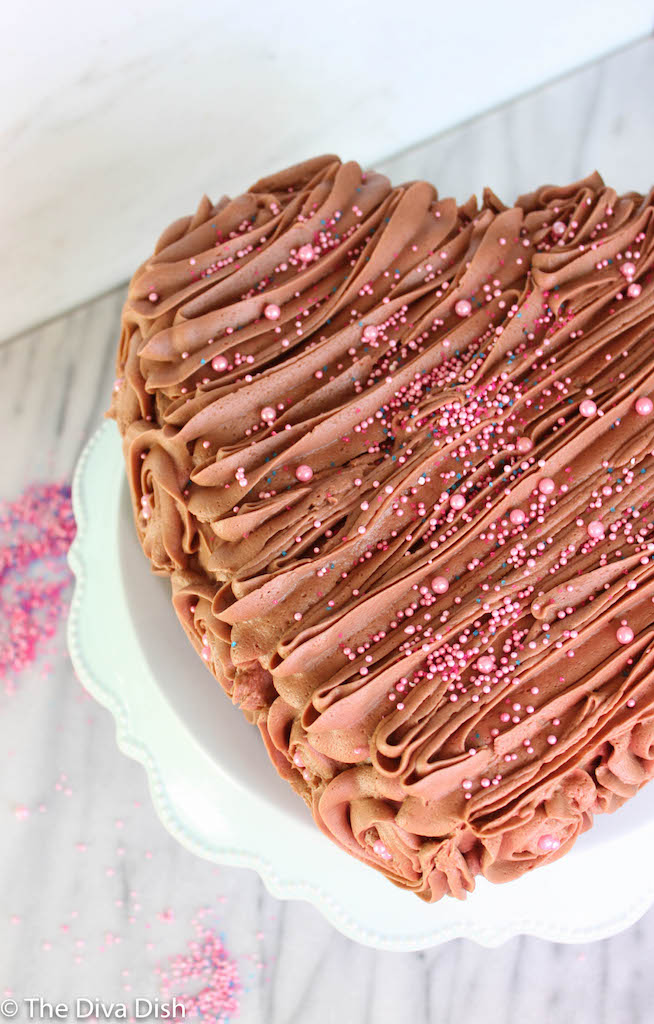
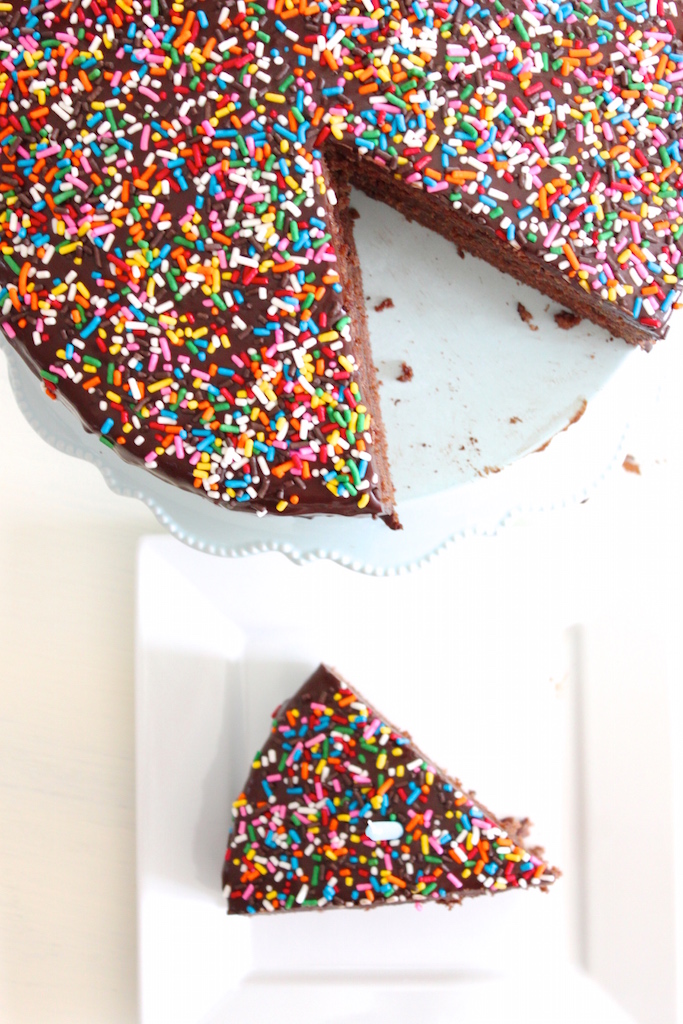
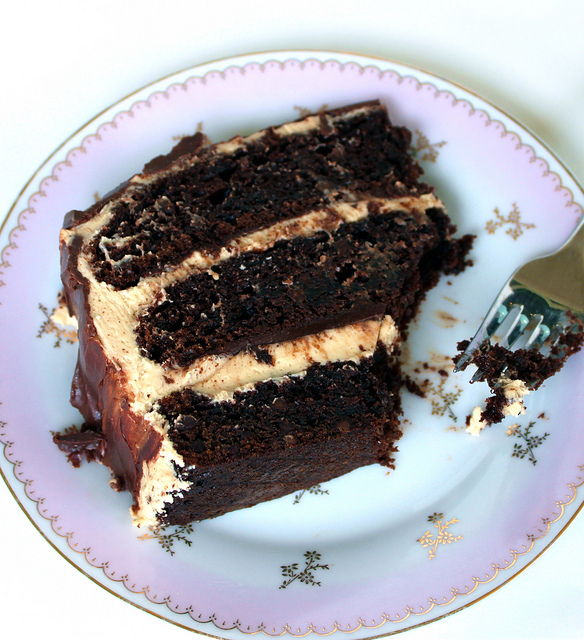
If you have been reading my blog over the years, then you already know my obsession with chocolate cake.
Chocolate cake has gotten me through many hard times. Whether I was eating or making the cake, it somehow has healed all of my mental and emotion wounds. Pretty sure that's what Saturday night looked like for me in college...
If you look back through my website, you will notice a large recipe collection of chocolate cakes. It's because I can't stop. Won't stop. Cause we get down baby. We get down baby.
Scroll through and click on which cake you want the recipe for!
These images remind me how much I LOVE sprinkles WITH chocolate cake. I have a serious problem.
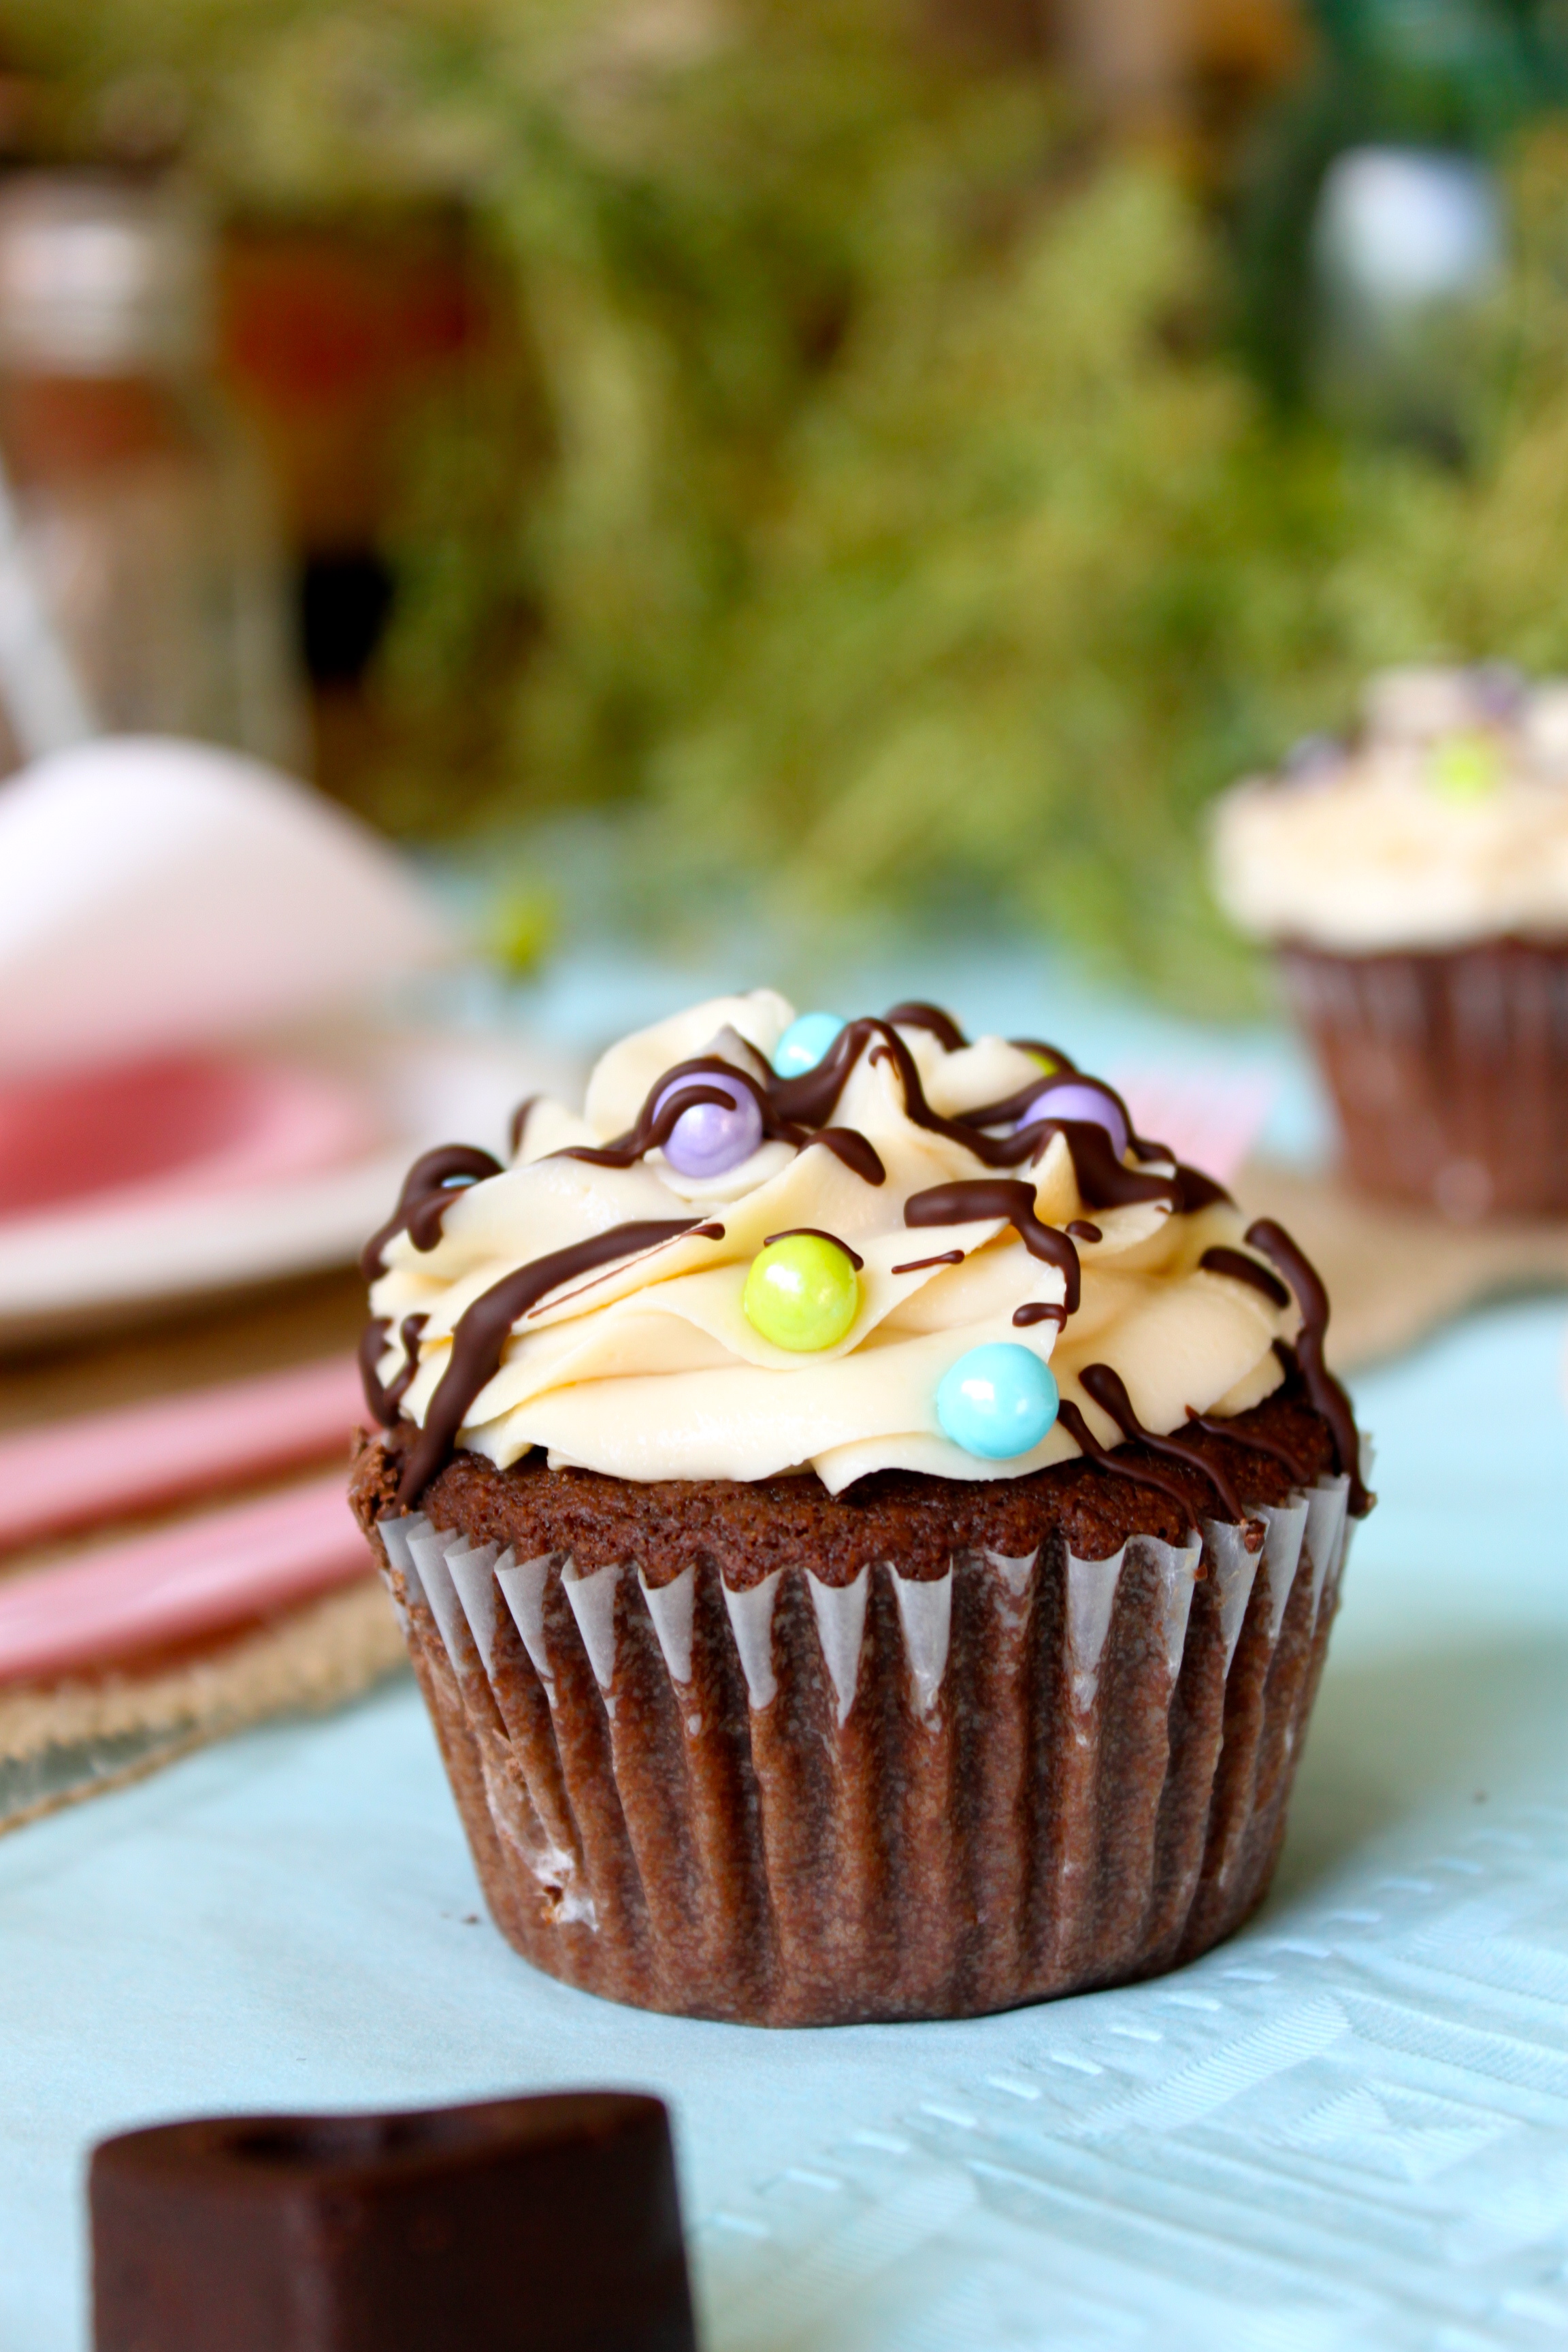
Obviously I couldn't stop at 1, 2, 3...ok so there is a lot of chocolate cake recipes. I was really looking for the perfect recipe for the Holidays, like Thanksgiving and Christmas. The holidays where you over indulge A lot.
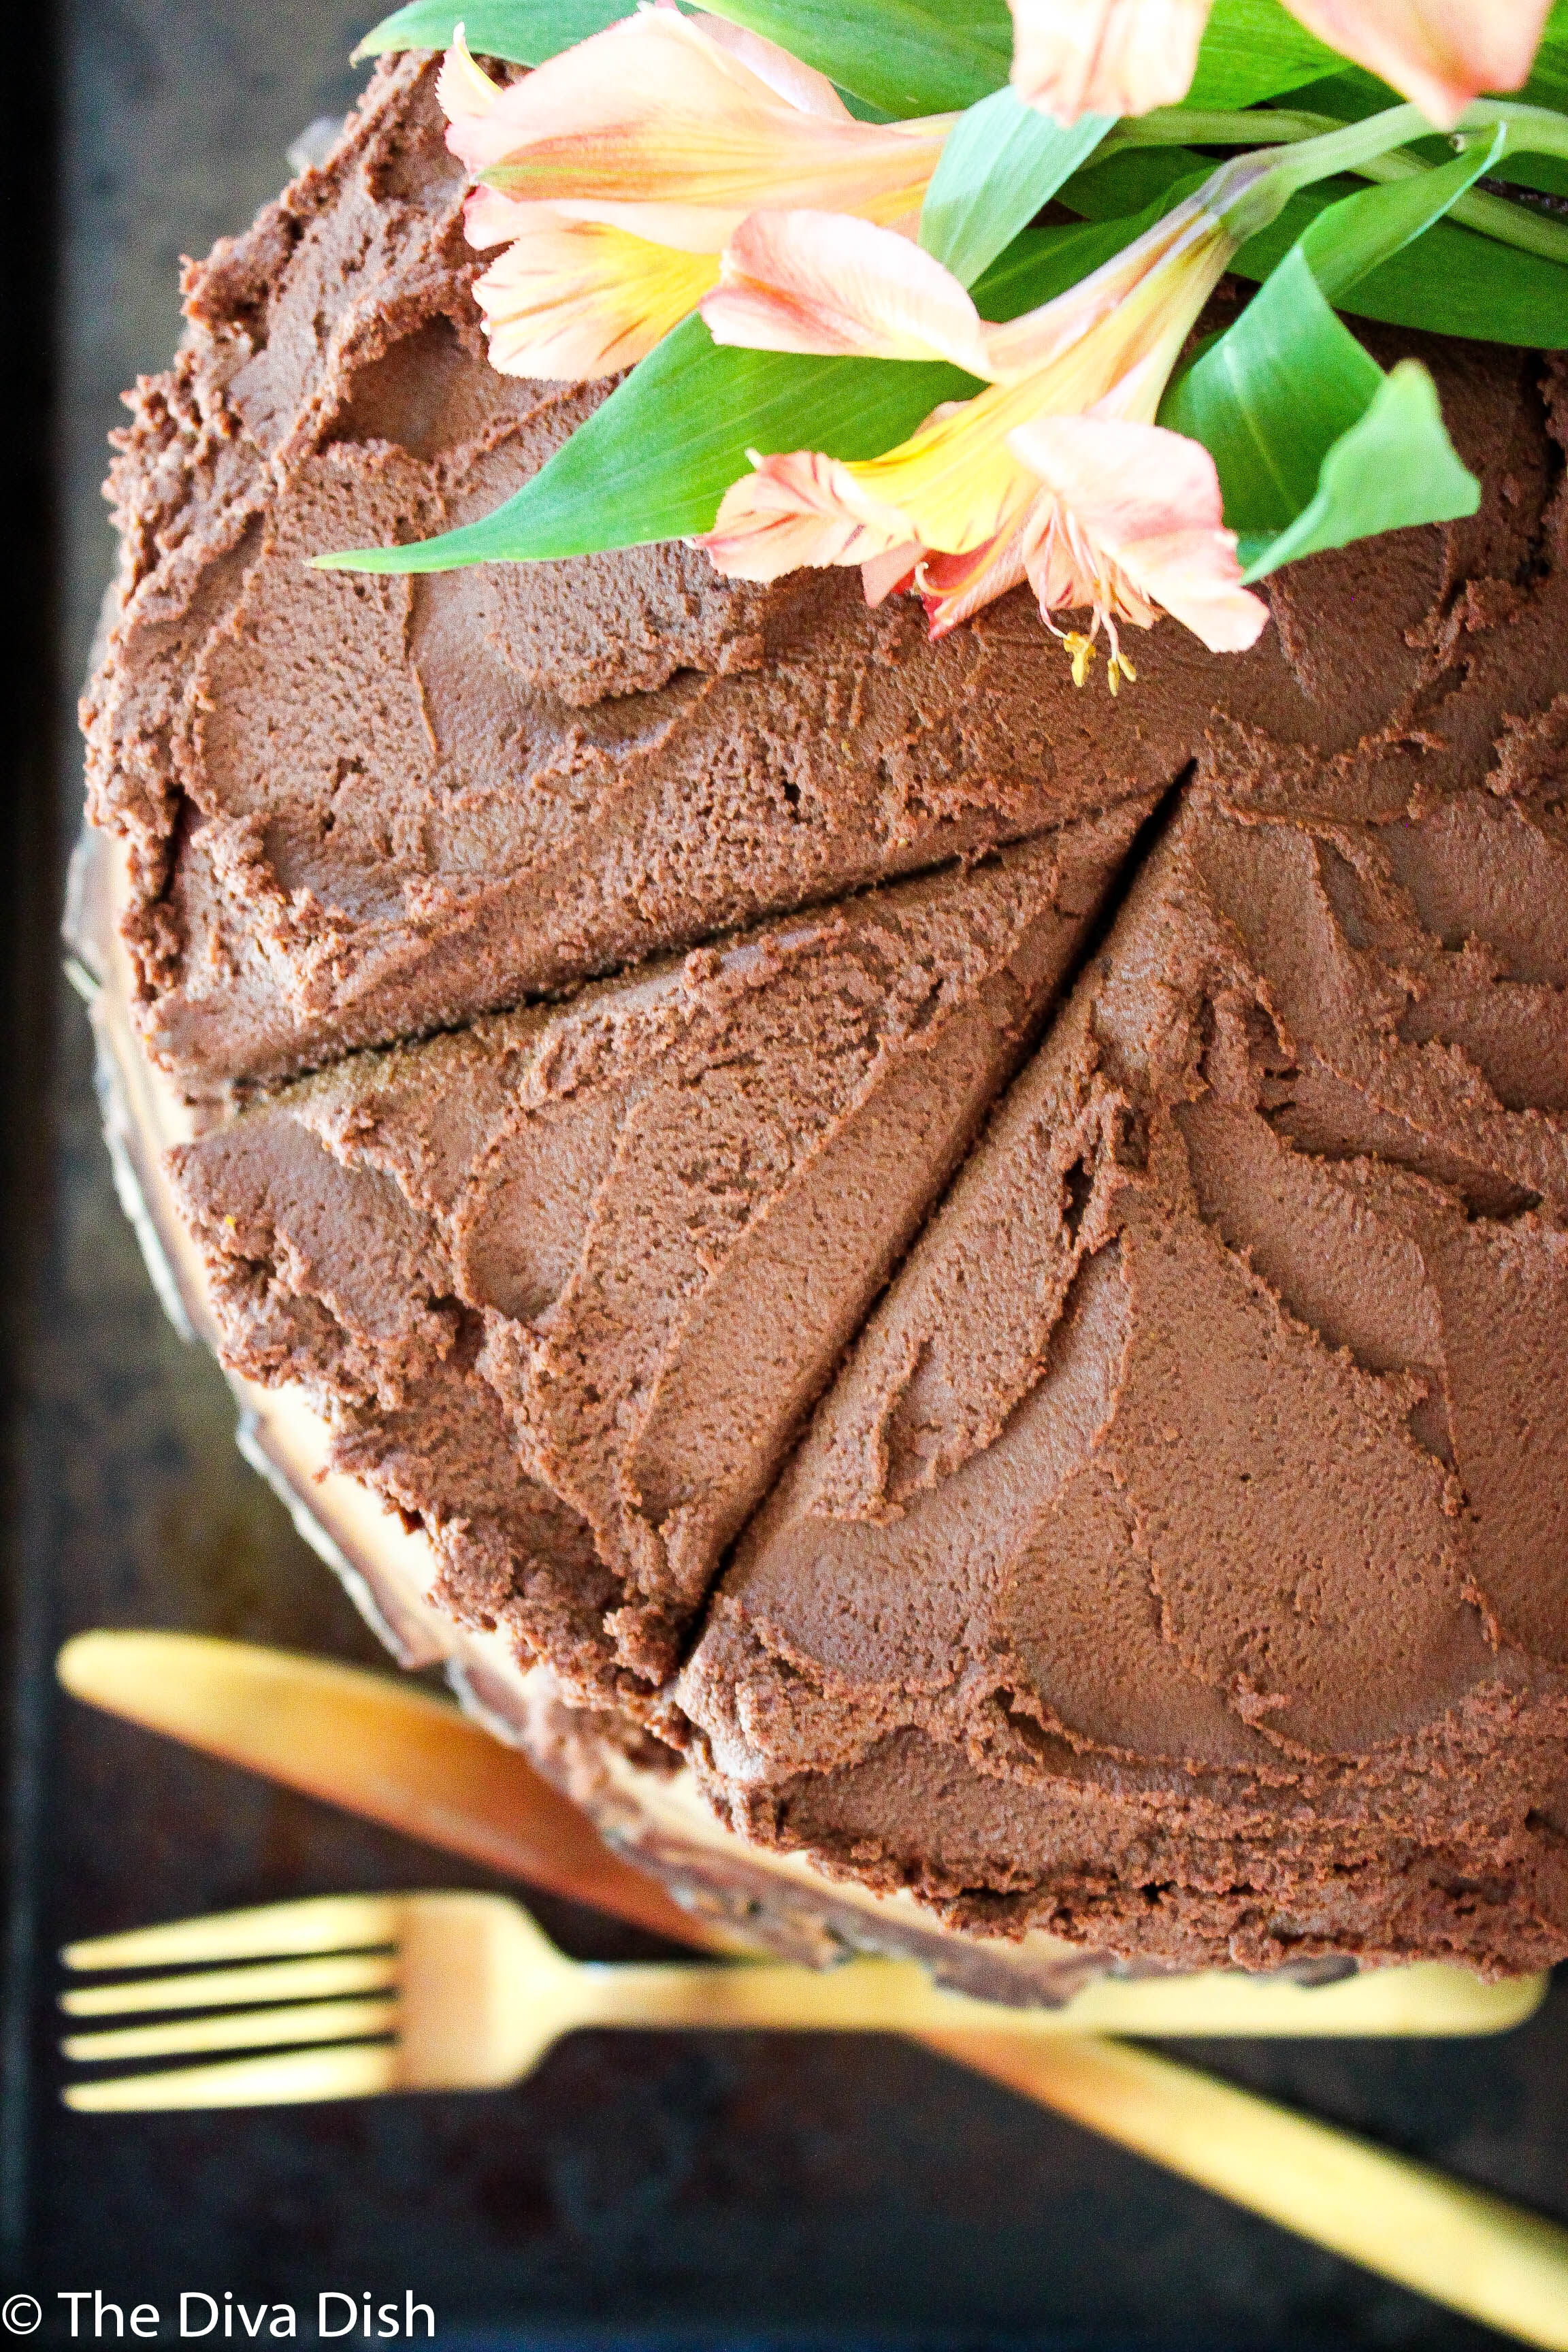
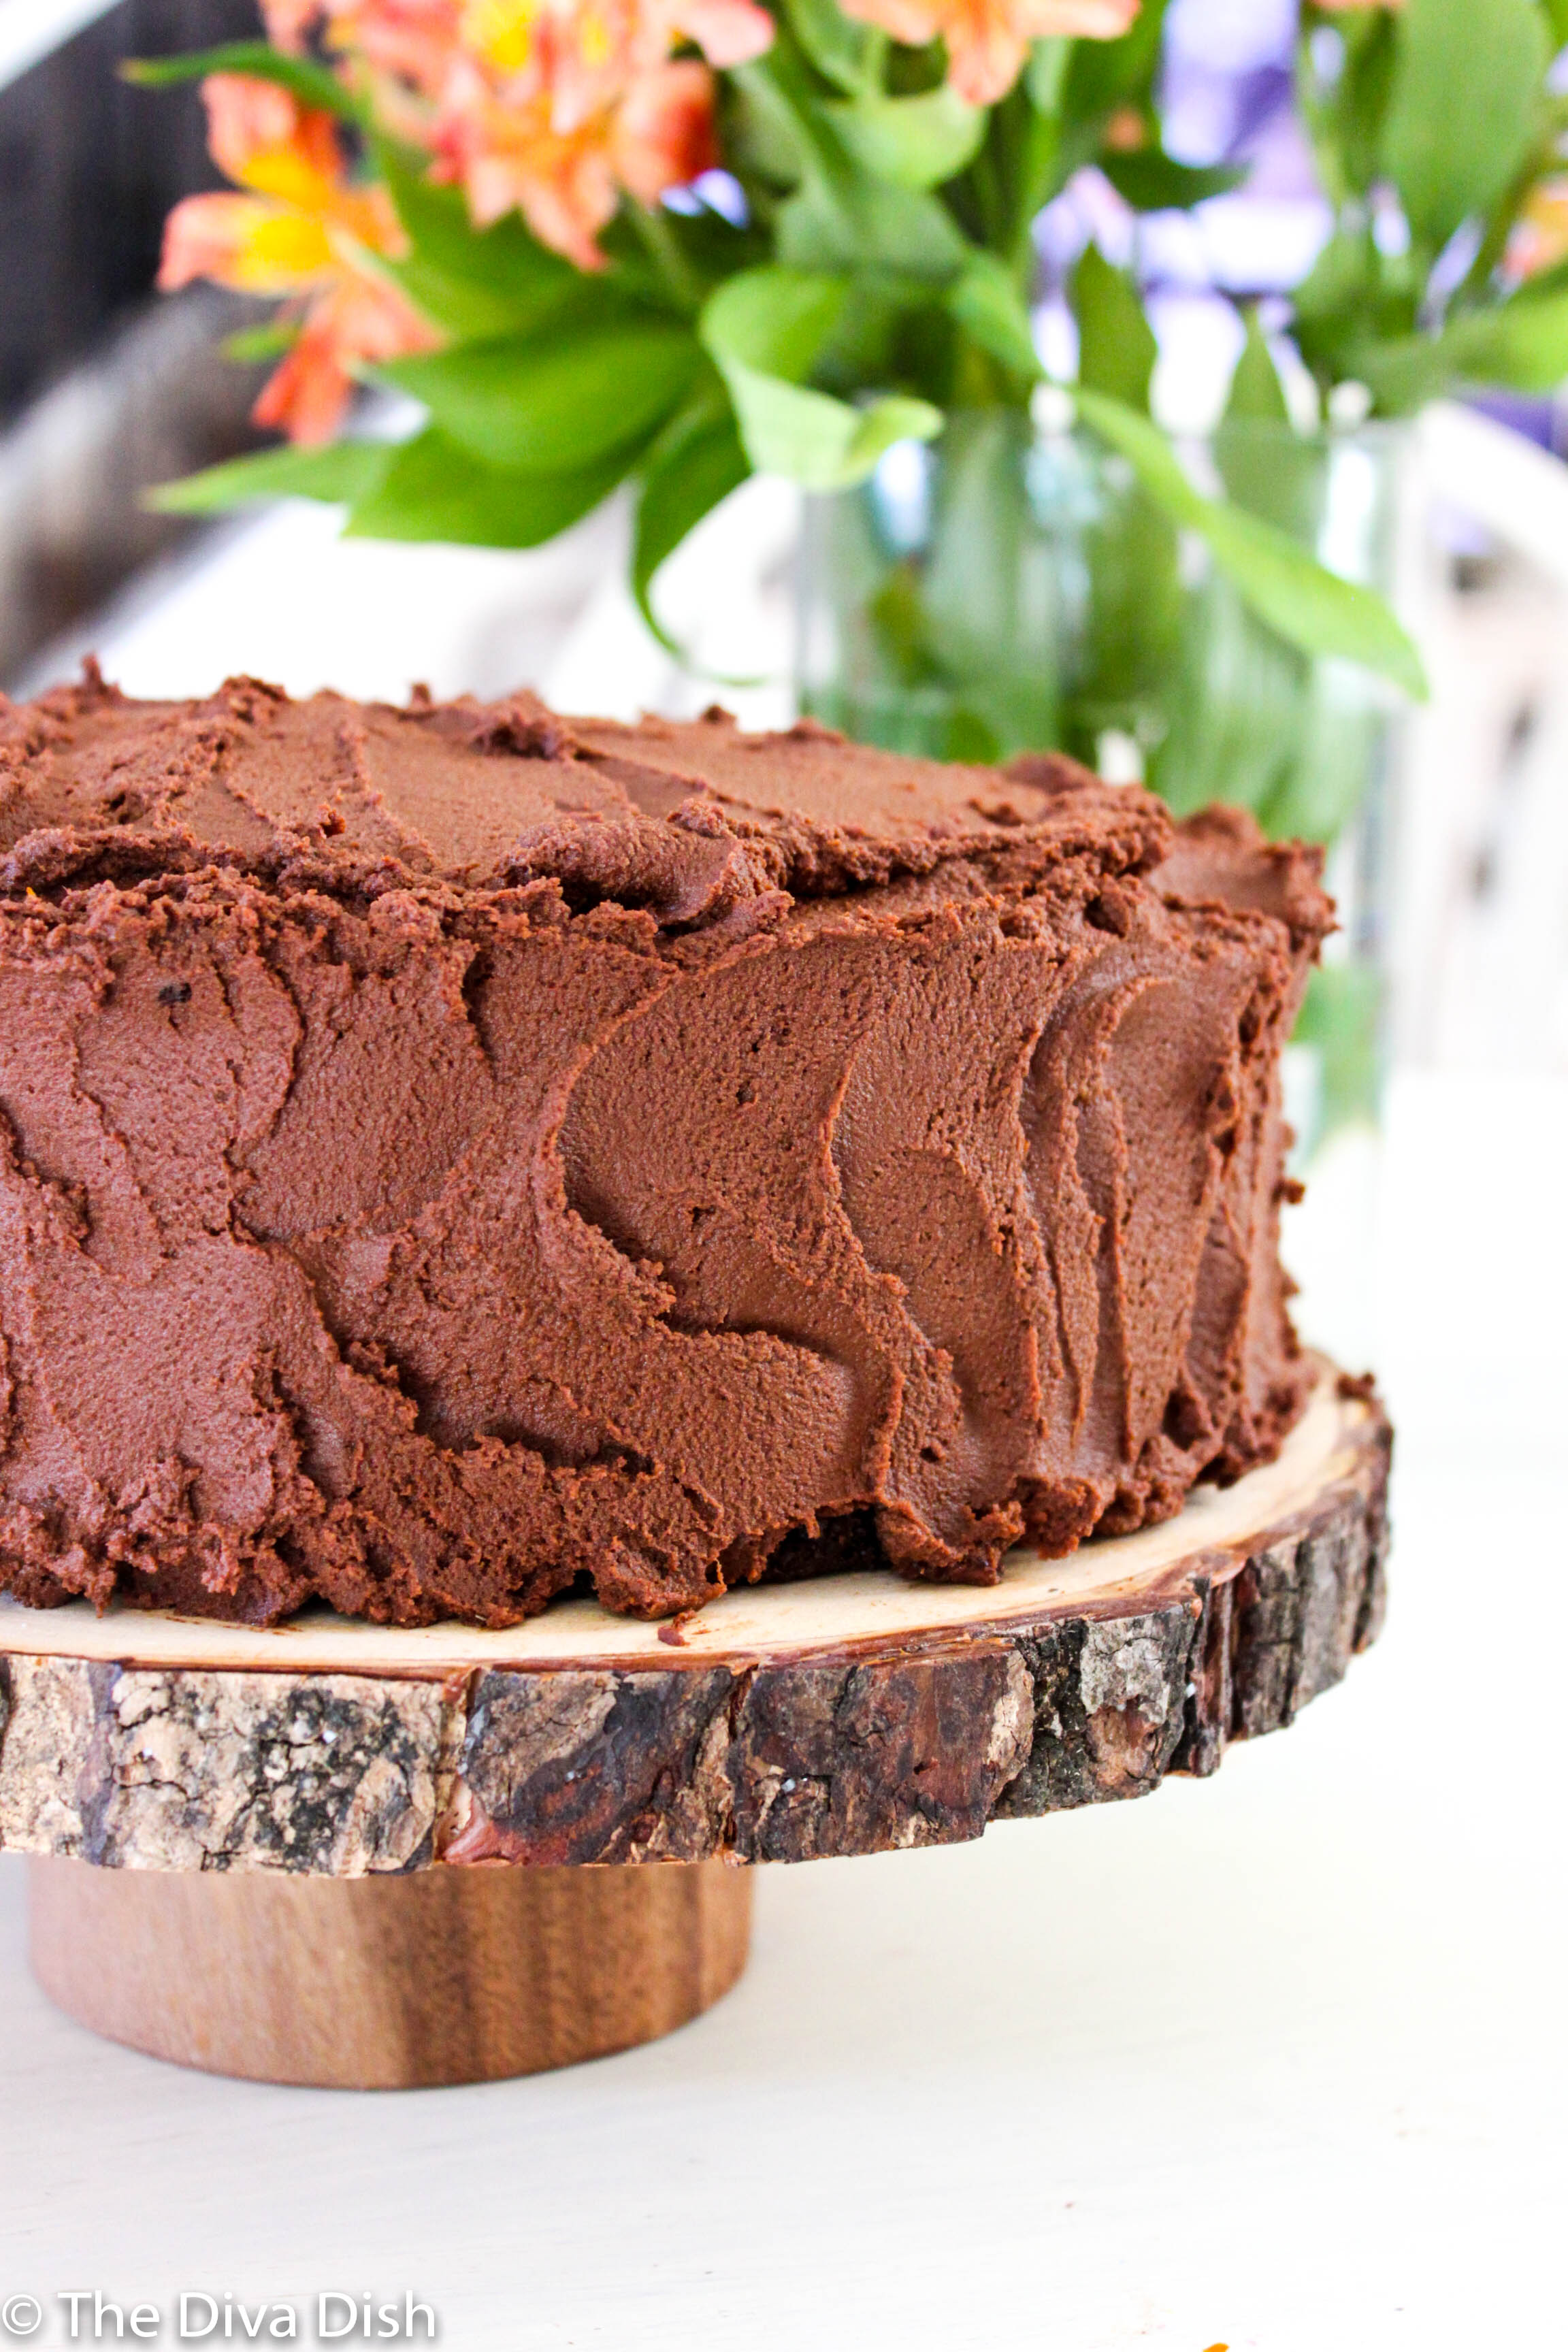
I think my FAVORITE part about this chocolate cake is the frosting. It reminds me of a rich chocolate ganache. But what makes it incredible is that it's made with a secret hidden veggie. I've been on the lookout for a healthier frosting, and I almost cried when this came together!
This cake is naturally sweetened and not overly loaded with sugars and unhealthy fats, which pairs perfectly with the 18 sides of stuffing that most likely I'll give into come Thanksgiving day. Balance.
print recipe
Healthier Holiday Chocolate Fudge Cake
by November-6-2017
Ingredients
2 1/4 cups Flour
1/2 tsp. Cinnamon
1/4 tsp. Cloves
1 TB. Baking Soda
1/2 tsp. Salt
1 cup Coconut Sugar
2 Eggs
2 Cups Applesauce Unsweetened
1 TB. Vanilla Extract
6 oz. Plain Greek Yogurt
1/2 cup Canola Oil
1/4 cup Cocoa Powder
Instructions
1. Preheat the oven to 350 degrees. In a small bowl, whisk together the flour, cocoa powder, spices, salt, and baking soda.2. In a medium bowl whisk together oil and sugar. Then add the eggs and applesauce. Followed by vanilla and greek yogurt. 3. Whisk together the dry ingredients with the wet. Don't over mix. 4. Pour batter into two prepared 9 inch cake pans. Bake for 20-25 minutes, or until done. Be careful not to over bake. Let cool on cooling rack completely.
Details
Prep time: Cook time: Total time: Yield:
print recipe
Healthier Chocolate Fudge Frosting
by November-6-2017
Ingredients
1 can Pumpkin Puree
3- 3.5 ounces 70% chocolate Bars, chopped
1/4-1/2 cup Coconut Sugar
Instructions
1. In a sauce pan add your pumpkin puree. Turn the heat on medium low and constantly stir to heat up.2. Once heated, remove from heat and add the chocolate and sugar. If needed, start with 1/4 cup of the sugar. Taste, and add more if desired. 3. Set in the fridge to thicken and set, about an hour or so, or until completely cooled. You can cook this before you make the cake so it's ready to be used by the time the cake has cooled.
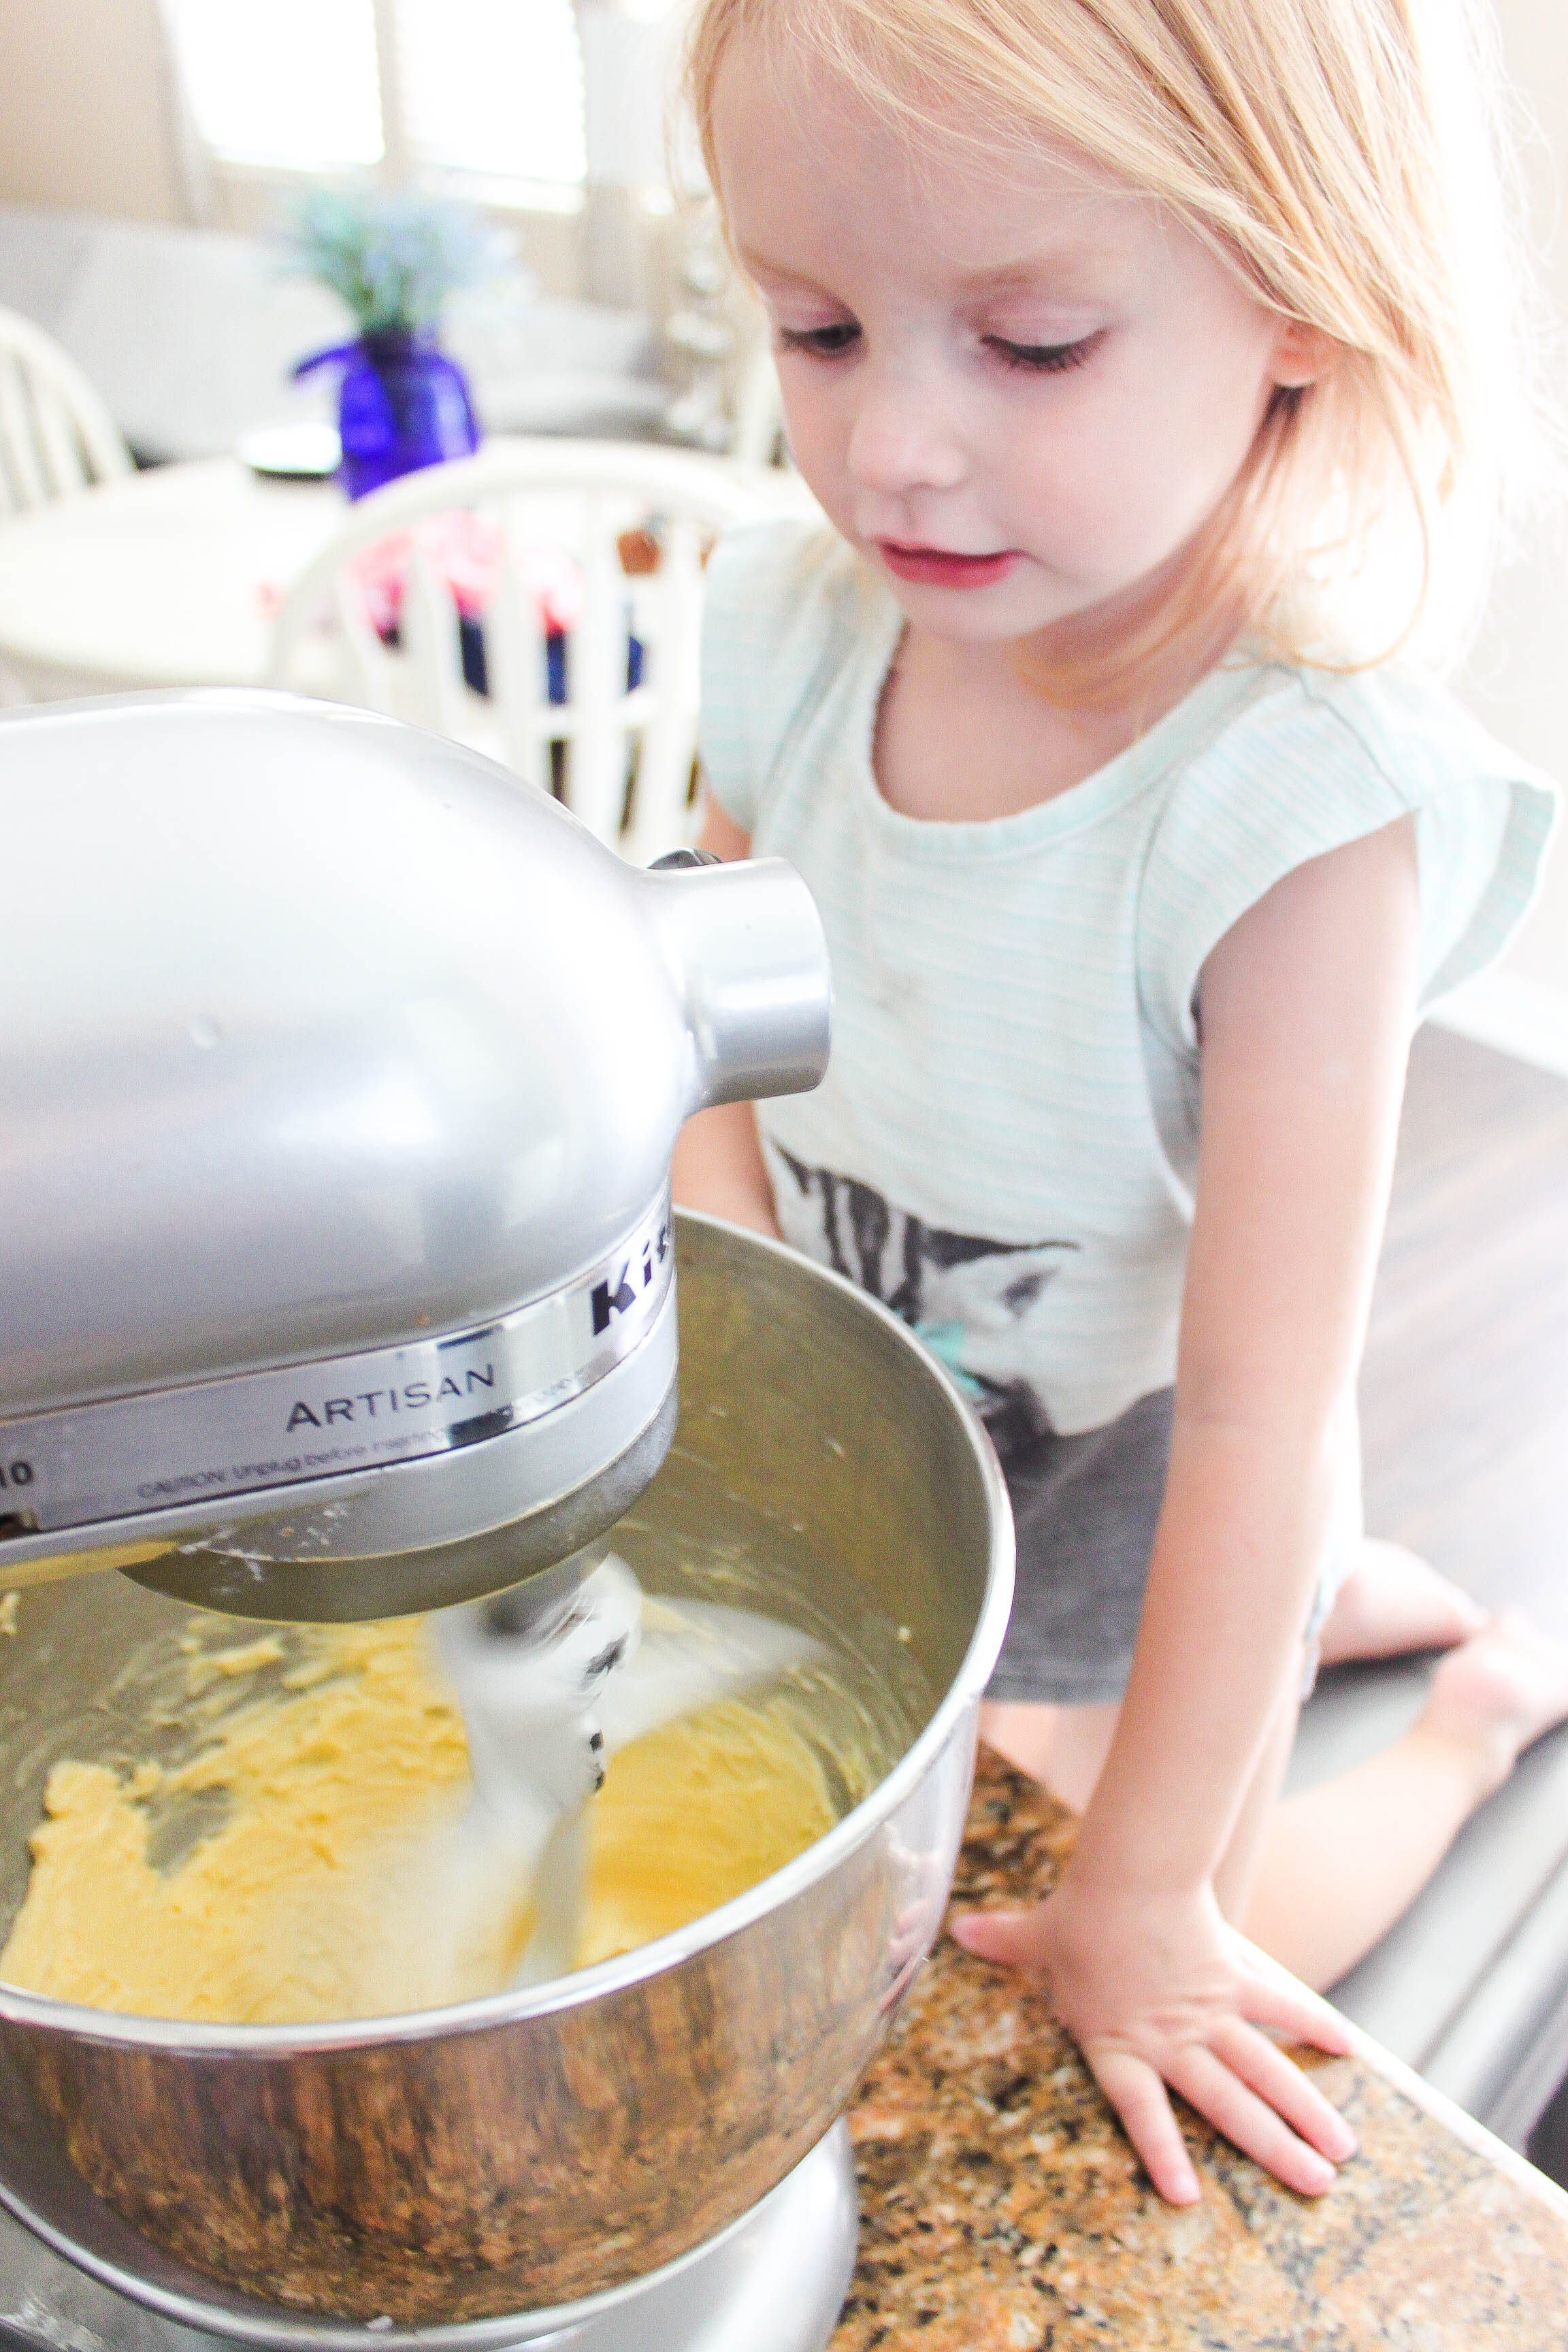
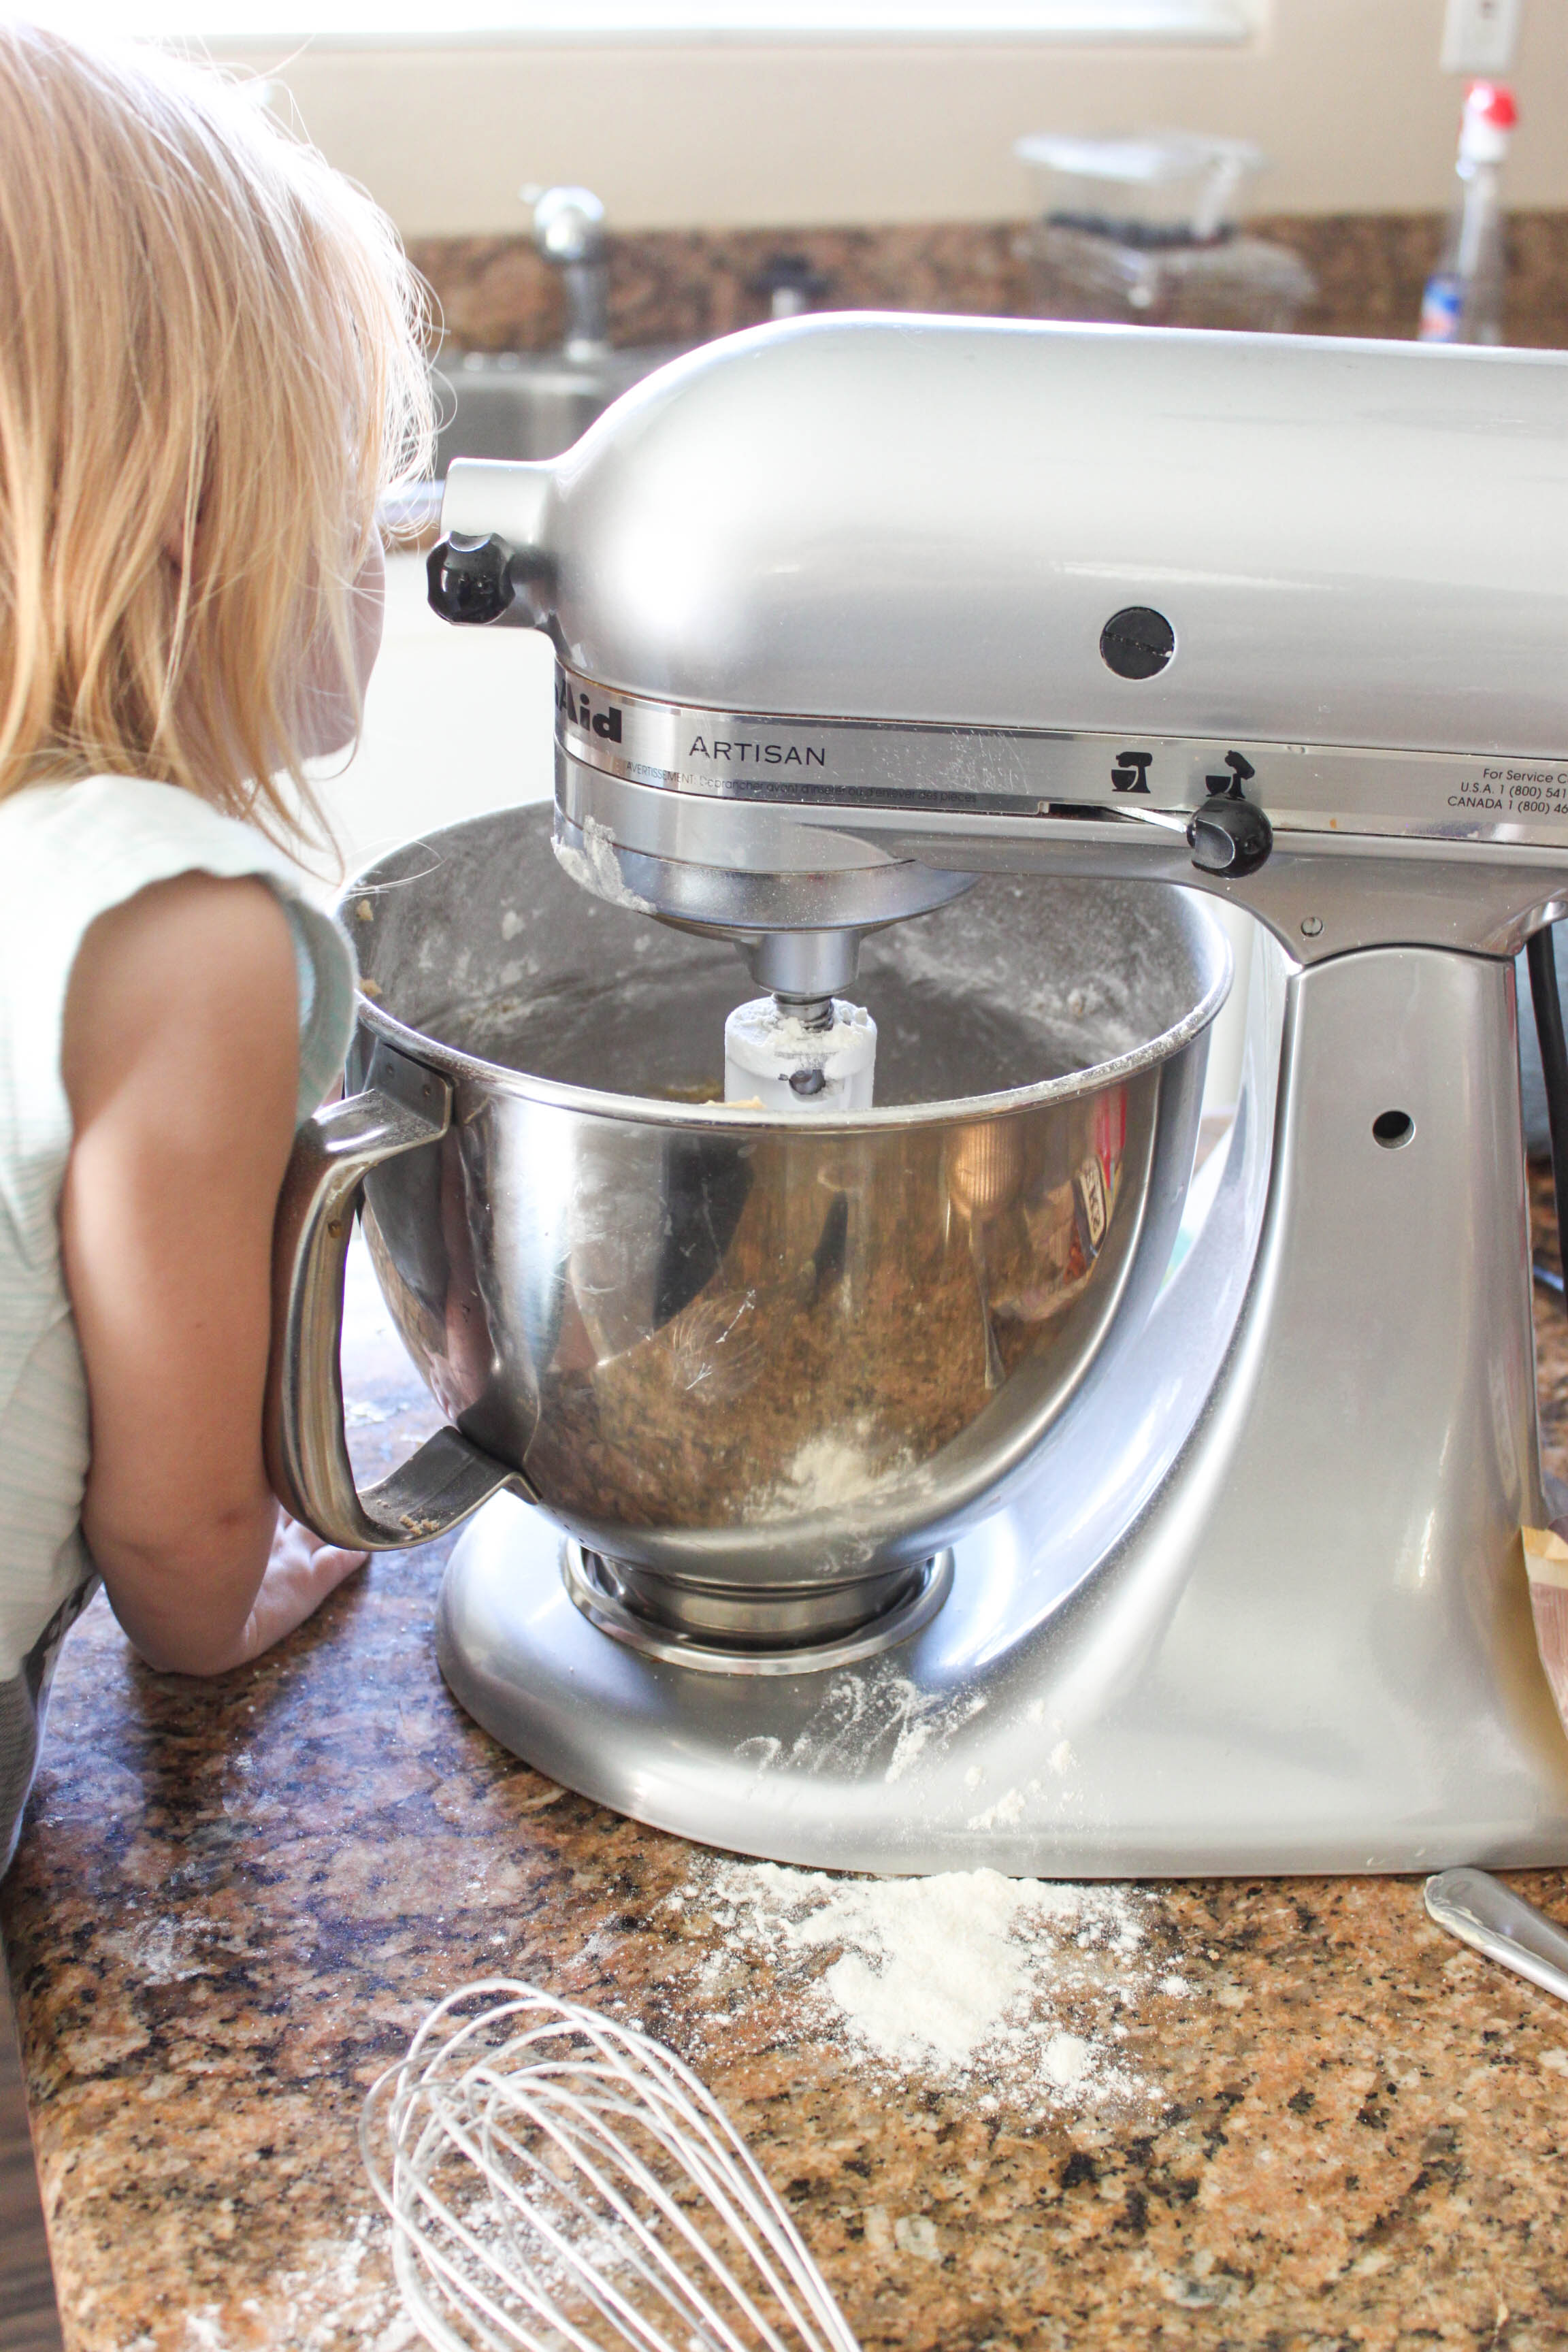
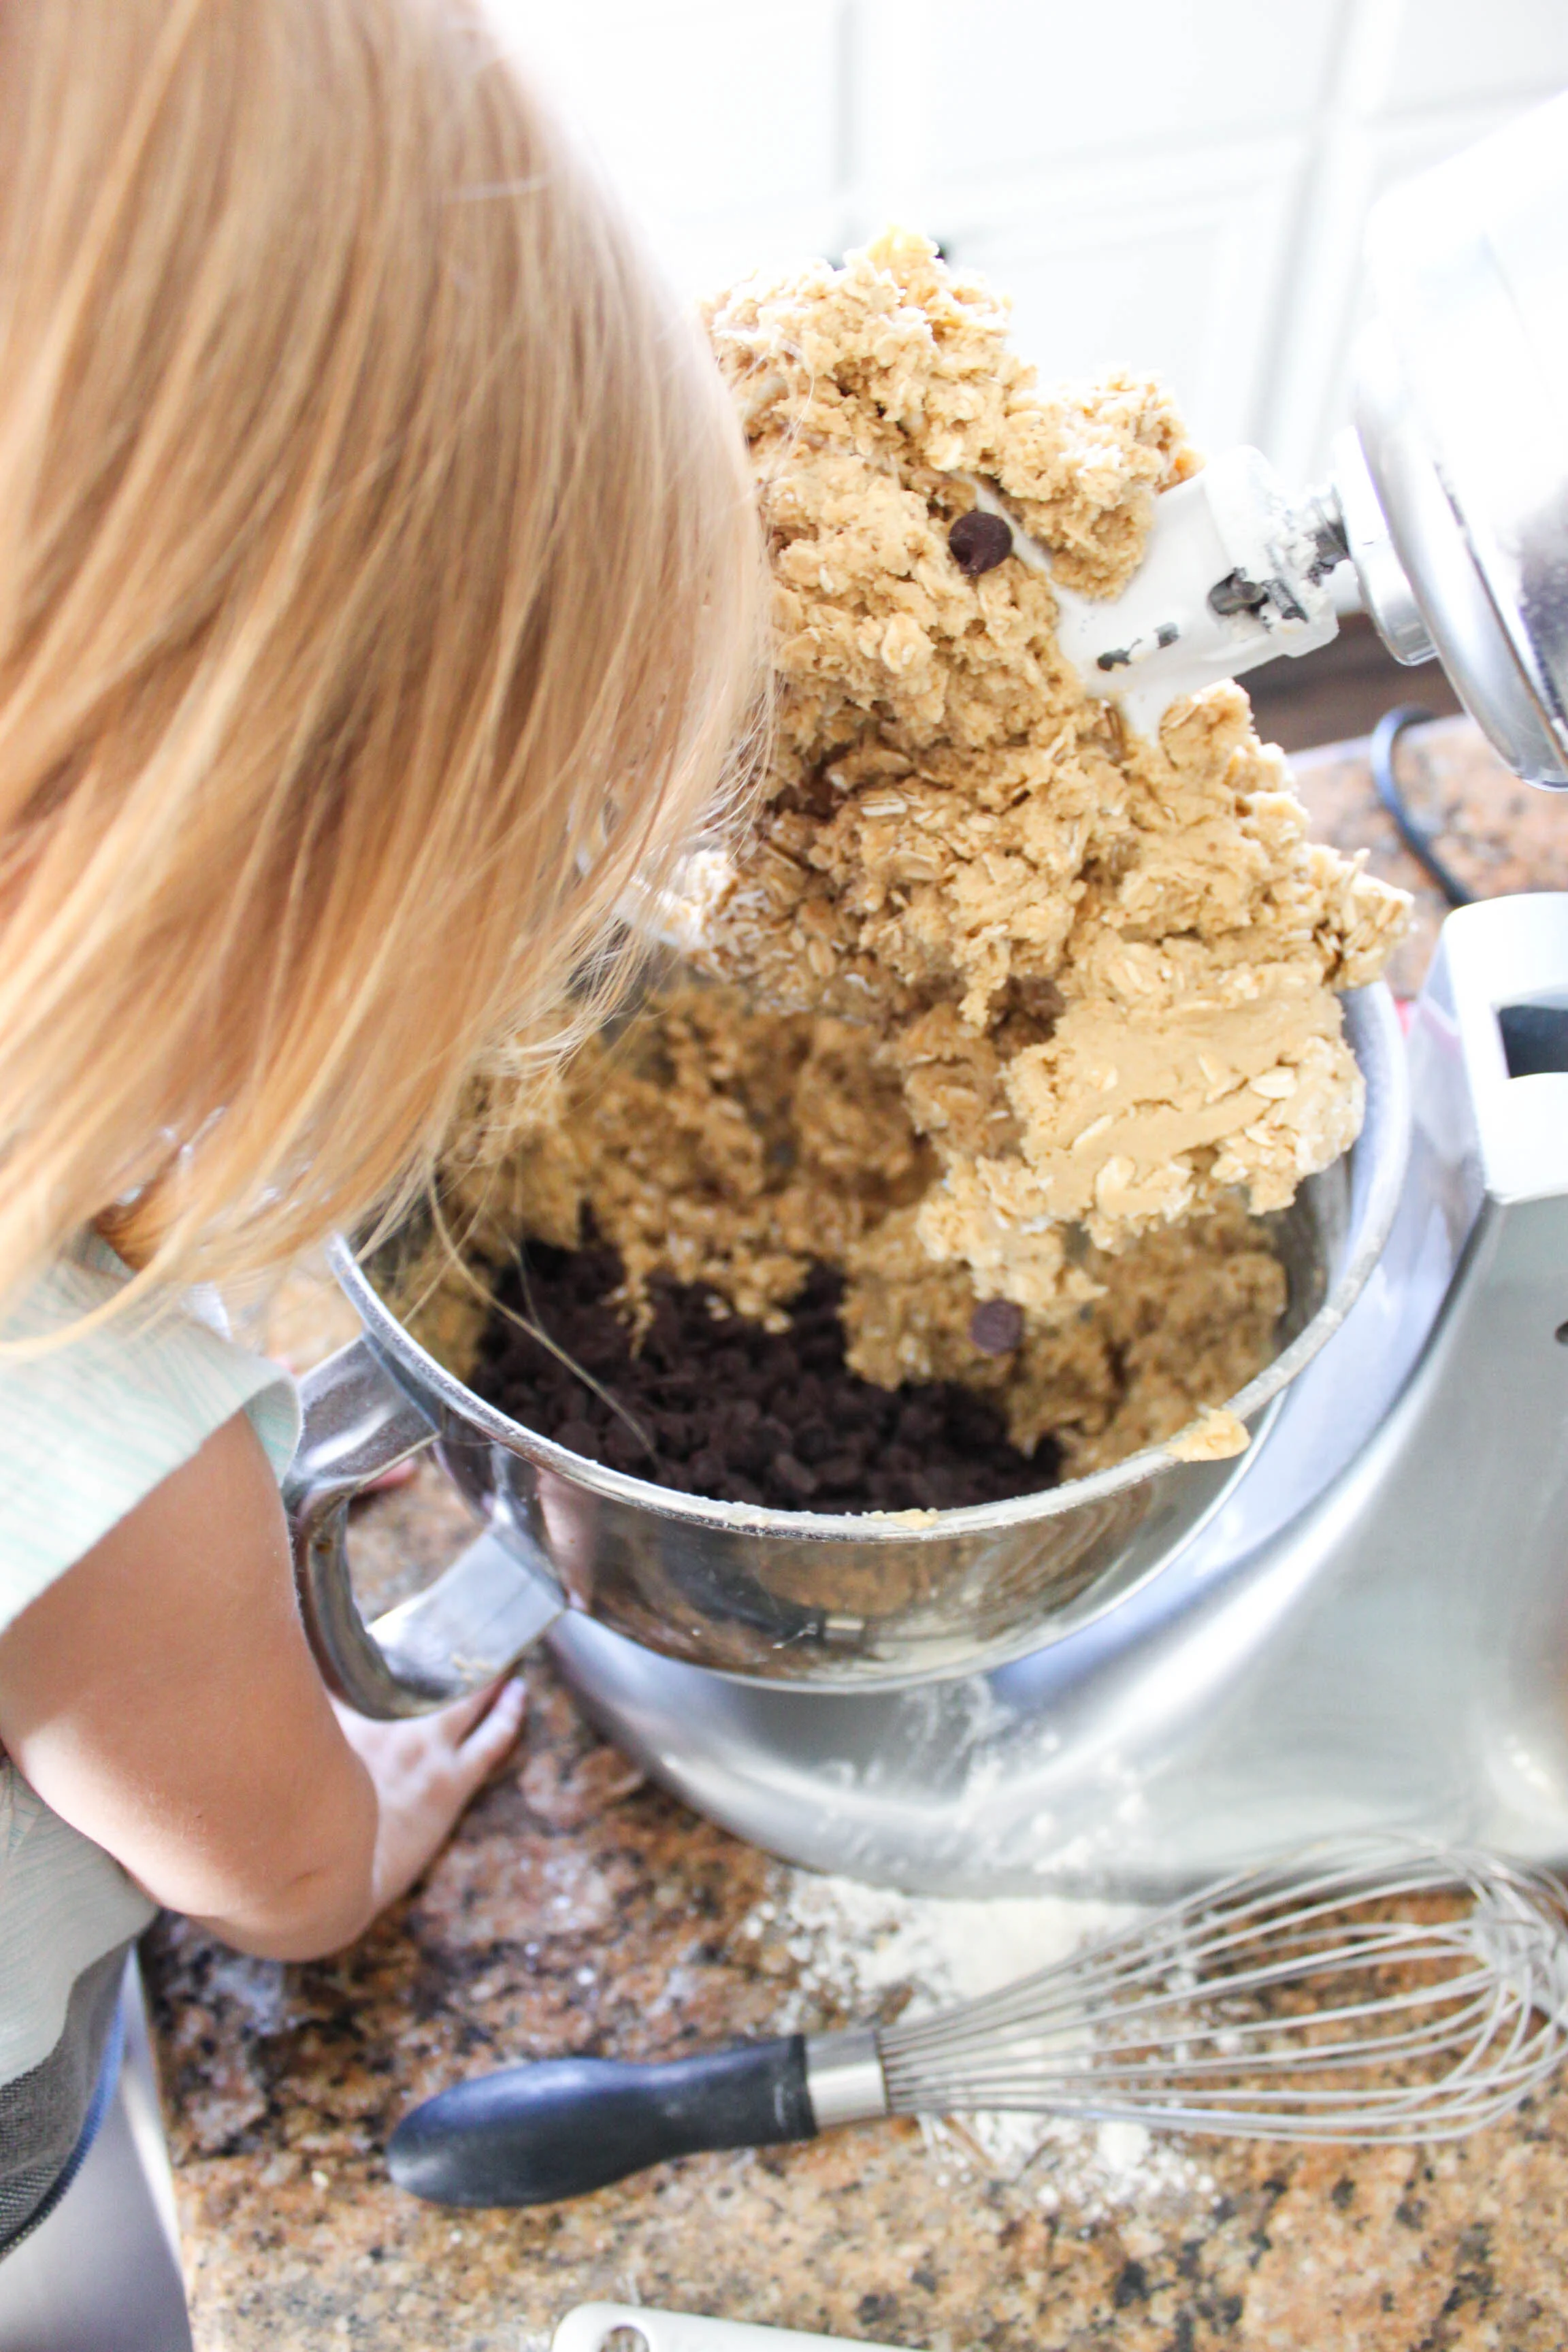
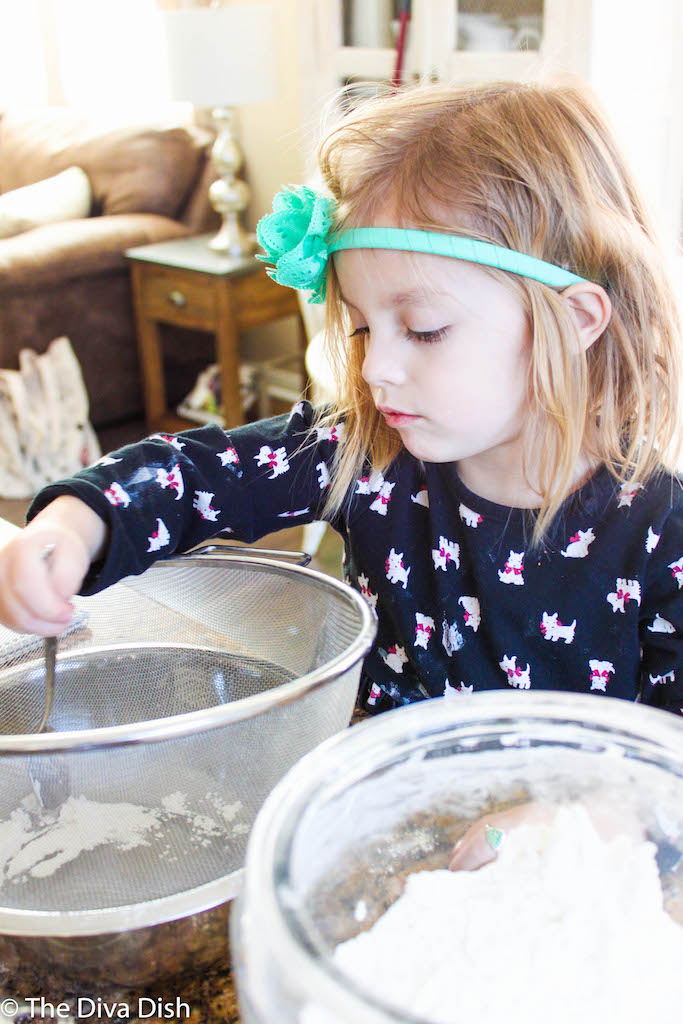
Years back when I had my first daughter, she would stick to my side like glue while I was in the kitchen. I loved it!
Not much has changed 6 years later, except instead of one kitchen helper I have three. And instead of one child being in charge of cracking the eggs or mixing the chocolate chips, there are three very opinionated girls who feel they would be better and pouring the vanilla than the other sister.
98% of the time this results in meltdowns, dropped eggs, and one child who always insists on sticking their entire hand in the jar of flour and then shaking it off all over the flour.
It's a crazy, stressed out, pull my hair kind of experience, but I cherish it SO much. Come 10 years they won't want to make cookies with me because they will be fighting me to wear a bikini to school or something horrible like that. So, I'll take eggs and flour all over my floor ANY DAY!
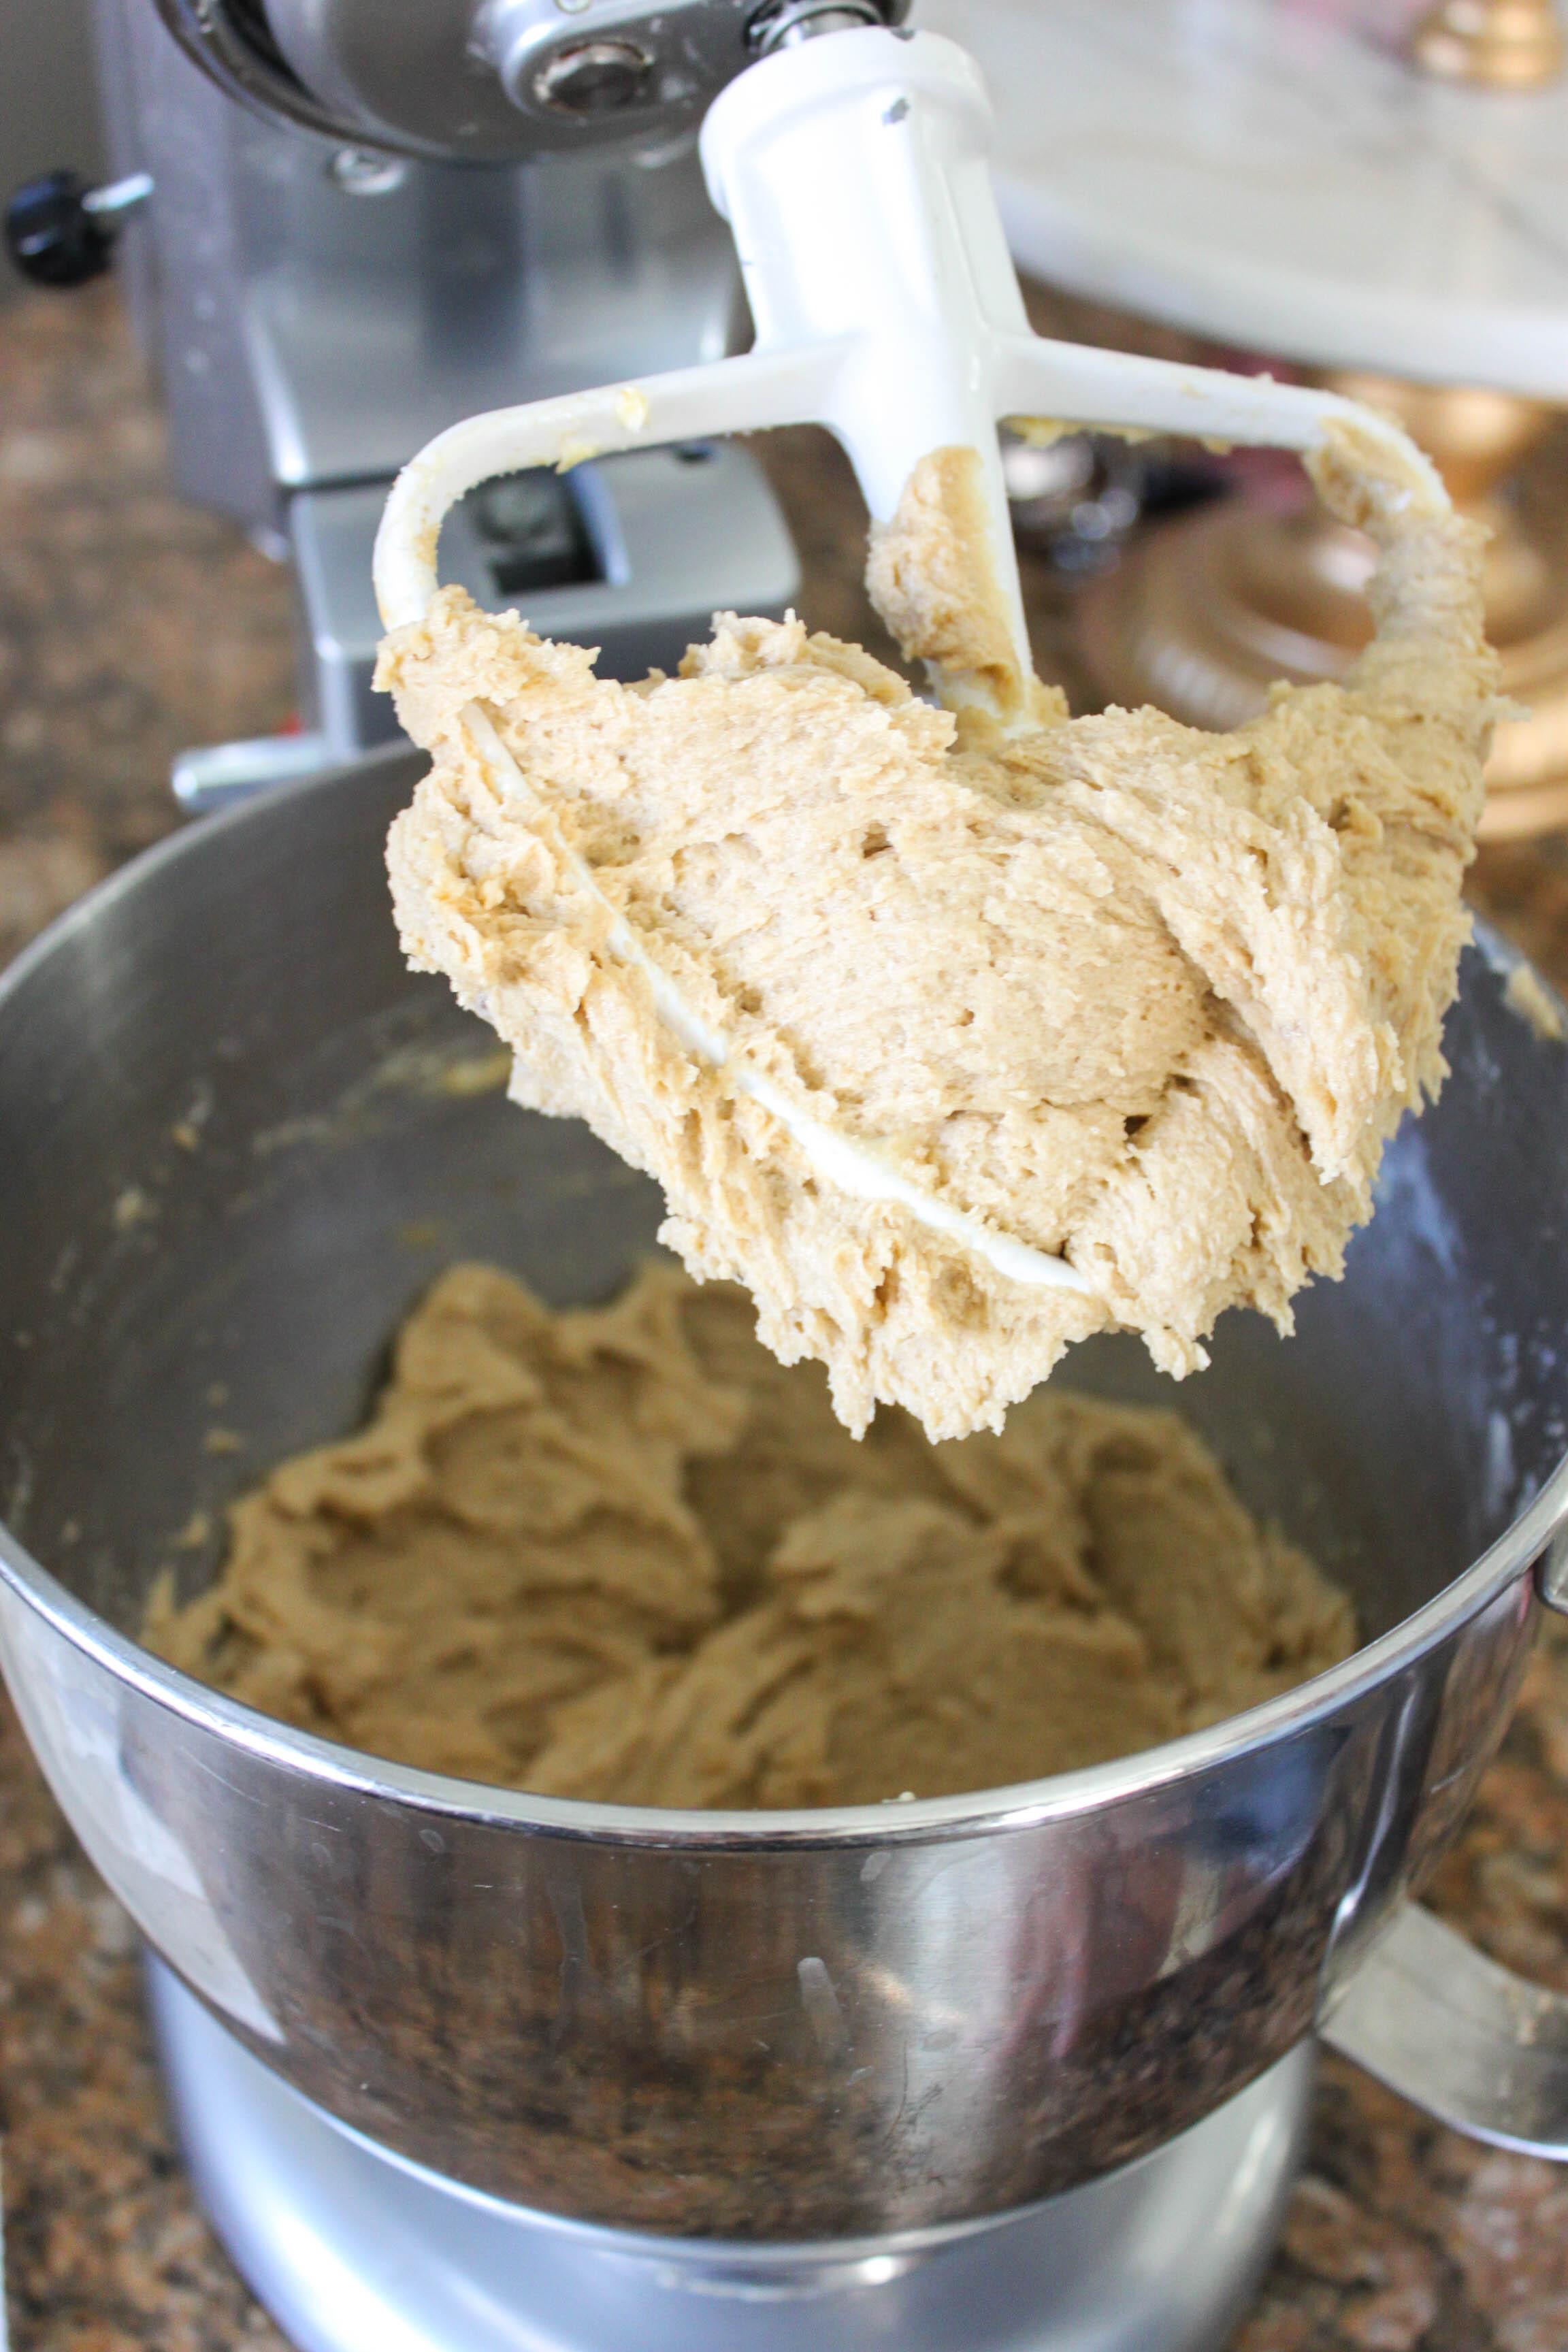
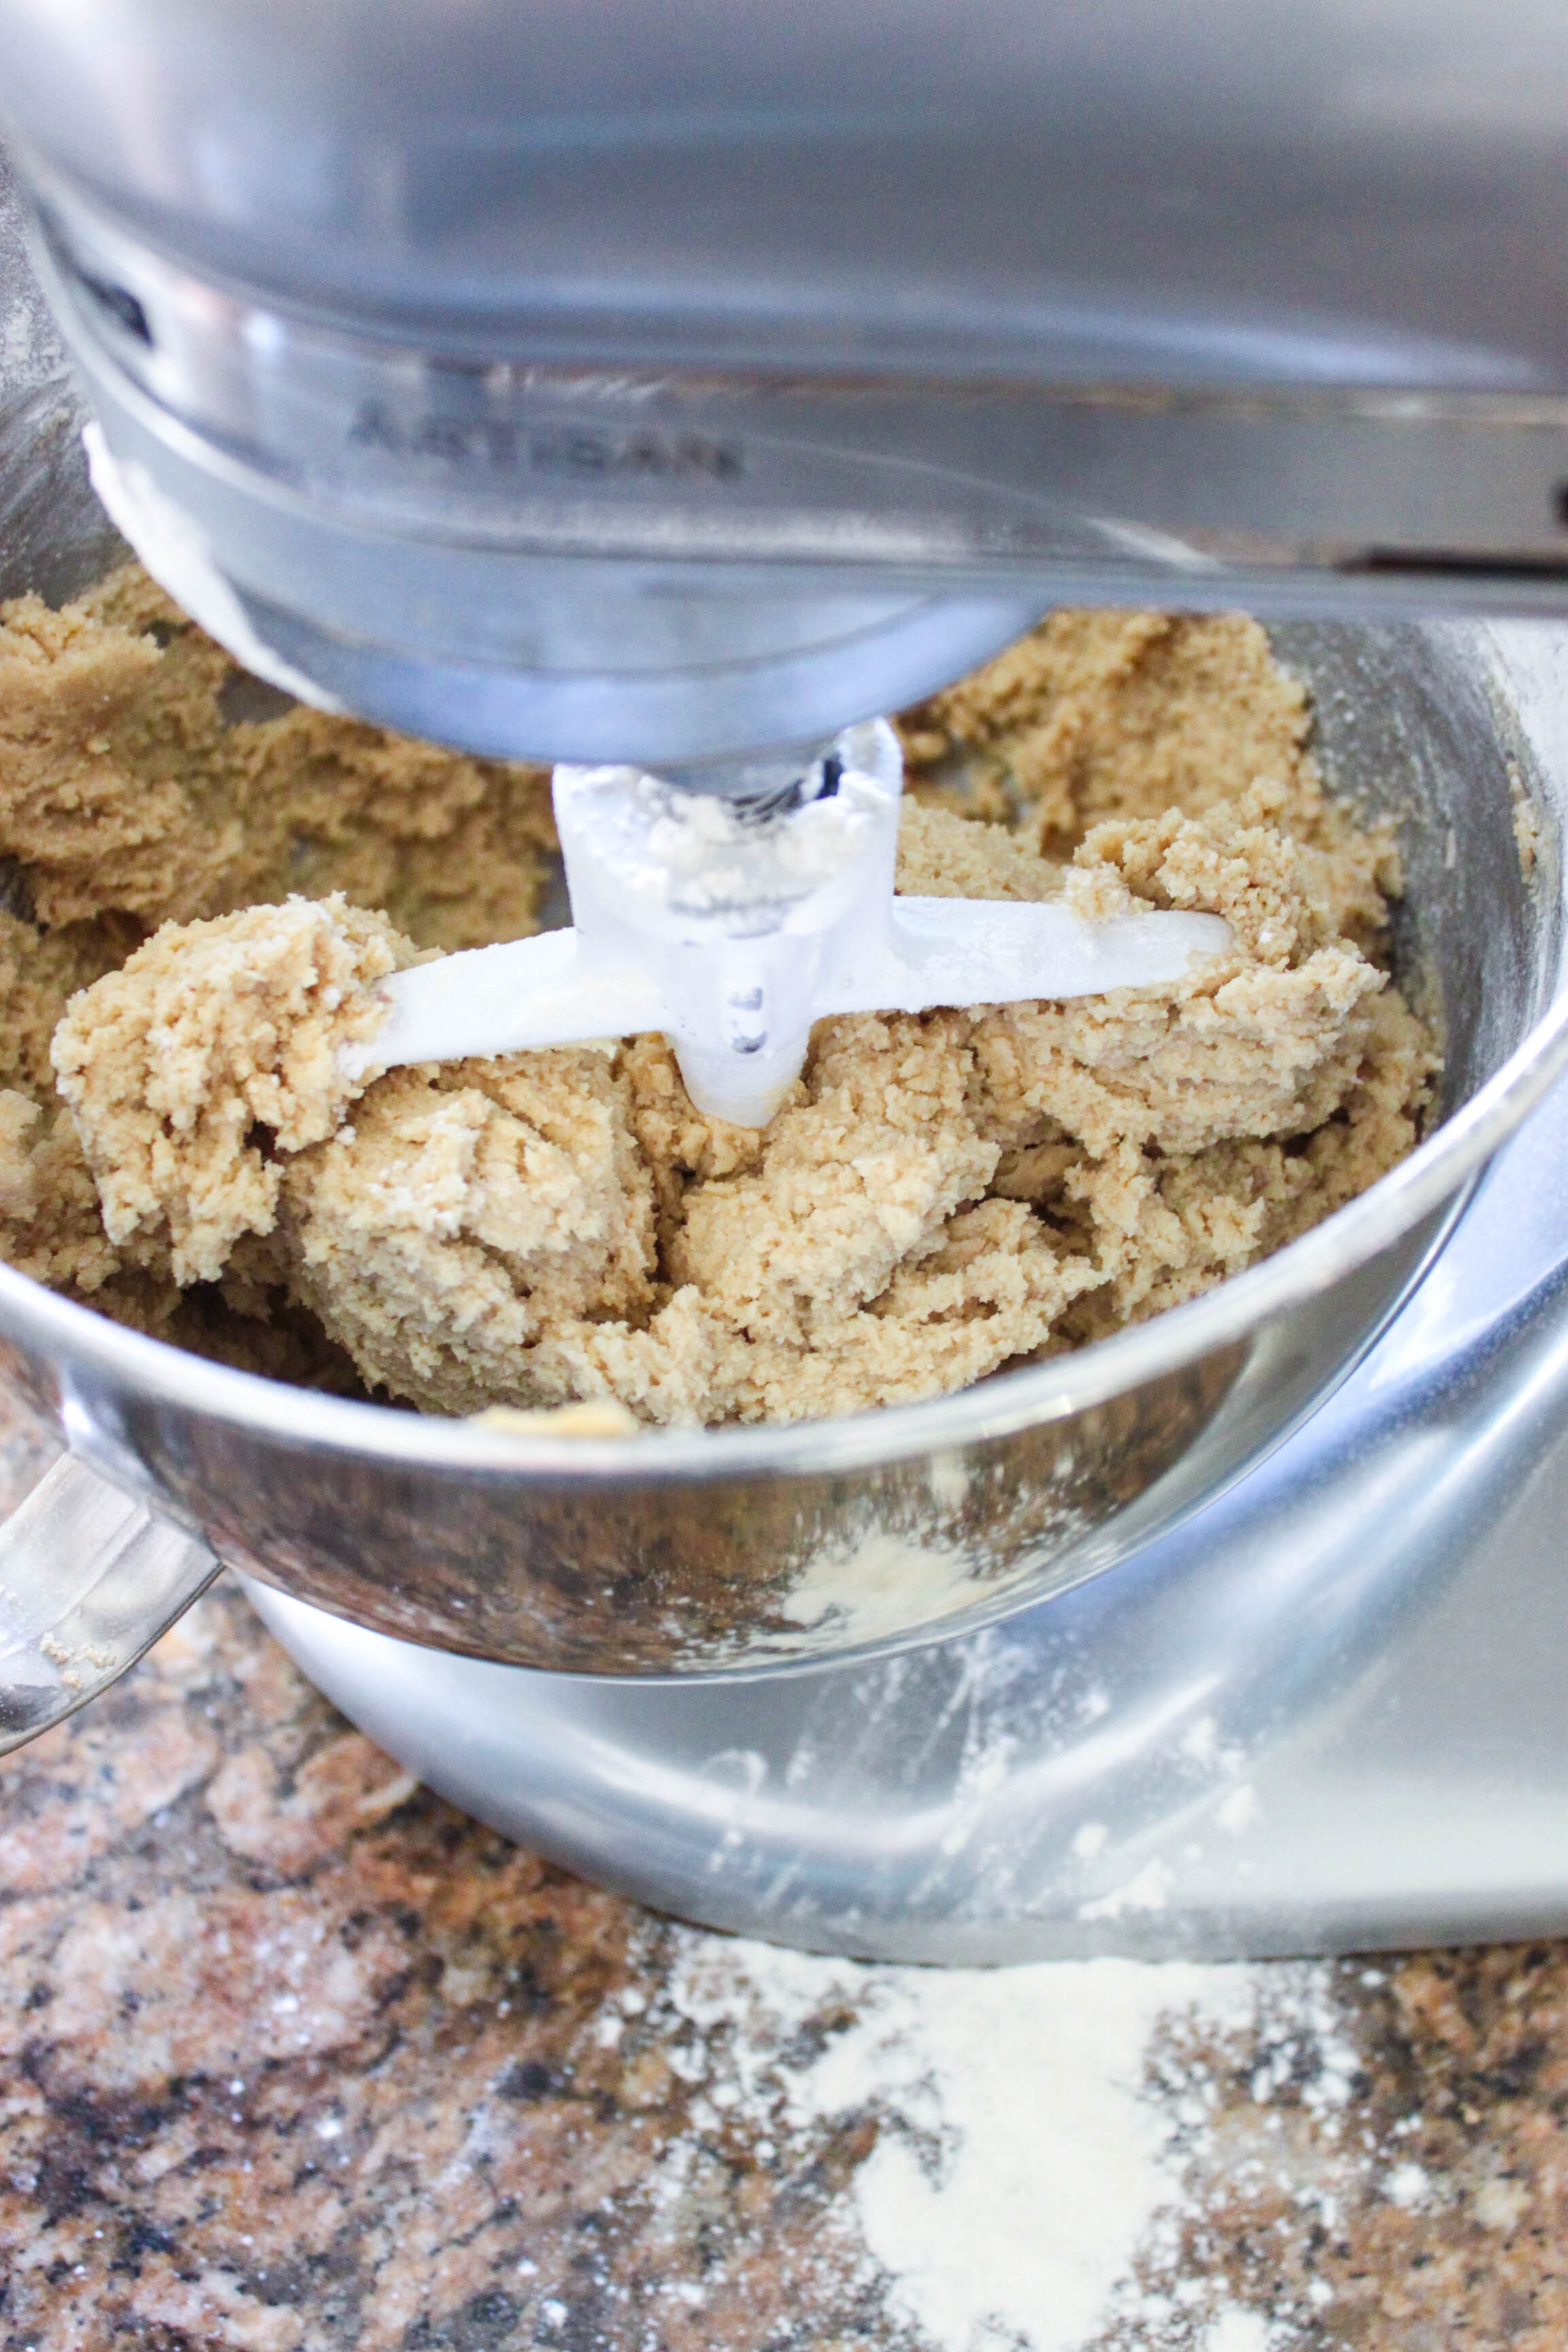
Mini Chocolate Chip Oatmeal Cookies
Ingredients:
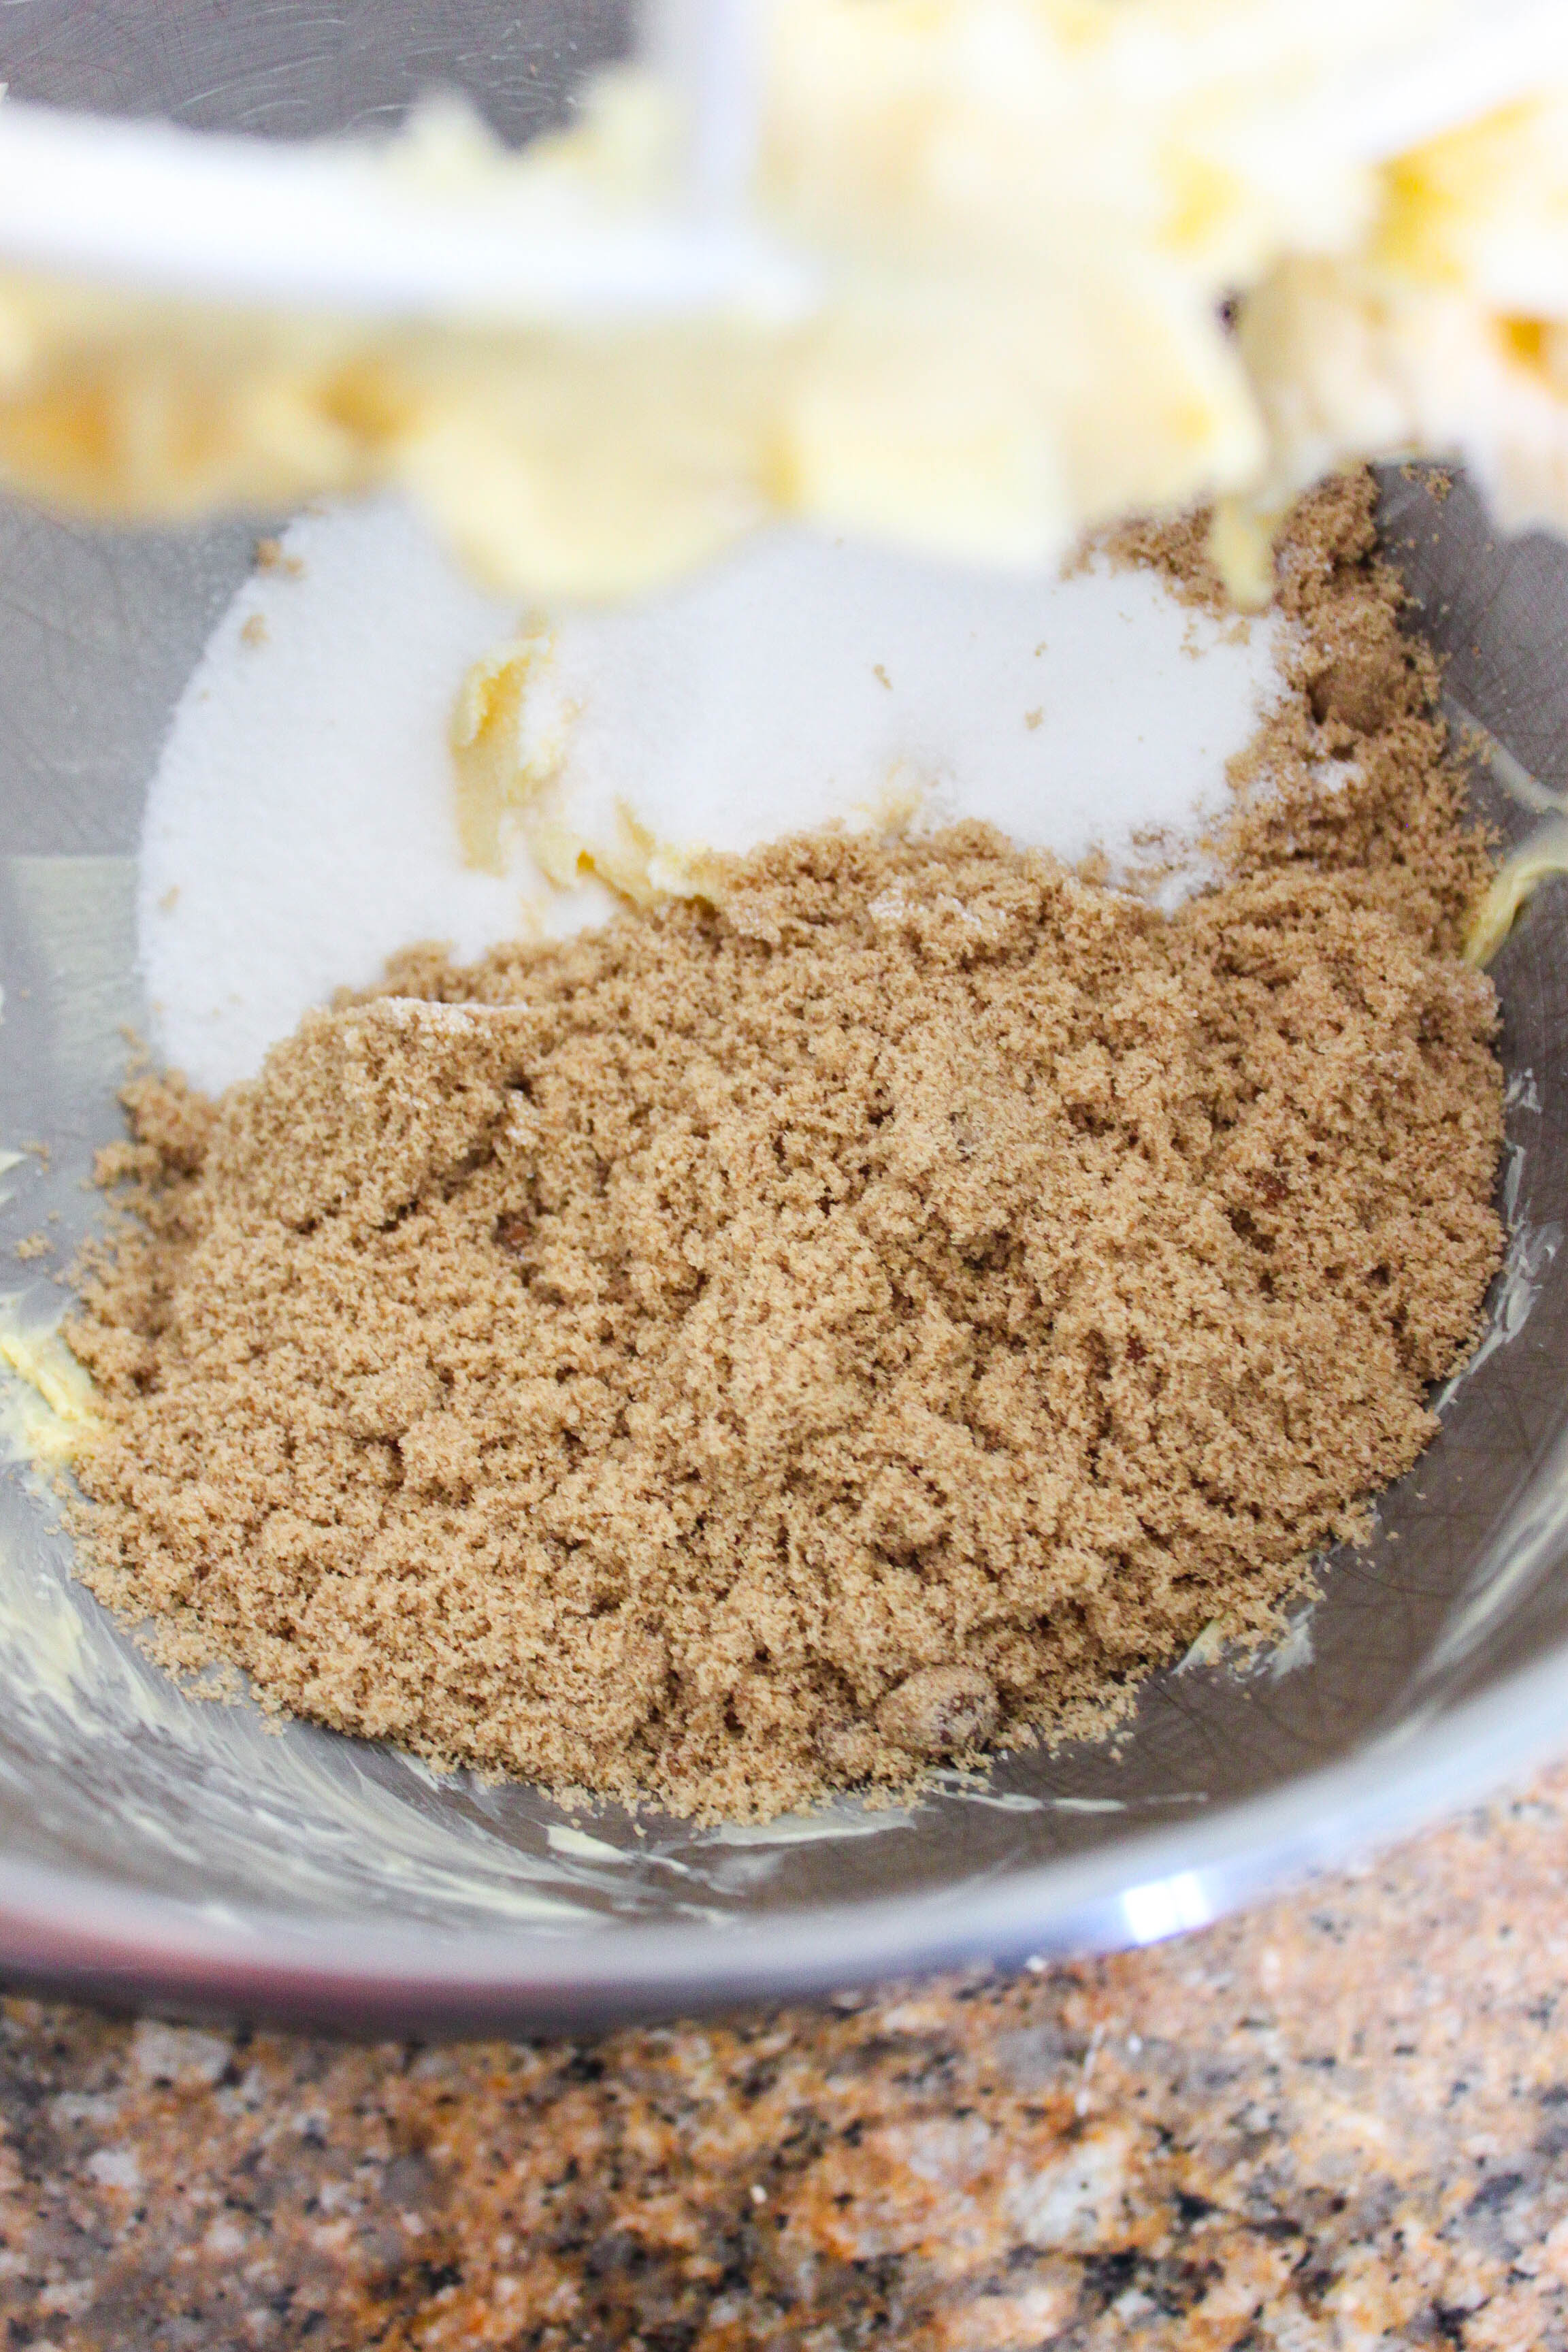
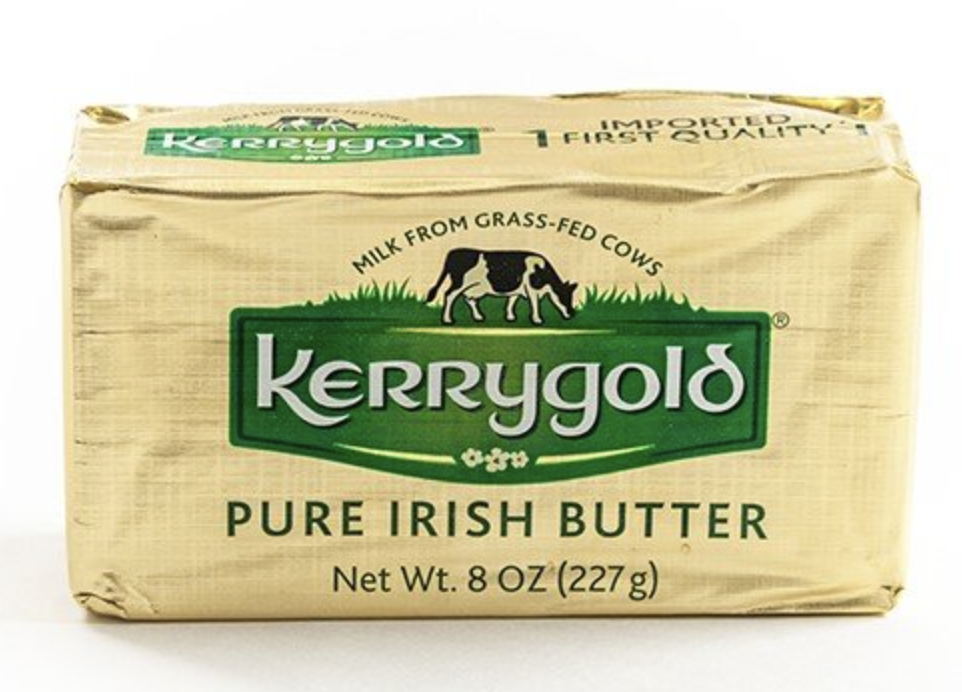
8 oz. Kerry Gold Butter, or salted butter, softened
3/4 c. white sugar
1 1/4 c. brown sugar
1 egg + 2 egg yolks
1 TB. vanilla extract
2 c. flour
1 tsp. baking soda
1 tsp baking powder
1/2 tsp. salt
2 1/2 c. old fashion oats
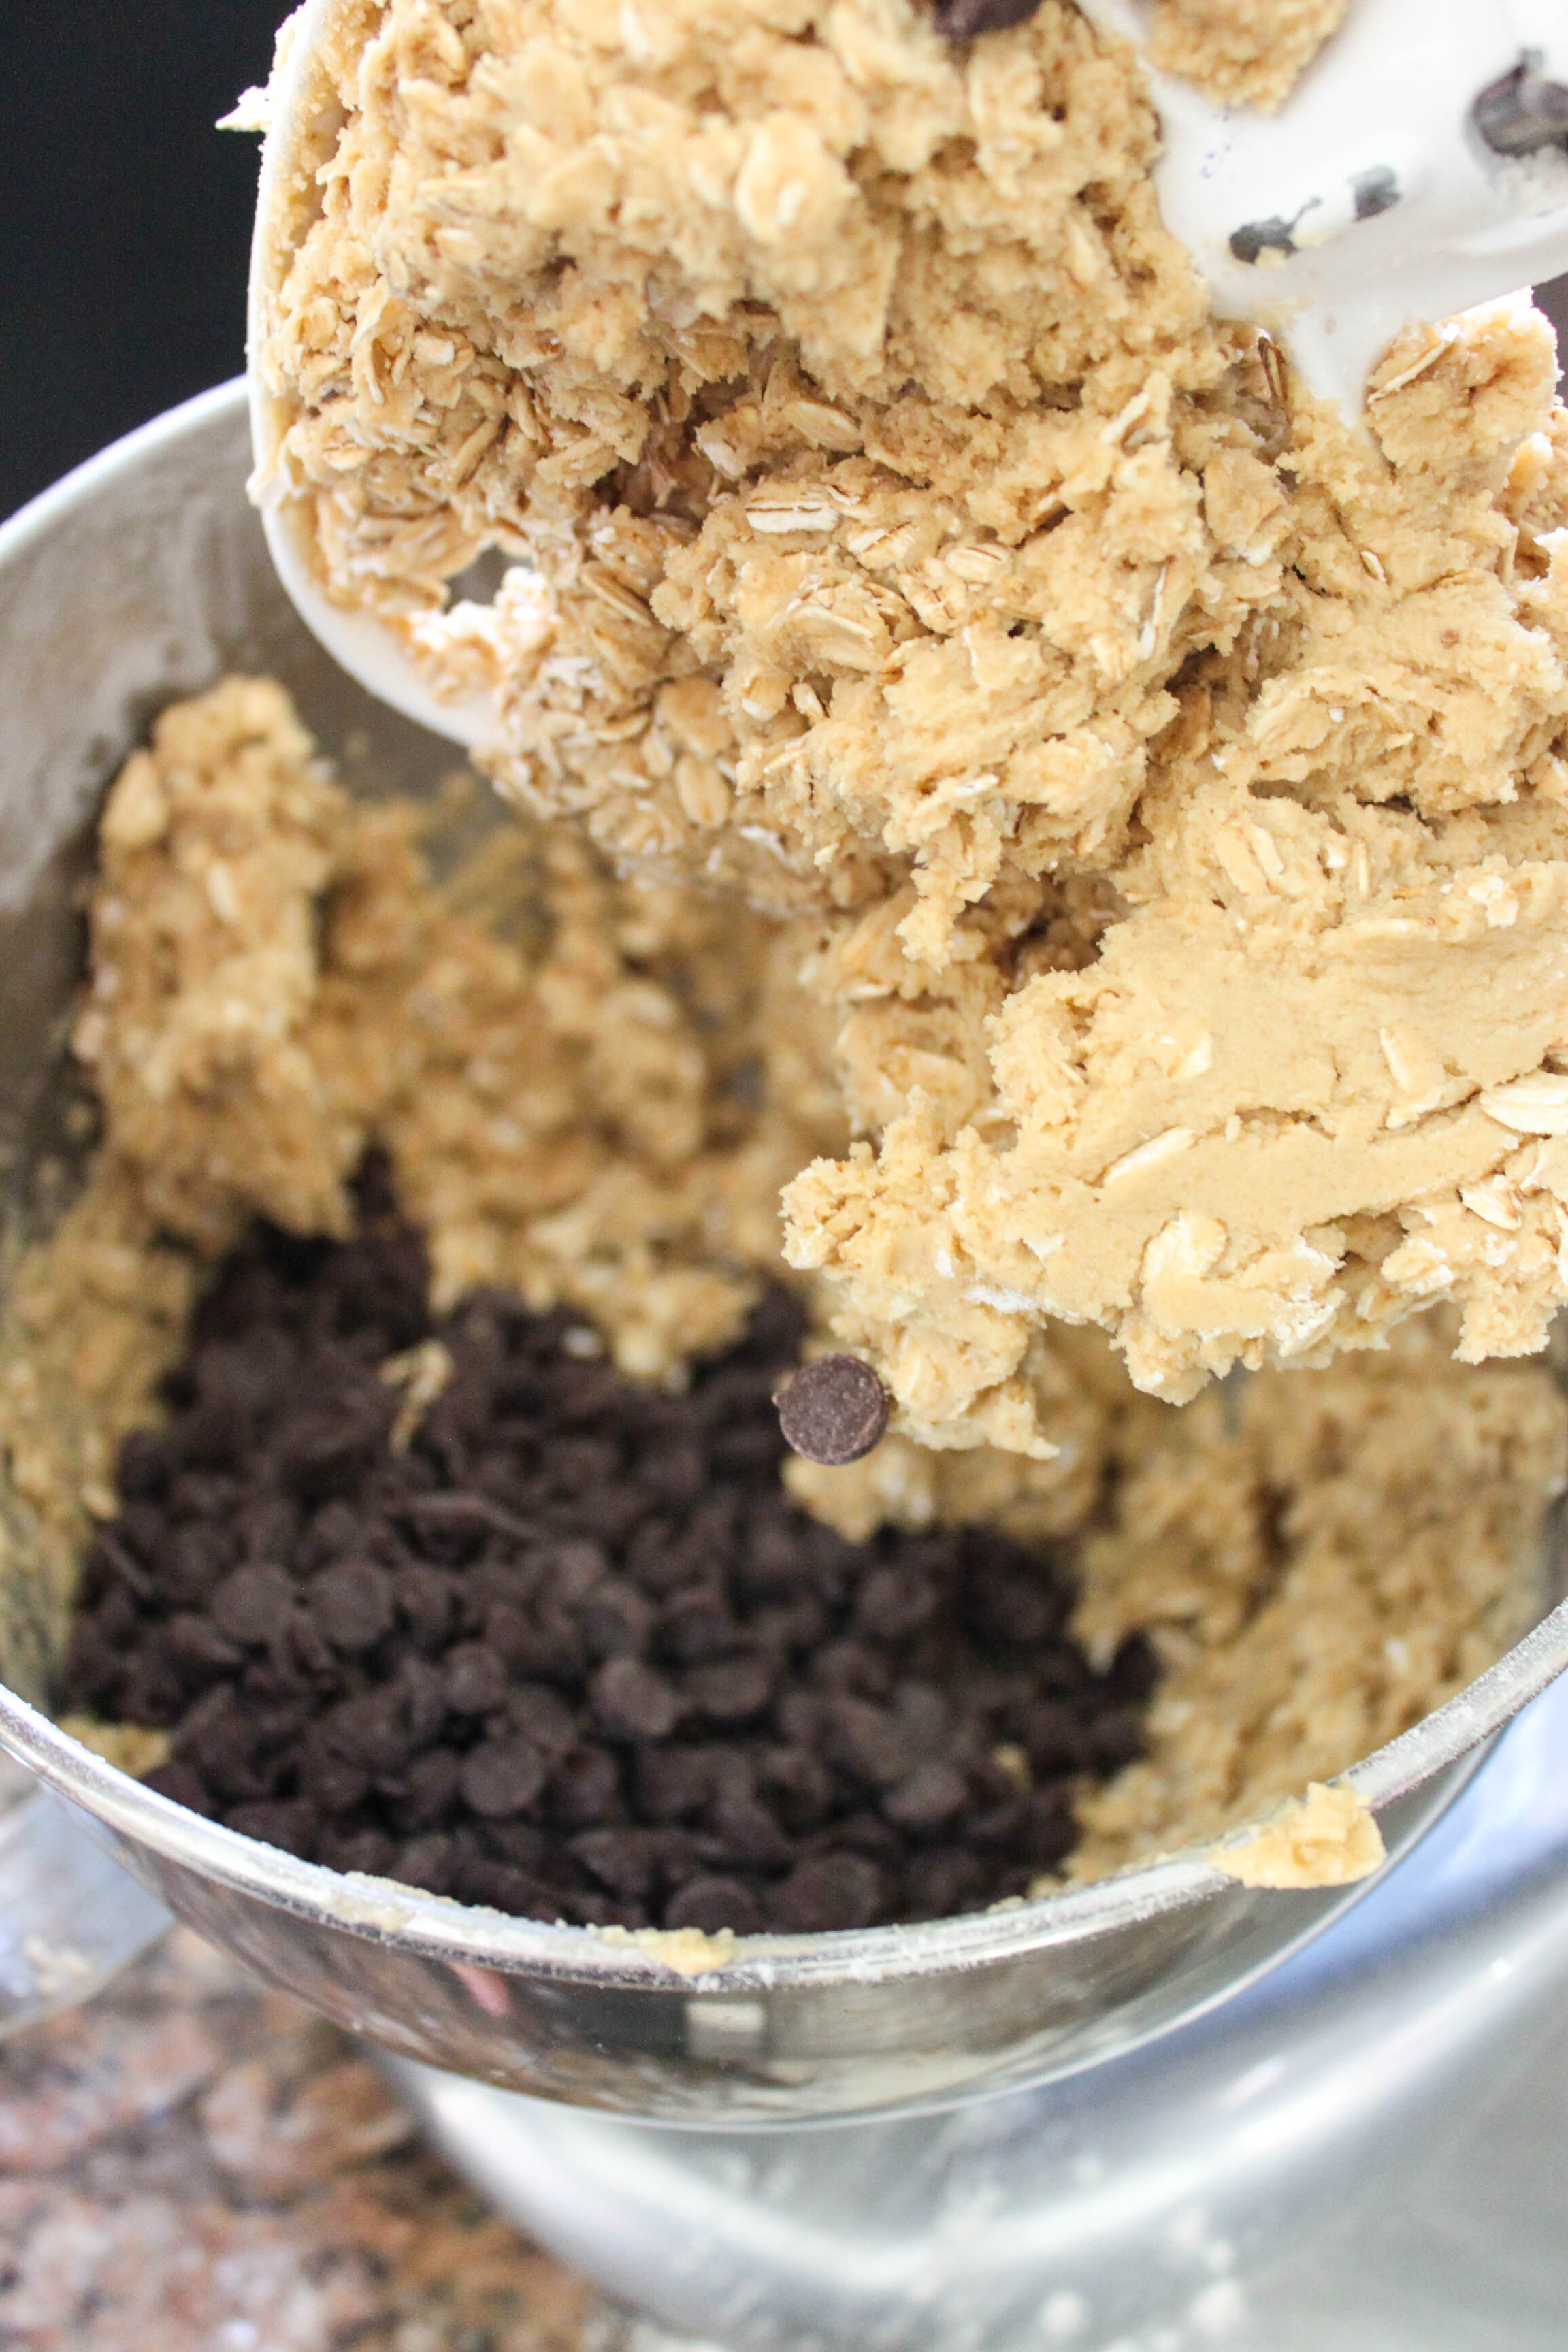
2 c. chocolate chips
Directions:
1. Preheat oven to 350 degrees.
2. Whisk together flour, baking soda, baking powder, and salt. Set aside.
3. In a kitchen aid, beat butter until soft for 1 minute. Add brown and white sugar. Beat until fluffy, 2-3 minutes. Add in eggs one at a time, followed by vanilla.
4. Slowly beat in flour mixture. Once Incorporated mix in oats. Then fold in the chocolate chips. (I always do this by hand. Prepare your baking sheets with parchment paper or grease, scoop cookie dough onto baking sheets using a mini ice cream scoop.
5. Bake for 7-8 minutes. They will be golden on the outside but undercooked in the middle. Let sit on the pan for about 10 minutes to cool, and then add them to a cooling rack.
6. Store in an air tight container for up to a week, or freeze.
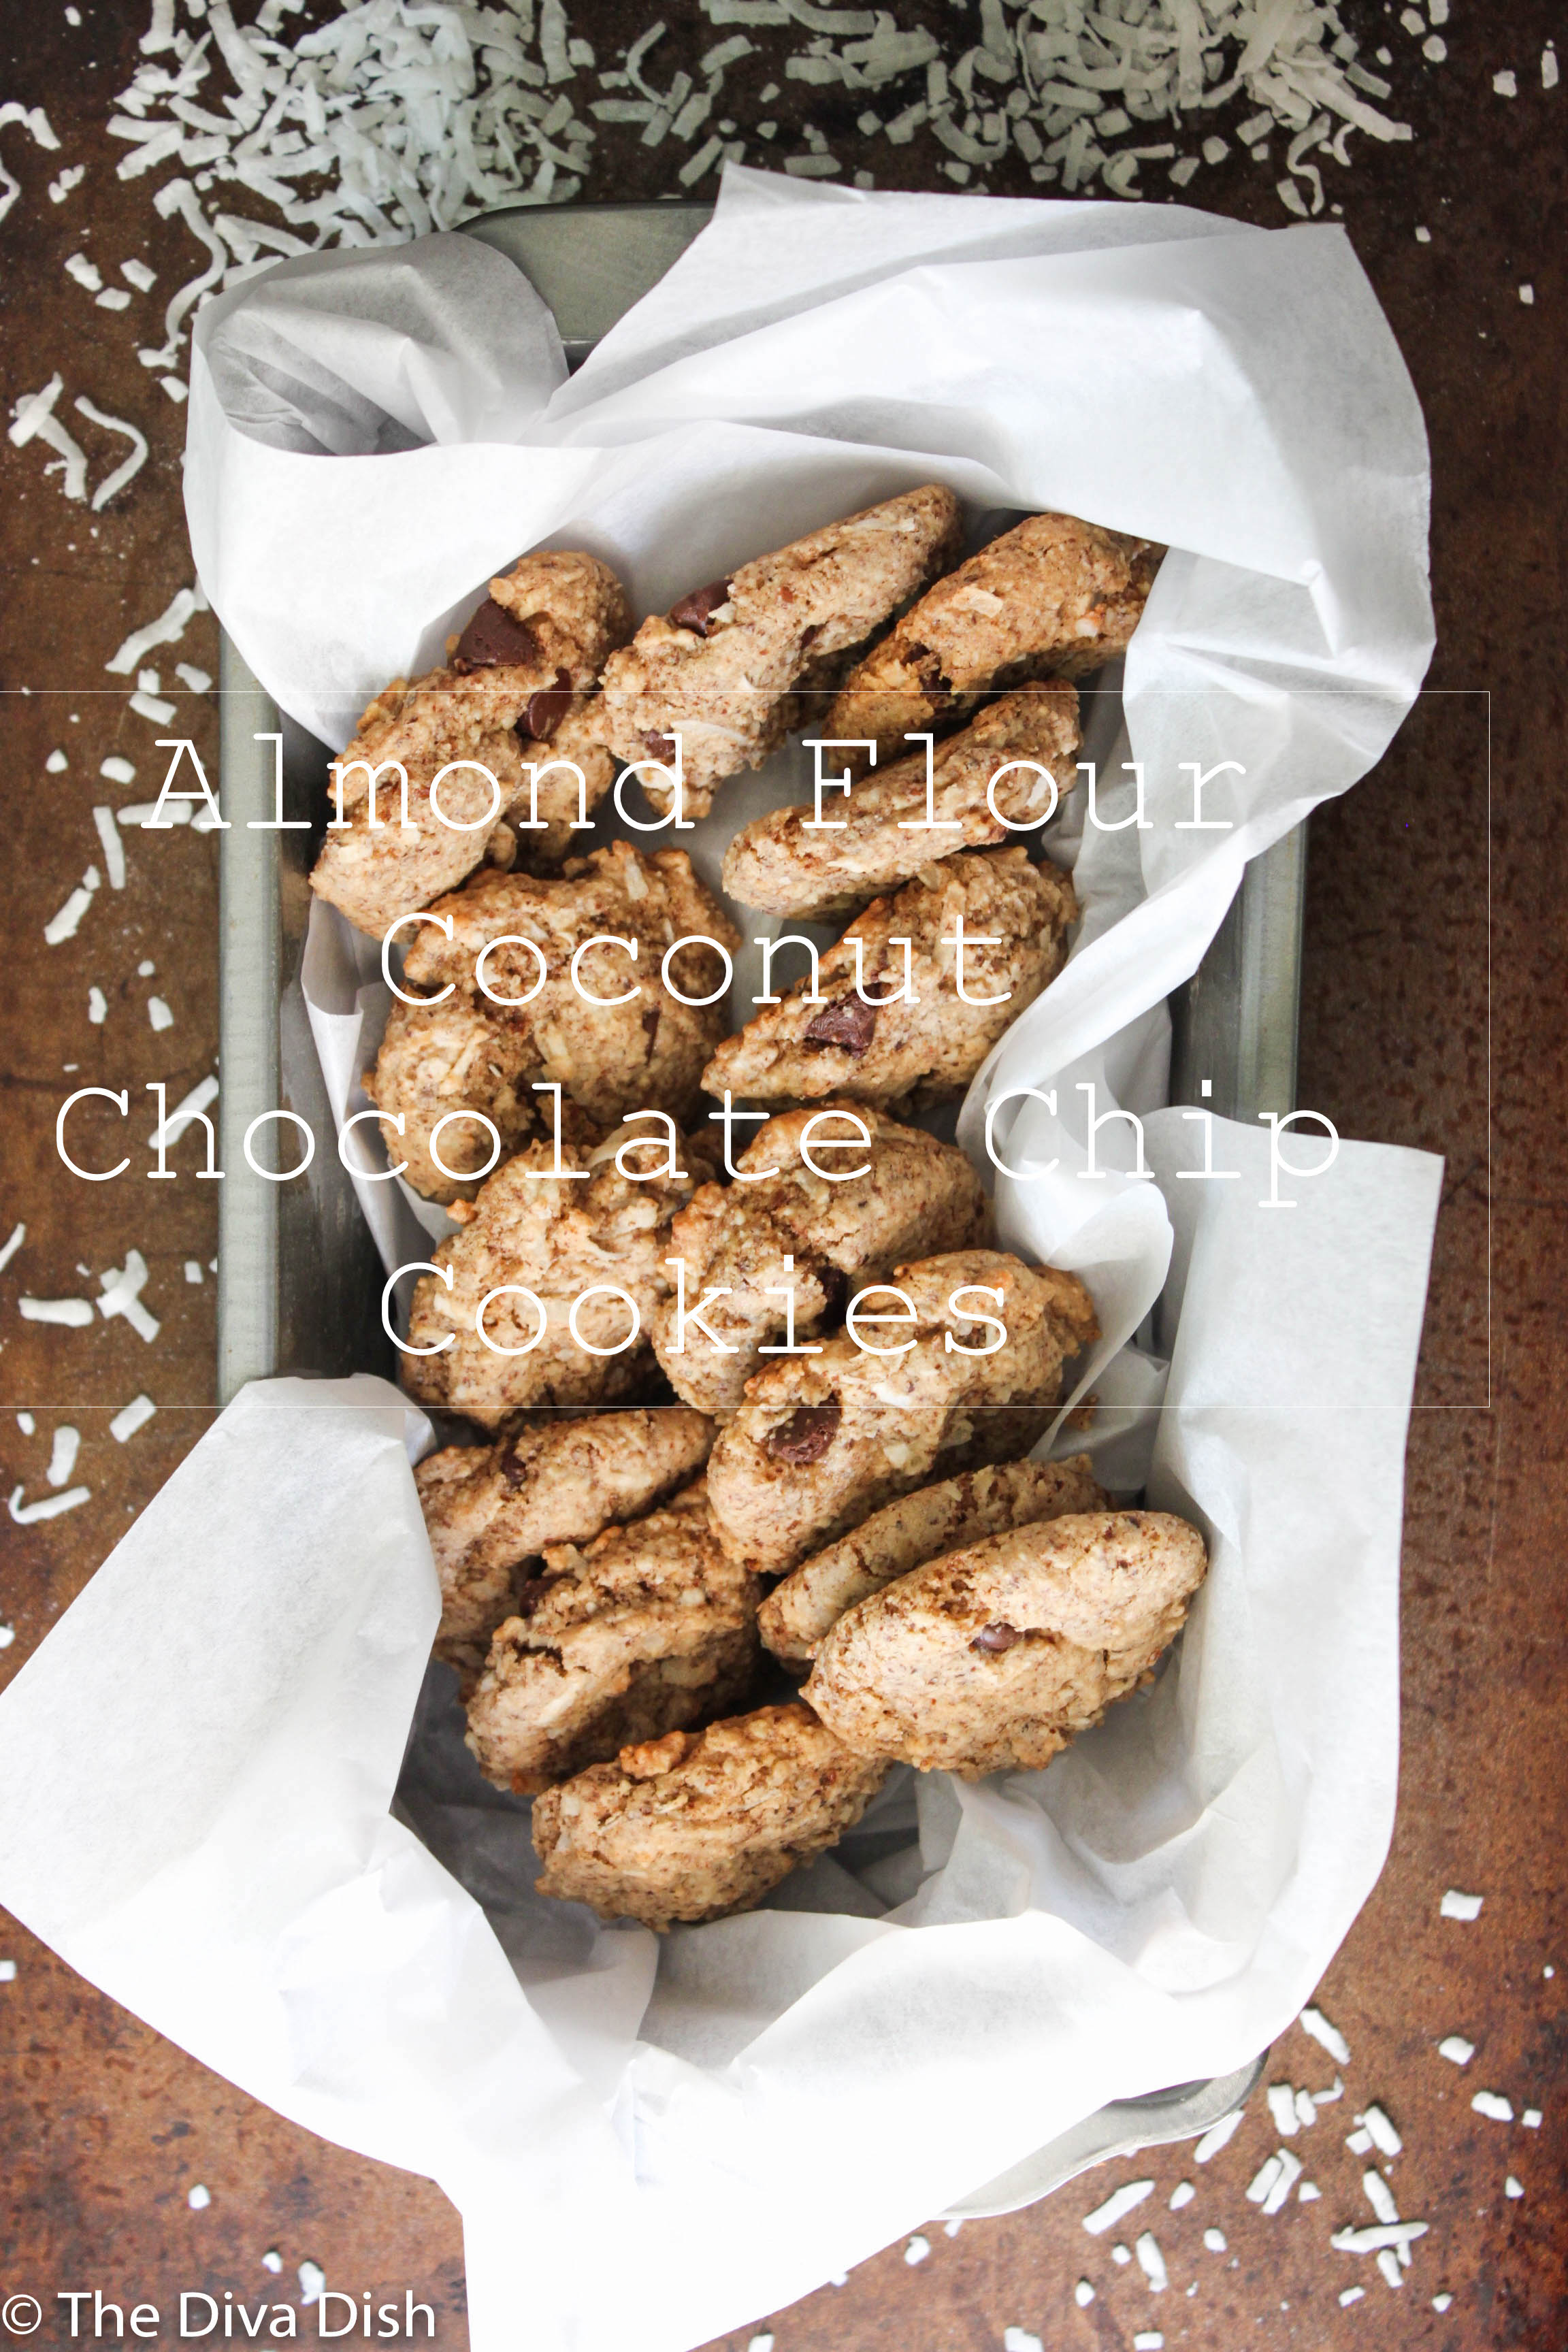
Almond Flour Coconut Chocolate Chip Cookies via The Diva Dish
I can't tell you how much these cookies saved my sanity. I'm talking a serious Hallelujah moment. I was this close to throwing it all away and digging right into my jar of 'regular chocolate chip cookies' after the first day my oldest went back to school.
I never realized how much my oldest played a major part in the entertaining of my two youngest. They followed her everywhere, played what she played, and did what she did. The minute we got home from dropping her off, the two youngest both looked at me like, "Now what?"
The whole day was spent playing, reading, peek-a-boo-ing, songs, games, and then I told myself..."I'm out of ideas!" It was only lunch time and I still had 3 hours to go...
So we started round 2 of play dough and "Let it Go" on replay and I busted these cookies out in desperation. Usually when I do things like that, the recipe NEVER turns out. But I think the sanity Gods were on my side, because 5 cookies later I decided these were something that definitely needed to be shared...
Almond Flour Coconut Chocolate Chip Cookies via The Diva Dish
Almond Flour Coconut Chocolate Chip Cookies via The Diva Dish
Almond Flour Coconut Chocolate Chip Cookies
Ingredients
2 1/2 cups almond meal/flour
2 TB. coconut flour
1/2 tsp. salt
1/2 tsp. baking soda
1/4 c. almond butter**
1 TB. vanilla
1/2 c. pure maple syrup
1/4 c. melted coconut oil
3/4 c. chocolate chips
1/2 c. unsweetened shredded coconut
**I used stir natural almond butter, which contains more oil than a no stir almond butter. If your almond butter isn't a natural kind, or has a less oily base, just add 1-2 tsp. additional oil.**
Instructions
In a small bowl, whisk together flours, salt, and baking soda. Set aside.
In a larger bowl, whisk together almond butter and vanilla. Next whisk in maple syrup. Slowly whisk in coconut oil until incorporated. Add the dry to the wet, and using beaters, beat together on slow the ingredients.
Fold in the chocolate chips and coconut.
Preheat the oven to 350 degrees.
Using a small ice cream scoop, scoop batter onto cookie sheet. Using your fingers, flatten the tops of the cookies slightly.
Bake 8-9 minutes, let cook and eat!
Cookies will soften a little once stored in a container.
3.5.3208
Almond Flour Coconut Chocolate Chip Cookies via The Diva Dish
And by shared I mean alone in your room sharing with you, yourself, and...you.
These cookies are soft and chewy on the inside, with a slight crunch on the outside! I couldn't believe how perfect they turned out, especially being made without regular flour and liquid sweetener!
Almond Flour Coconut Chocolate Chip Cookies via The Diva Dish
Save the 'regular' chocolate cookies for when things start looking really bad...
Like when your daughter asks to play "Let It Go' for the 645 time. That's when you know it's bad.
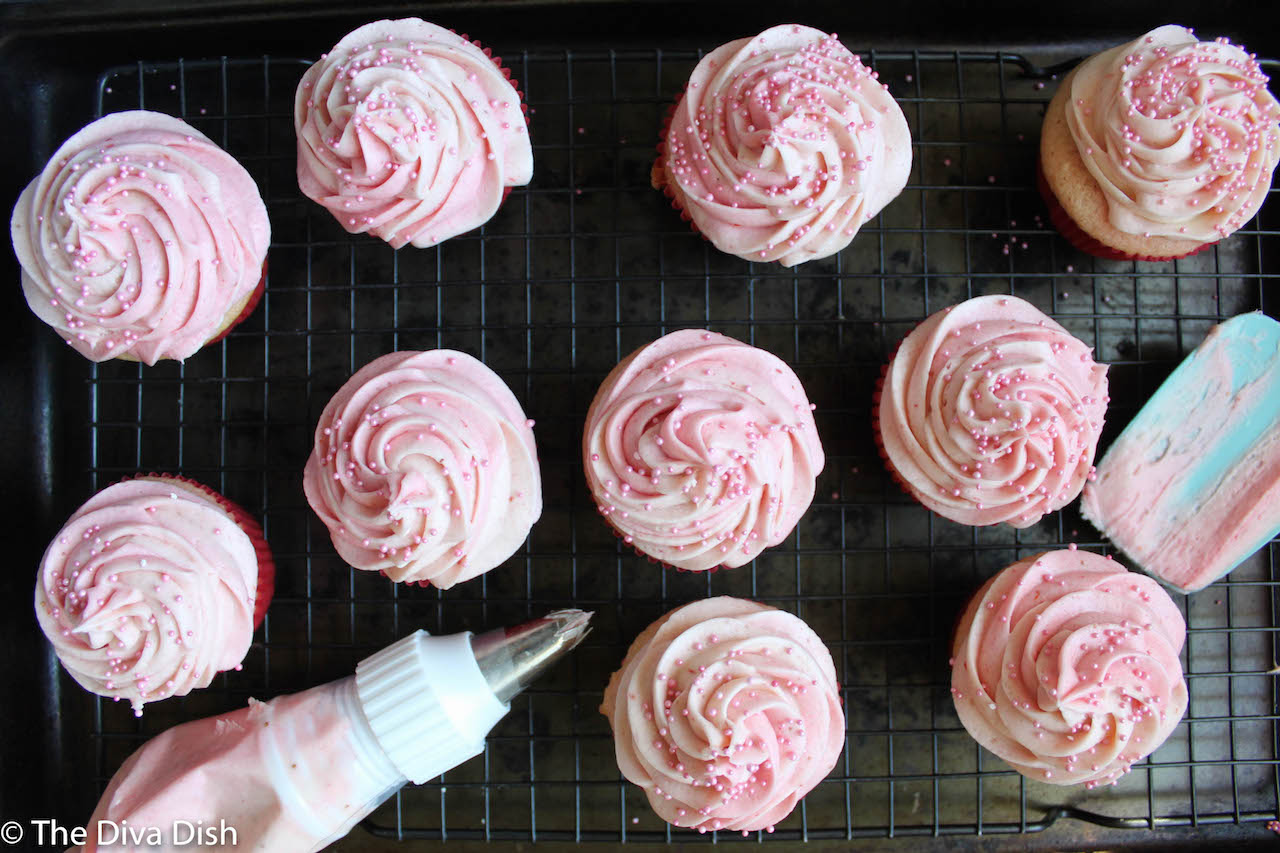
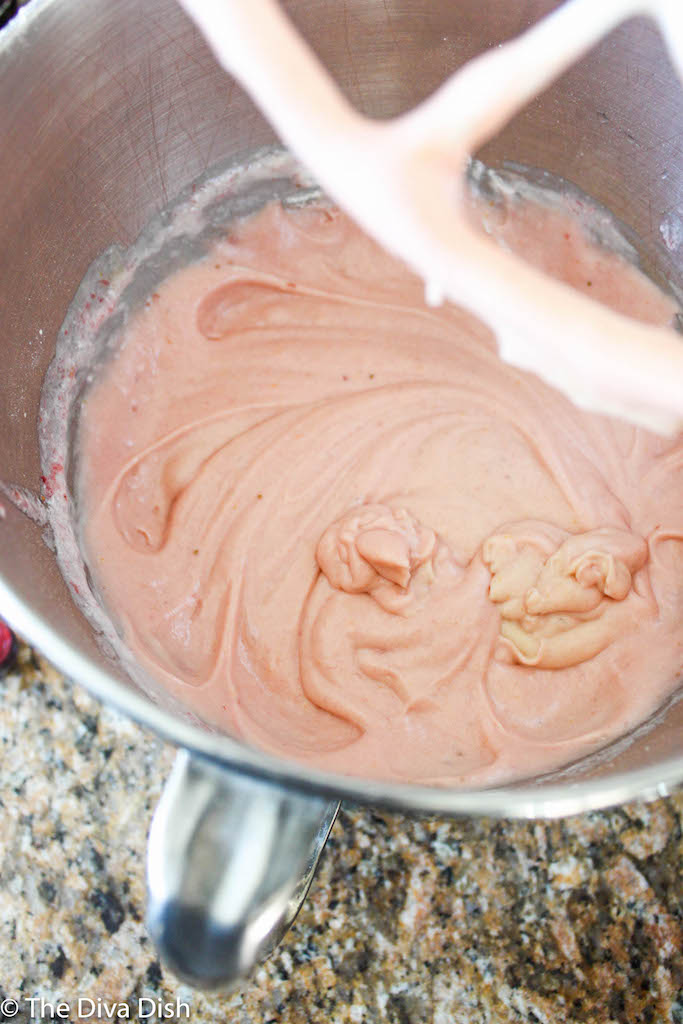
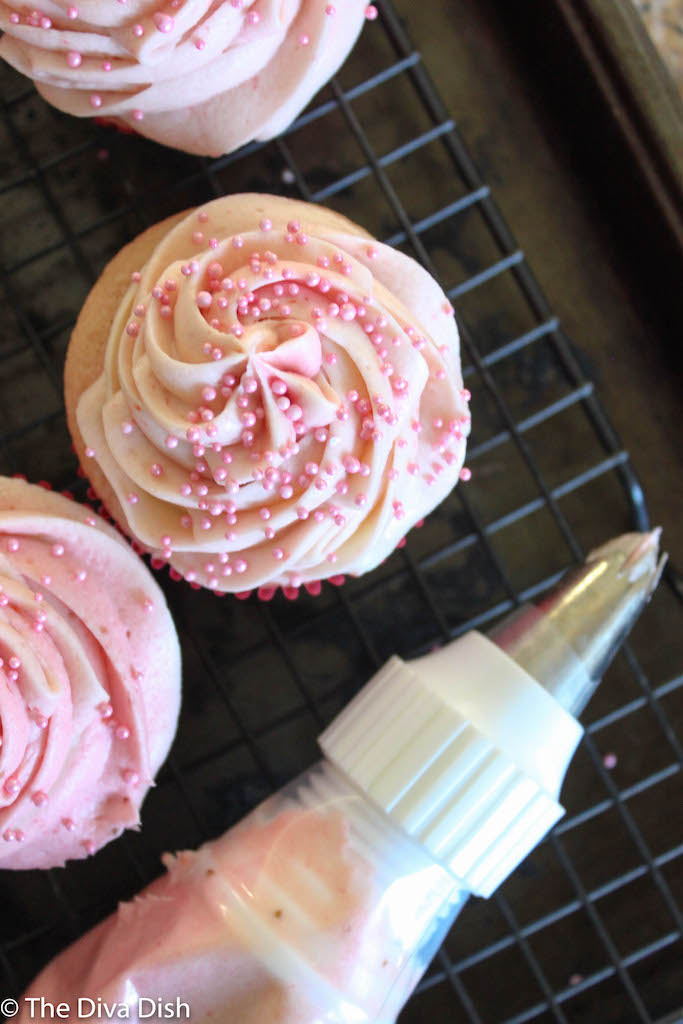
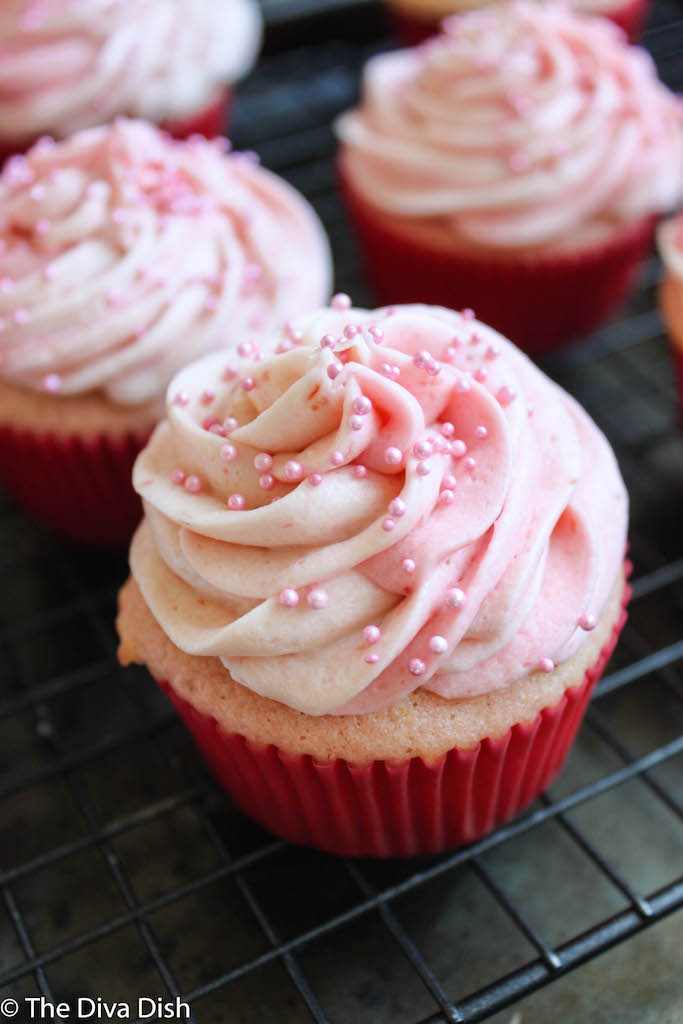
*These are hands down the yummiest, fluffiest, and most fresh tasting strawberry cupcakes ever!*
Valentines Day is kind of a big deal at our household, and to top that off my little baby has a birthday a few days before! We've got pink thrown up all over the house, heart pictures and talks of boyfriends, valentine notes attached to sugar...
And cupcakes. The BEST Strawberry Cupcakes!
Now, before we get to the recipe, let's talk about my wonderful experience with Valentines during...High School.
The BEST Strawberry Cupcakes w/ Strawberry Buttercream! Fresh and from scratch! via The Diva Dish
The BEST Strawberry Cupcakes w/ Strawberry Buttercream! Fresh and from scratch! via The Diva Dish
The BEST Strawberry Cupcakes w/ Strawberry Buttercream! Fresh and from scratch! via The Diva Dish
When I was in High School, our school did this thing where we could purchase a Valentine Gram for a dollar, and then during one of the periods a bubbly student from student council would deliver you a personalized card to your class. I think there was candy attached or a balloon. Something obnoxious, in which I wanted so bad.
It was the most painful thing every year.
The BEST Strawberry Cupcakes w/ Strawberry Buttercream! Fresh and from scratch! via The Diva Dish
The BEST Strawberry Cupcakes w/ Strawberry Buttercream! Fresh and from scratch! via The Diva Dish
Each Valentines Day the same girls/guys would receive Valentines Grams as they laughed it off as kind of a, "who, me?!" mentality. Meanwhile I would sit there counting down the minutes until lunch time so I could purchase a BRC (bean, rice, cheese) burrito. Priorities right?
One year I received a Valentines Gram. I don't exactly remember it, but I'm pretty sure everyone in class looked at me like, "Do you even go here?"
And then one kid shouted, "Yes! She's the burrito girl!"
The BEST Strawberry Cupcakes w/ Strawberry Buttercream! Fresh and from scratch! via The Diva Dish
The BEST Strawberry Cupcakes w/ Strawberry Buttercream! Fresh and from scratch! via The Diva Dish
The BEST Strawberry Cupcakes w/ Strawberry Buttercream! Fresh and from scratch! via The Diva Dish
I remember sitting there with butterflies in my stomach thinking that maybe, just maybe it could be from so and so. Or maybe that other so and so...He was totally hot.
As I ripped in half that little heart sticker that held it together I began to feel flush in the face. Kind of like the same feeling I get just before that burrito hits my mouth. I had visions of my whole life changing and that maybe my life would turn out to be a Mary-Kate and Ashley Movie after all!
The BEST Strawberry Cupcakes w/ Strawberry Buttercream! Fresh and from scratch! via The Diva Dish
The BEST Strawberry Cupcakes w/ Strawberry Buttercream! Fresh and from scratch! via The Diva Dish
This is what the Candy Gram said,
" Roses are Red, Violets are Blue, Sugar is Sweet and So Are You! Happy Valentines Day! Love...."
The BEST Strawberry Cupcakes w/ Strawberry Buttercream! Fresh and from scratch! via The Diva Dish
The BEST Strawberry Cupcakes w/ Strawberry Buttercream! Fresh and from scratch! via The Diva Dish
The BEST Strawberry Cupcakes w/ Strawberry Buttercream! Fresh and from scratch! via The Diva Dish
...Nicole!"
Aka, my best friend. #soabouthoseburritos
The BEST Strawberry Cupcakes w/ Strawberry Buttercream! Fresh and from scratch! via The Diva Dish
1 TB. Vanilla extract, or 2 tsp. vanilla bean paste
(Opt: 2-3 drops red food coloring)
dash of salt
Instructions
(For the Cake)
Preheat the oven to 350 degrees.
In a bowl, sift together the flour, baking powder, and salt. Set aside.
In a mixer bowl add butter and sugar. mix together until fluffy on low speed for 30 seconds. Next add in eggs one at a time, followed by vanilla.
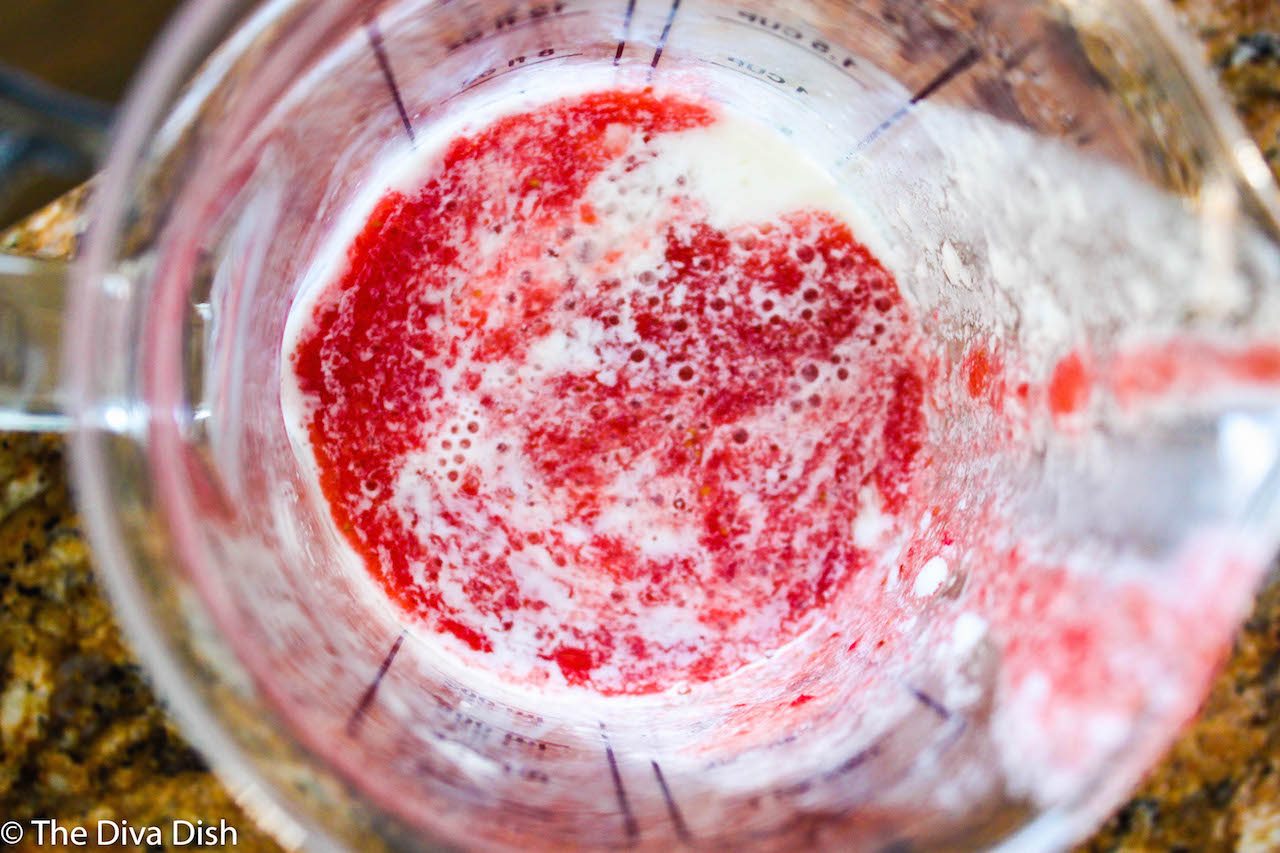
Add your strawberry puree to your buttermilk.
Add 1/3 of the flour mixture to the batter, followed by 1/3 of the buttermilk mixture. Continue doing this until the flour and buttermilk are gone. Do not over mix the batter.
Add in the food coloring if you prefer. You can mix it in, but not fully to give it a swirled look.
Add batter to prepared muffin tins, filling 2/3 of the way full. It will make about 12-14 cupcakes.
Bake for 15-20 minutes, or until done.
(For the Frosting)
While the cupcakes are cooling, make the frosting.
Beat the butter until fluffy. Add in the rest of the ingredients and beat until fluffy.
(opt:) You can tint half of the frosting mixture and pipe both frostings together in one piping bag. Just add one color to one side, and the other color to the other. Then pipe the frosting onto the cupcake! Top with sprinkles and enjoy!
3.5.3208
The BEST Strawberry Cupcakes w/ Strawberry Buttercream! Fresh and from scratch! via The Diva Dish
The BEST Strawberry Cupcakes w/ Strawberry Buttercream! Fresh and from scratch! via The Diva Dish
Moral of the story...Burritos before Bros.
Happy Birthday to my little baby! I can't believe you are one!!
Due to the fact that Monday night's around our house are basically a national holiday, being Bachelor night and all...How about the perfect trash TV treat to go with it, eh? Eh?
I know it's ridiculous to how much I look forward to a scripted once in a lifetime romantic television, and I probably should end my night reading a book that will makes my brains all smarts n' stuff...But, like have you ever seen the Bachelor?! How could you not love it?! Everyone is emotional, drunk, bat shiz crazy, and after a day of messy kitchen's and back talking toddlers, it's just what I need.
Is that sad?
No, no It's not. Because today my 5 year old told me I was ruining her life because her pony tail was crooked.
BRING ON THE CRAZY!
The best way to watch the Bachelor in my opinion is with a group of girls. Everyone's dressed in yoga pants bringing forth delicious goodies, and we all pile together on a couch to judge other crazy women. I've tried watching it at home with my husband, but he just mocks me. Especially during the scenes where the girls are in bathing suits...OH he just can't leave the room because he HAS to tell me how ridiculous this show is!
He doesn't get it.
It's a once in a lifetime opportunity, and people are working on themselves and really finding out who they are! Pure gold.
And trust me, I'm pretty sure we would all find out who we really are as we traveled the world with our Boyfriend and his 16 other girlfriends. LIKE...Oh crap. I'm awesome.
Healthy Caramel Popcorn
Ingredients
1/2 c. popcorn kernals
2 TB. coconut oil
1/3 c. coconut sugar
salt
Instructions
Get a large baking sheet out and set aside. This will be used to pour the popcorn on once done.
Add coconut oil, coconut sugar, and popcorn kernels to a stove top popper. Turn the heat on medium/low and stir the popcorn mixture together continuously. (This allows the coconut sugar not to burn.)
As the popcorn begins to pop, continue to stir the mixture slowly until the popcorn begins to decrease to a slow pop.(If you open the lid, the popcorn will have made it's way to the top.)
Pour the popcorn on the baking sheet, and spread it out. Let it cool, then enjoy!
Store in an airtight container for 3-4 days.
3.5.3208
This popcorn was amazing! The second It was ready to eat, I couldn't stop. I love the fact that it's made with a natural sugar, and there is a little bit of crunch and caramelization on there. I had this on the counter in a jar while family was in town and people could not get enough of it!
Now...Before we get to this weeks dinner menu and workout schedule, I thought I would leave with this...
Basically how we are when it's time to eat, right?
Monday:French Bread Pizza, using whole wheat french bread, veggies + fruit
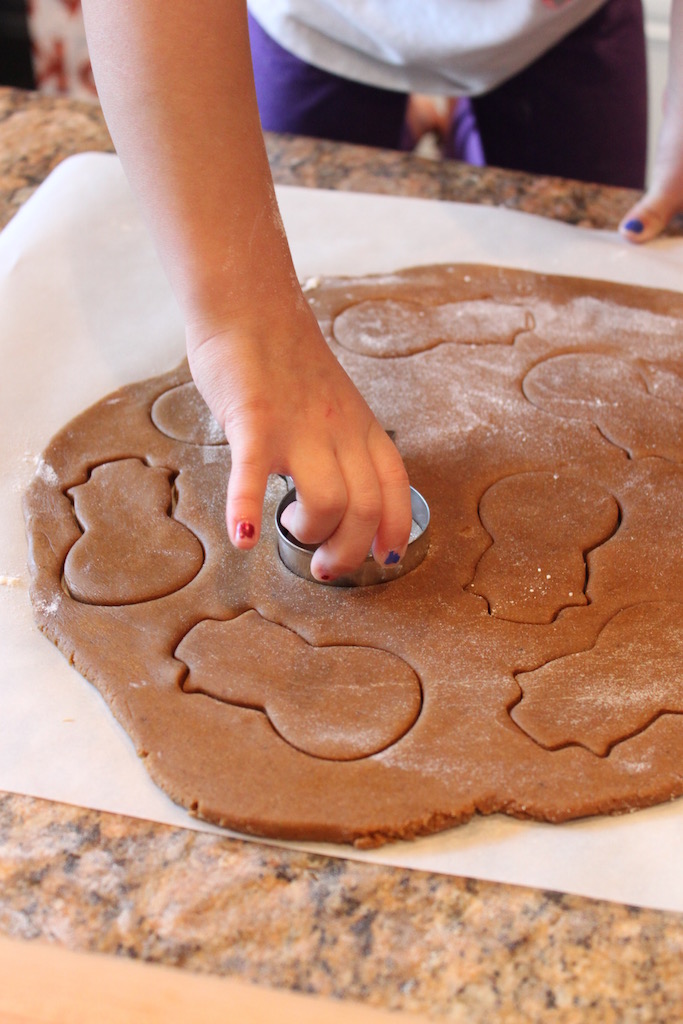
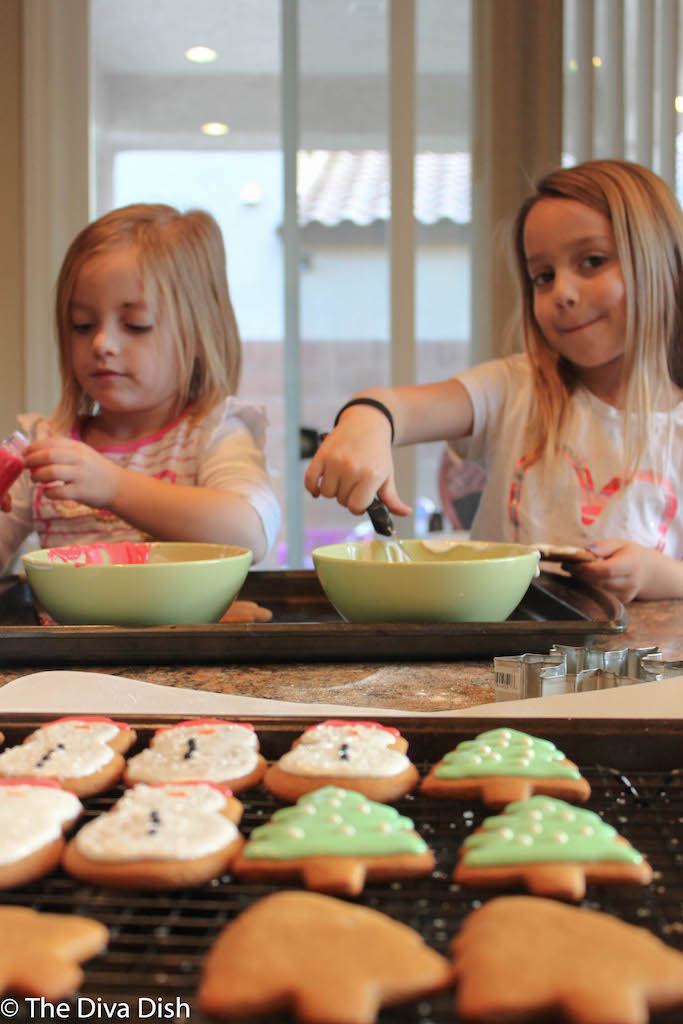
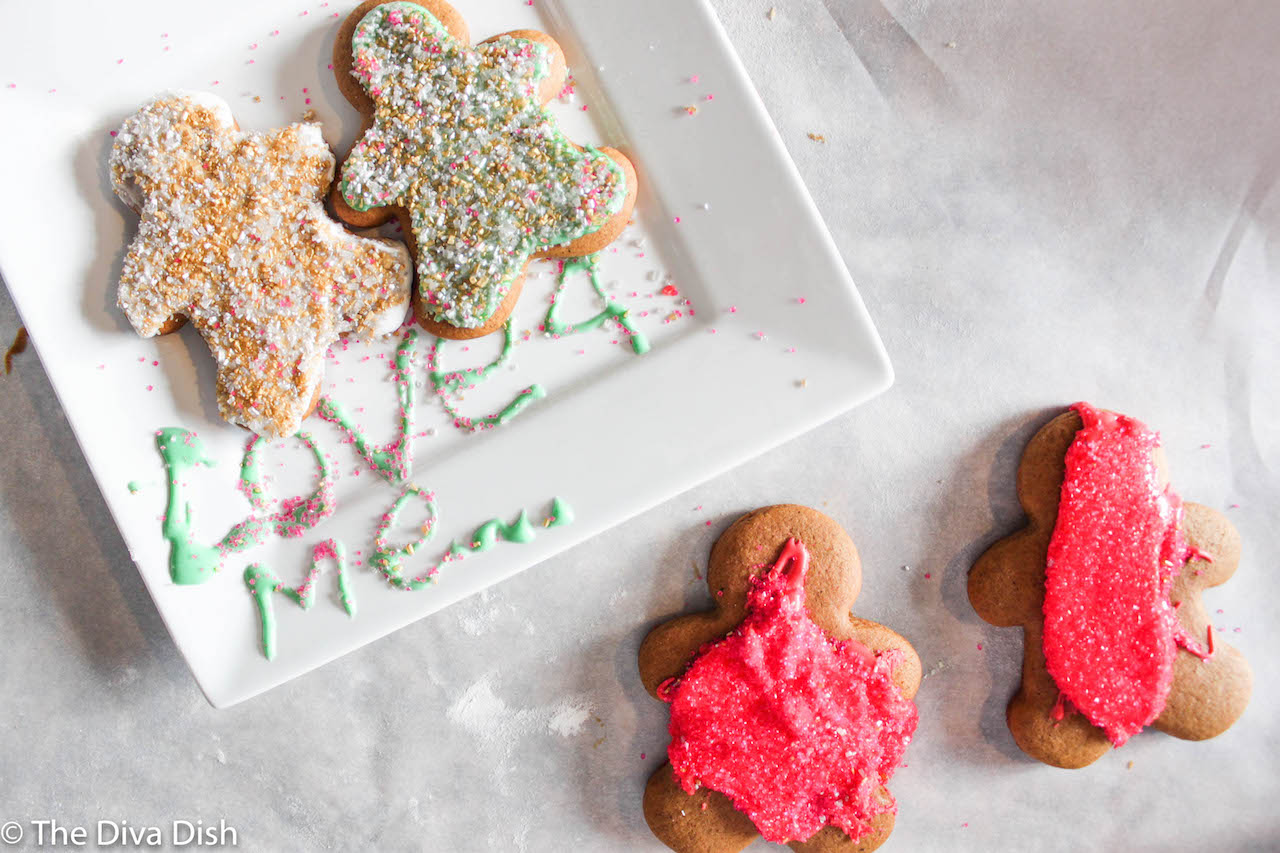
*This is not an exaggeration. Hands down, these are the best Gingerbread cookies I've ever had. And many friends and family agree!*
Not many grandmas have Facebook pages created on behalf of things they've said...But mine does.
The BEST Gingerbread Cookies via The Diva Dish
I'm pretty sure I've talked about her before on the blog, and her name is Grandma B. Every so often she will come out to visit my little family and spend a few days. It's always an adventure. There are always memories made. And you never forget when Grandma B. visits. Ever.
From the second you open the door you hear squeals of delight from three tiny girls, and a "Ooooooohhhh hellOOO!", from Grandma B. herself. Her slight Argentine accent peaks through as she talks about the weather in Las Vegas and how beautiful it really is. She then proceeds to walk around the house stating, "Ok, let's see what's new around here.", as she examines each piece of furniture/decor debating whether that was here last time she stayed with us.
The BEST Gingerbread Cookies via The Diva Dish
She brings with her chamomile tea, english muffins, and orange marmalade for her to have for breakfast each morning, alongside the LA Times. She talks about uncomfortable positions in politics and asks if I need eye makeup for Christmas since she hasn't seen me wear any in the 2 days she's been here.
My girls love to get her attention by making the loudest noise possible, which of course she loves. She always asks the right questions, like about my breasts and time of the month schedule. Quickly followed by remarking in front of the kids how hard it must be for me to hide the elf on the shelf every morning. Don't worry, they didn't catch on. They also missed when she asked them if they saw the real Santa at our church Christmas party or a pretend one...
The BEST Gingerbread Cookies via The Diva Dish
And each times she visits, we laugh, we play, and we eat lots of food. (She also folds my laundry!!) It might be uncomfortable at times, and I probably will never use the word breasts again, but isn't that what the holidays are all about?! Awkward, fun, memorable, uncomfortable, family togetherness.
And dessert.
IMG_0524
Because if there is one thing I did inherit from my grandmother it's that there must always be something to eat for dessert after breakfast lunch dinner. No matter what.
And what better way to honor that than with my mom's gingerbread cookies! After all, it's all about family.
And breasts.
IMG_0525
Mom's Gingerbread Cookies
Ingredients
(Royal Icing)
6 cups all purpose flour, sifted
1 tsp. baking soda
1/2 tsp. baking powder
2 sticks unsalted butter, softened
1 c. dark brown sugar, packed
4 tsp. ground ginger
4 tsp. ground cinnamon
1 1/2 tsp. ground cloves
1 tsp. finely ground black pepper
1 1/2 tsp. salt
2 large eggs
1 c. unsulfured molasses
(Royal Icing)
1/4 c. merengue powder
4 c. powdered sugar
1/2 c. cold water
Instructions
In a bowl, sift together flour, baking soda, and baking powder.
In a mixer, beat together the butter and brown sugar until fluffy. Mix in the spices and salt, then the eggs, followed by the molasses.
Add flour mixture slowly.
Wrap the dough in plastic wrap and chill for at least an hour.
Preheat the oven to 350 degrees. Roll out a portion of the dough, cut into desired shapes, and place on baking sheet. (Use parchment paper!)
Chill the shapes for 20 minutes.
Bake for 8 minutes, or until golden. Do no overtake!
Cool on a wire rack, and frost when completely cool.
(Royal Icing)
Beat all ingredients together. Dye your color of choice.
3.3.3077
Obviously my girls inherited my impeccable cookie decorating skills, not to toot my own horn or anything...
The BEST Gingerbread Cookies via The Diva Dish
The Best Gingerbread Cookies via The Diva Dish
I promise you, despite the heavy sprinkle gear and hot pink frosting, these cookies are irresistible to anyone! Even when Grandma B. says, "well I'll be the judge of that!"
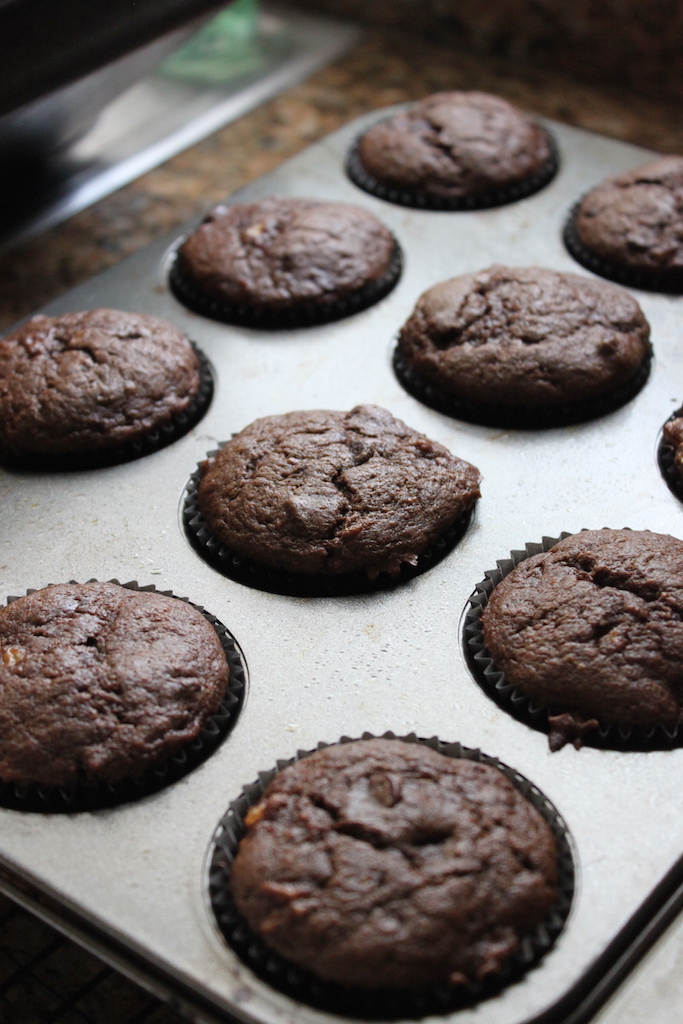
I'm trying my hardest to type this blog post all about the most delicious Chocolate Spiced Banana Muffins, but my daughter has Peppa Pig on in the background, and now I've somehow developed a British accent with pig snorts shoved in-between. You want to know what's worse than regular writers' block? British accent pig snorts writers' block...
So about these muffins...
Ever since I started decorating for Christmas in October last week, I've been fully embracing the holiday baking season. I also started going back to the gym to counteract all of the calories I've been eating baking. In fear that my maternity pants may have to make their way back out of the garage, I've decided to start distributing baked goods out early this year to our friends.
They win and I don't look pregnant.
IMG_0402
Although, I've always wanted to be the friend who dropped off kale salads to the neighbors during the Christmas season because that's what everybody really wants! Right? Yup.
IMG_0408
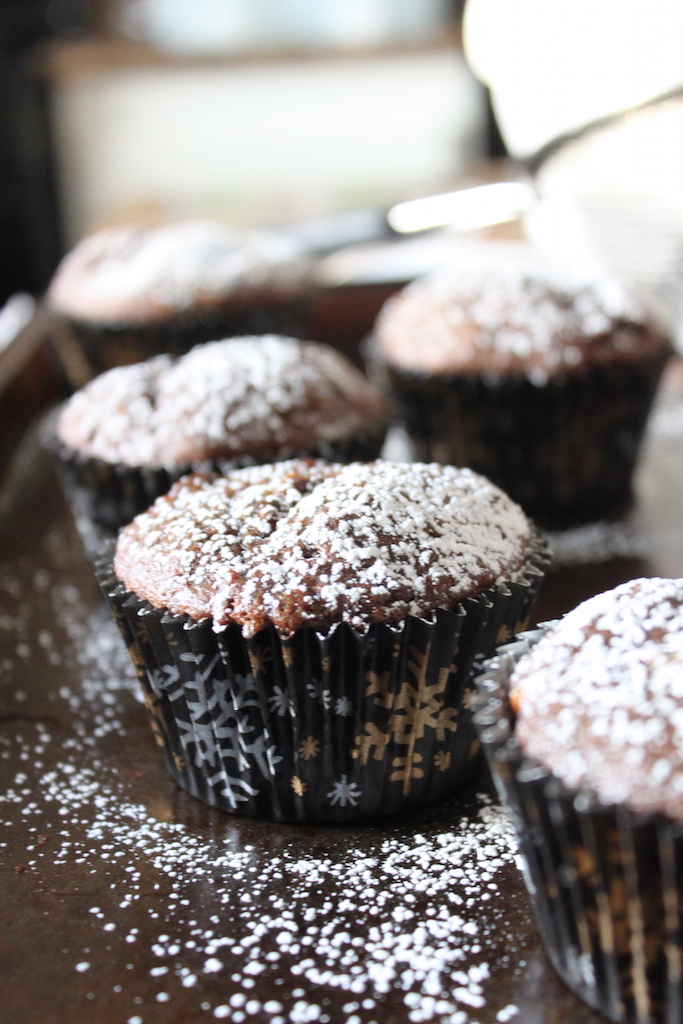
The second these came out of the oven, my girls each had two and then didn't eat their dinner. I'd say that means this recipes is a winner and I'm a top notch parent! Snort!
IMG_0412
IMG_0413
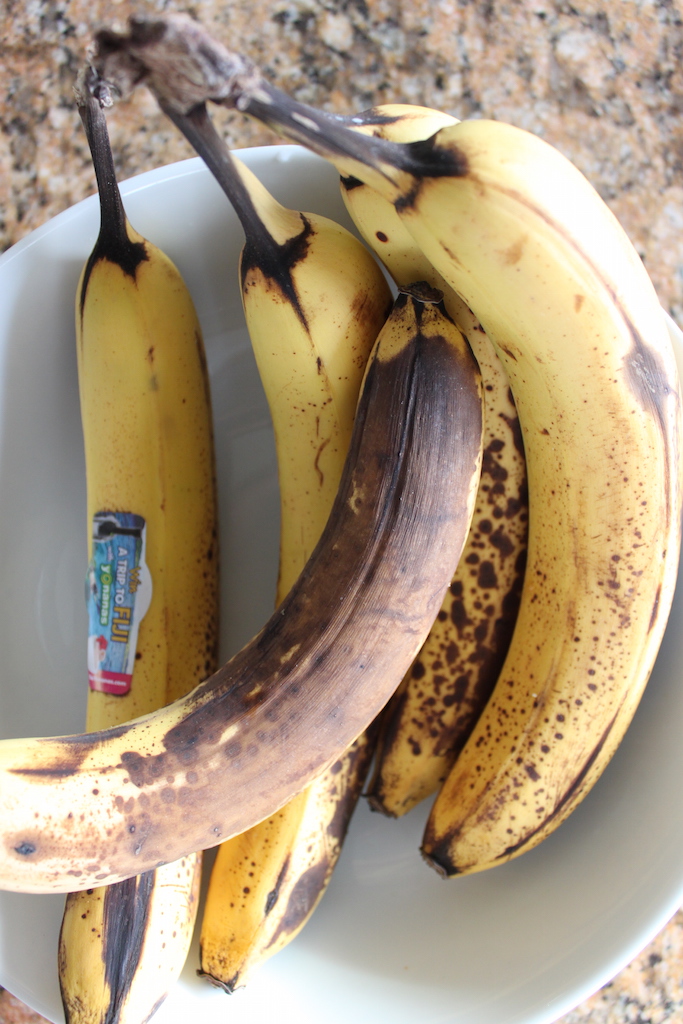
Chocolate Spiced Banana Muffins
Serves:
24
Ingredients
2 1/4 c. white whole wheat flour
1/4 c. cocoa powder
1 1/2 tsp. baking soda
dash of salt
1 1/2 tsp. cinnamon
1/2 tsp. ground cloves
1/2 tsp. ground nutmeg
1/4 tsp. ground ginger
3/4 c. softened butter, can sub room temp coconut oil
2 eggs
1 1/2 c. coconut sugar
1 TB. vanilla
5 mashed bananas
1 1/2 c. dark chocolate chopped, or dark chocolate chips
Instructions
In a bowl, whisk together the dry ingredients including flour, baking soda, and spices.
In a separate bowl, beat together the butter and sugar until combined and fluffy, about 2 minutes.
Next add in the eggs, slowly beating one after the other. Then the vanilla.
Next add in the bananas and combine.
Slowly mix in the dry ingredients, and then fold in the chocolate chips.
Try not to over beat.
Preheat the oven to 325 degrees. Line a muffin tin with cupcake liners and scoop batter into the muffin tin using a medium ice cream scoop to create even baking.
Bake for 18-22 minutes, depending on oven.
Makes 24 muffins.
Dust with powdered sugar if desired.
3.3.3077
IMG_0418
IMG_0425
Sidenote: These are probably a 'healthier' treat than other Christmas treats, so it's basically like dropping a kale salad.
I am a hypochondriac.
The first step is admitting it, right?
IMG_0164
Literally every week I tell my husband I've got some sort of sickness/disease, and I'm 100% sure because at least 15 out of the 27 websites I checked said so. And let's be honest, the doctors on those sites are LEGIT!
And then today, my daughter locked herself and the baby in one of our bedrooms so as I finally opened the door, she wam-bam slams the door right into my head.
Flashbacks of the movie Simon Burch went through my mind, because I'm pretty sure she hit my temple. I dropped to the floor dramatically as I sat silently holding my head. I waited a few minutes, only to hear my 3 year old laughing hysterically.
I survived. But barely.
IMG_0165
This bread was the only thing that kept me from googling "what happens if I hit my head on the temple", because we all know Youtube would pop up and THAT scene from Simon Burch would pop up, and then I would cry, and then I would call my husband and freak out, and then I would probably eat the whole loaf of bread in the corner of my closet watching the movie...crying.
Was that a run on sentence?
IMG_0179
I didn't google it thankfully, and I even shared this bread with the child that almost killed me. After all, that's what any sensible person would do...
IMG_0181
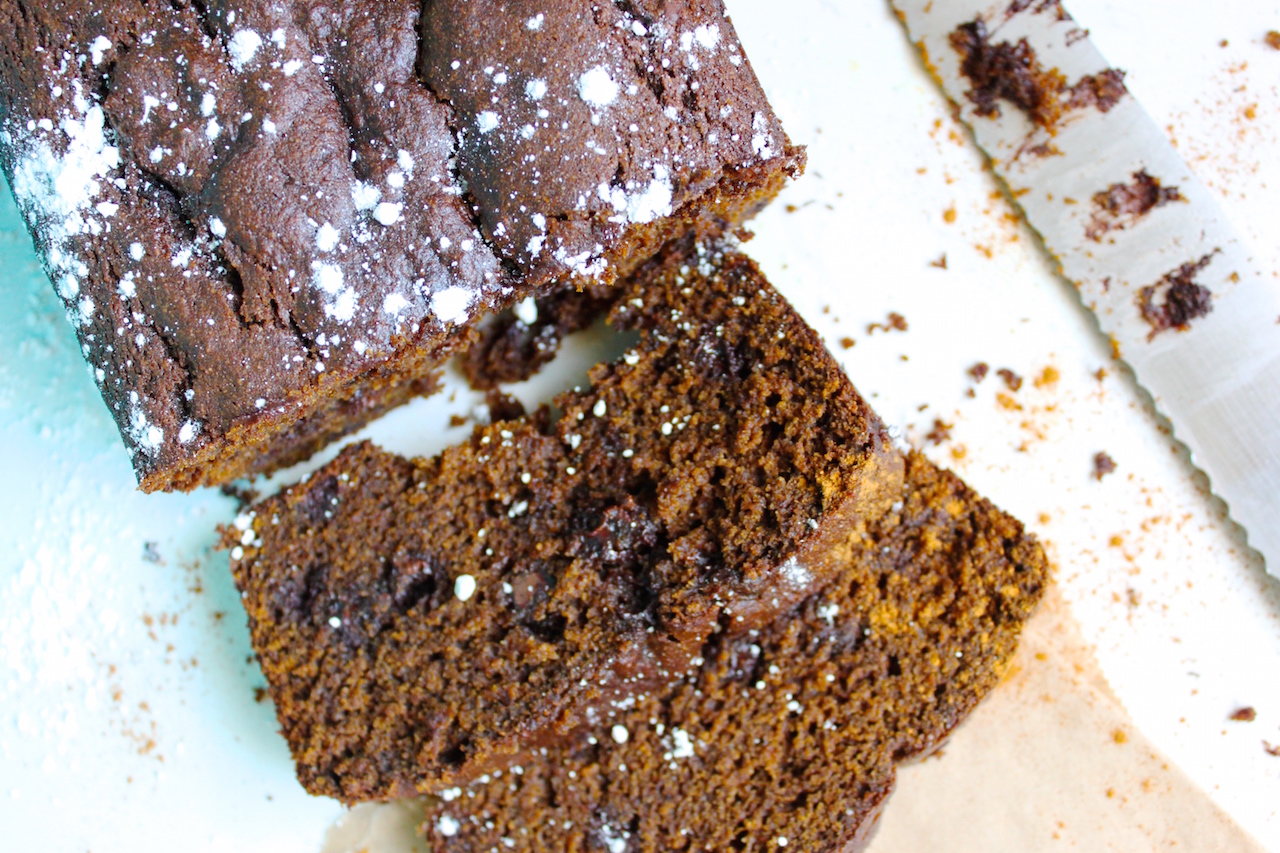
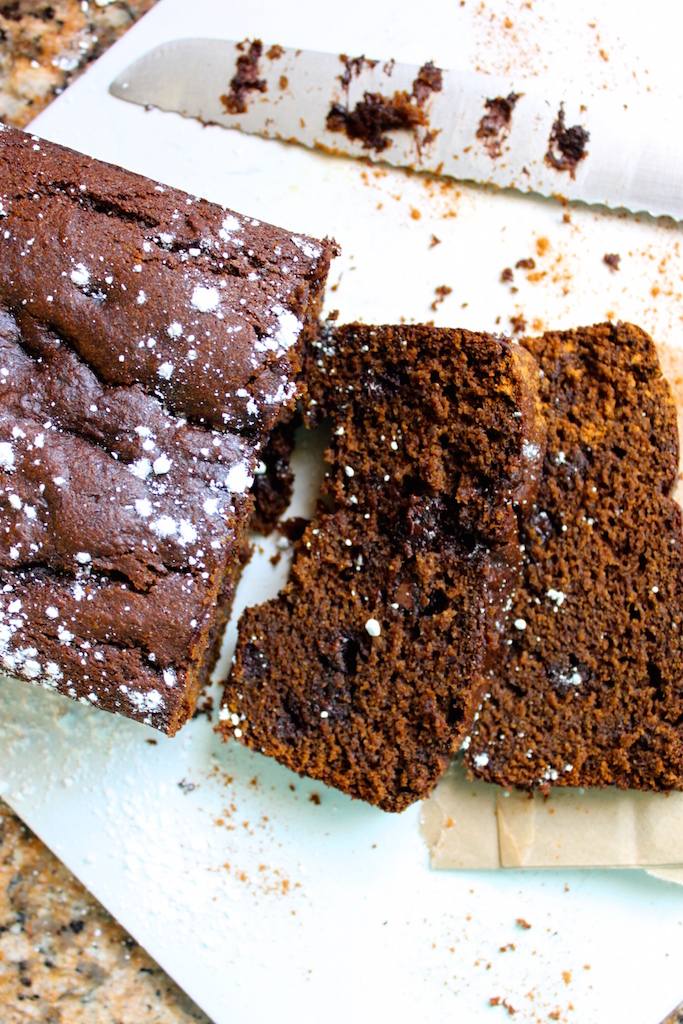
Gingerbread Pumpkin Bread
Ingredients
3 c. flour, white whole wheat or unbleached white
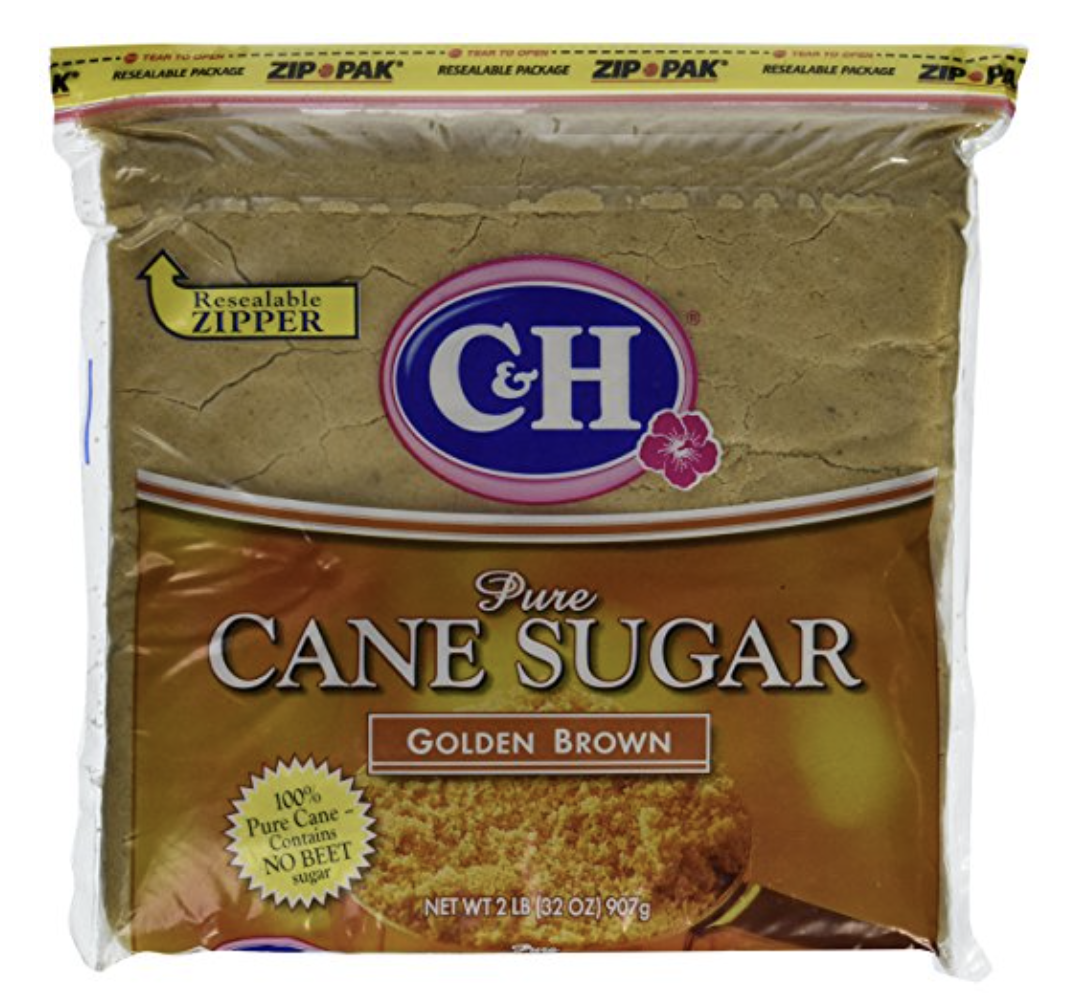
1 1/2 c. pure cane sugar OR coconut sugar
1/2 tsp. salt
2 tsp. baking soda
1/2 tsp. baking powder
2 tsp. cinnamon
1 tsp. cloves
1/2 tsp. ginger
1/2 tsp. all spice
1/4 tsp. nutmeg
1 c. melted butter OR melted coconut oil
4 eggs
2 c. pumpkin puree
1/3 c. molasses
1/3 c. water
1 TB. vanilla
2 c. chocolate chips
Instructions
Preheat oven to 350 degrees.
In a bowl, whisk together the flour, sugar, baking soda, baking powder, salt, and spices.
In a separate bowl mix together the oil/butter, eggs, pumpkin, molasses, water, and vanilla.
Add the wet to dry, and stir until combined. Fold in the chocolate chips.
Bake in 2 greased bread pans, and bake for 50-60 minutes. I usually cover the bread with a foil tent so the edges don't burn.
OR, make 24-26 cupcakes and bake for 18-25 minutes, depending on the oven.
3.3.3077
IMG_0182
IMG_0184
If you HAVE to google anything, google this bread. After all, the author is LEGIT!
Let me share with you the conversations that a household of girls might experience...
Conversation between the 5 year old and 3 year old while getting ready for school in the bathroom:
5 year old: "Is Jack going to be at school today? Don't you think he's cute?! Is he your Boooooyyyyffrriiieennndd?!!!"
3 year old: "HE'S NOT MY BOYFRIEND! We are just friends! We are JUST FRIENDS!"
5 year old: "No, he's your boyfriend. OOOOOHHH! You have a boyfriend! You have a boyfriend!"
3 year old:"(Inaudible screaming) Moooooooom! Tell Gia that Jack is just my friend. You can have boys and they can be friends, but not be boyfriends!! Mom, tell Gia!"
5 year old: "Boy friend! Boyfriend! Boyfriend! Boyfriend."
3 year old: (More inaudible screams) "AHHHHHHHHHH!!! NOOOOOOOOO!!!"
Baby: (Sitting and staring)
I'll spare you the rest of that scene.
Conversation between the 5 year old, the 3 year old, and myself after school:
5 year old: MOOOOOM! I don't have ANYTHING to wear. I have NO clothes! I just want a shirt that doesn't have a print on it, but has pretty things on it! Can I wear one of Myla's shirts?
3 year old: NOOO! Those are my clothes! (Starts crying) Don't take my clothes! You are too big and they don'ts fit you! (Yes. Don'ts)
Me: Gia, you have plenty of clean clothes hanging in your closet. Go find a shirt in there, you aren't wearing your sisters shirts. And why are you changing anyways?
5 year old: Ahhh! Why can't you just let me do what I want?! All I want to do is have a cute shirt to match this skirt!
3 year old: (Crying. Loud.) DON'TS TAKE MY SHIRTS! THOSE ARE MINE!
End scene.
Conversation with the 5 year old, 3 year old, and myself:
Me: "Girls, I made cookies! Come have one and tell me about school today."
Girls: (Grab cookies and sit down and eat)
Me: "So what did you do? What is one thing you learned?
Girls: (Eating. No response.)
Me: "Were you nice to everyone, and kind?"
3 year old: (Takes the last bite of her cookie.) " Mom, I look like you don't I?
5 year old: "No, you look like daddy."
3 year old: "NOOOOOO! I don't want to look like daddy!!"
Me: "Here, have another cookie."
Silence.
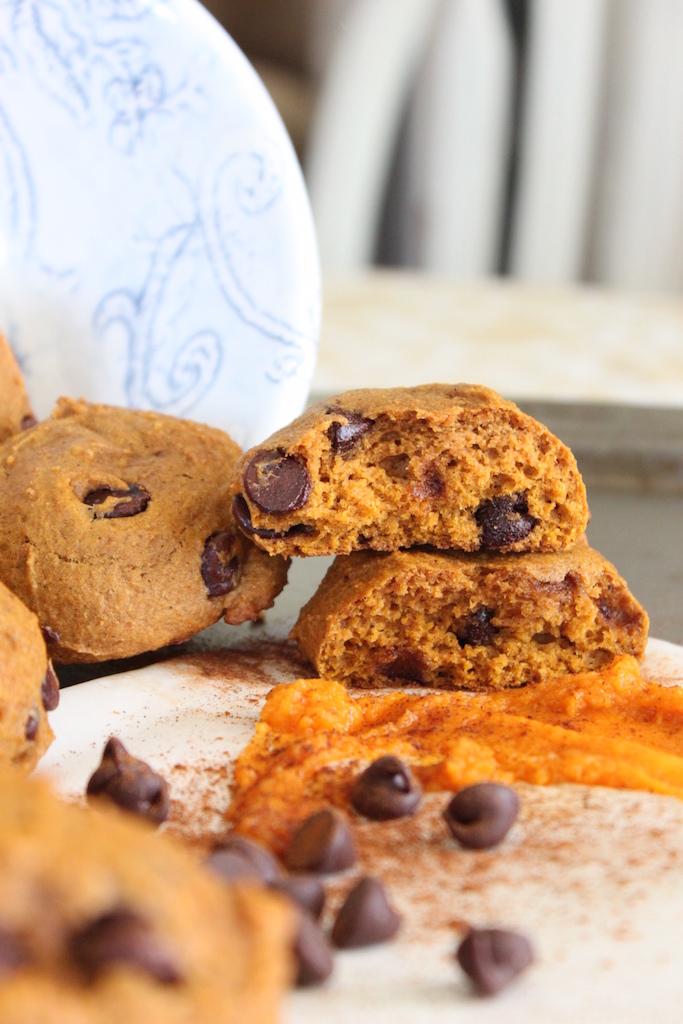
Chocolate Chip Pumpkin Cookies (Muffin Tops & Ice Cream Sandwiches)
Ingredients
1 c. pumpkin puree
1 c. coconut sugar
1/2 c. melted coconut oil
1 TB. vanilla extract
1 egg
2 cups. white whole wheat flour, oat flour, or unbleached white flour
1 1/2 tsp. pumpkin pie spice
2 tsp. baking powder
1 tsp. milk + 1 tsp. baking soda, mixed together
1 1/2 c. chocolate chips
Instructions
Preheat the oven to 375. In a bowl mix together the puree, sugar, oil, vanilla, and the egg.
In a separate bowl, whisk together the flour spices, and baking powder.
Add the dry ingredients to the wet, along with the baking soda mixture, and mix until combined.
Fold in the chocolate chips.
Prepare a baking sheet with parchment paper and using a medium cookie scoop, scoop the batter onto the baking sheet. Slightly press down the cookie a little.
Bake for about 10 minutes.
The cookies will resemble a soft pillow/muffin top texture!
You don't have to make ice cream sandwiches out of these cookies, but they are the perfect texture for them! I made the ice cream out of frozen greek yogurt ice cubes, and the recipe can be found HERE!
So what did we learn today friends?
Giving your kids cookies will shut them up.
Just kidding. I mean, kind of. Maybe for a second it will...
Conversation between my 5 year old, 3 year old and myself while tucking them into bed:
5 year old: (Squeezing my arm) "Mom, I just want to lay here and cuddle you. You are just the best mom."
3 year old: (Reaching her arms out) "Hugs. Hugs. Hugs." (Gives me a big hug) "Kiss. Kiss. Kiss" (Gives me a big kiss)
5 year old to 3 year old: (Hugging each other) "I love you little sister."
3 year old to 5 year old: (Looking at her sister, then gives her a big kiss.) "I love you."
Me: (Tears)
3 year old to 5 year old: "GIIAA, those are my pajamas!!"
Have you ever been to a Cold Stone? Do those even exist anymore?
Besides paying an arm and a leg for a scoop of ice cream, cold stone was THE place to go way back when. There was one right by my house and a lot of times all the cool kids would be like, "Let's meet at cold stone?" In my mind I was thinking, "Hell to the yea!" , but what came out was, "I mean, sure yea that's cool. If ice cream is your thing." I couldn't let people know my TRUE love of food, although the size of my JLO booty might have said otherwise...So I had to play it cool.
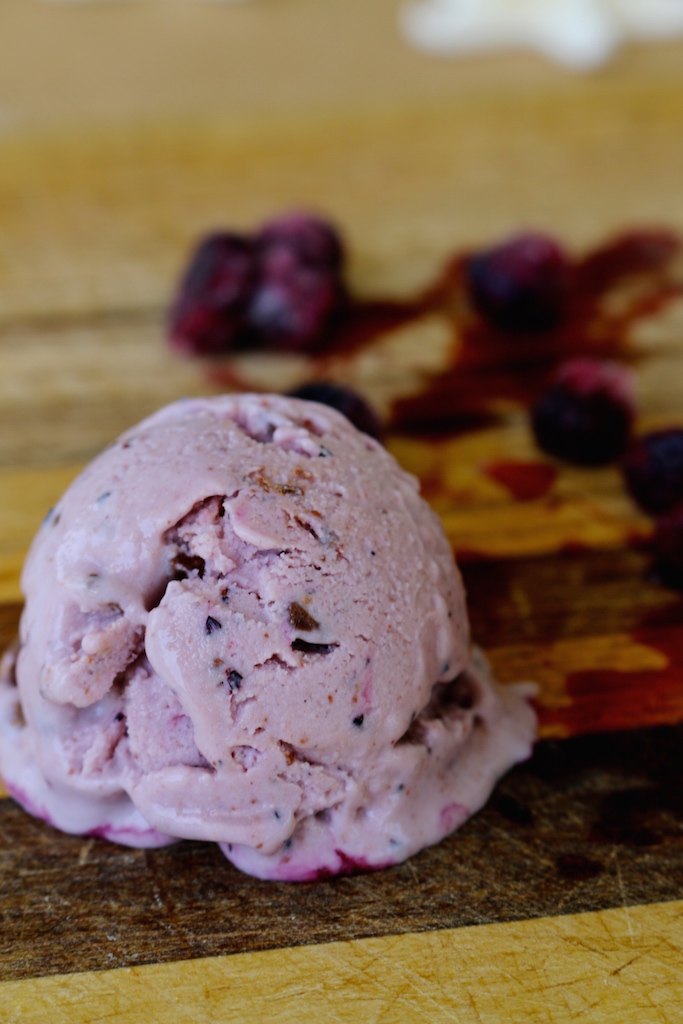
Blueberry Chocolate Chip Greek Yogurt Ice Cream
Founders Favorite.
I can still remember the taste to this day. Cake batter ice cream, soft and rich brownie chunks mixed with caramel and chocolate sauce. It's definitely a girls night/stress eating/my boyfriend just broke up with me kind of ice cream.
And to think they rejected my application to work there...
Blueberry Chocolate Chip Greek Yogurt Ice Cream
This ice cream I made doesn't taste anything like a Founders Favorite. You're welcome.
I really do want to re-create/health-ify that ice cream some day, but for now there is this Blueberry Chocolate Chip Greek Yogurt Ice Cream. Waaa Waaa. (Way to sell that one Arielle.)
It all started when Jessica from How Sweet It Is shared her Blackberry Chip Ice Cream which sounded and looked delicious! I knew I was going to make it for our Fourth of July Party! Then the night before I completely spaced and hadn't purchased any of the ingredients. What's new?
So I searched through the fridge and realized I had multiple containers of plain greek yogurt and a ton of blueberries. Light Bulb!
Blueberry Chocolate Chip Greek Yogurt Ice Cream
Blueberry Chocolate Chip Ice Cream
Ingredients
4 cups plain greek yogurt ice cream
1 1/2 c. blueberries
2 tb. water
1 TB. vanilla
3/4 c. pure cane sugar*
heaping 1/2 c. dark chocolate, finely chopped
*If I were making this for myself I would be fine with 1/2, but greek yogurt can be pretty tart so if you are making this for a crowd I would keep the sugar at 3/4 c. You could also sub a liquid sweetener to taste, but it will change the taste a little. I haven't tried this with coconut sugar, but it's a possibility.
Instructions
In a food processor, blend the blueberries and water until pureed.
using the back of a spoon, push the mixture thorough a fine strainer to remove all of the skins.
In a bowl, whisk together the yogurt, sugar, vanilla, blueberries, and chocolate.
Let cool in the fridge for about an hour.
Make your ice cream in your ice cream maker according the makers instructions.
Serve immediately or freeze in the freezer.
If it's frozen in the freezer, allow it to thaw for about 15-20 minutes before serving.
3.3.3077
Blueberry Chocolate Chip Greek Yogurt Ice Cream
Greek yogurt ice cream might be my new favorite thing! Can you imagine all of the flavor possibilities and combinations?!
Maybe, just maybe, there will be a Founders Favorite Greek Yogurt on here some day...