
Let's talk about style.
There is different looks, different themes, different era's, different patterns, different fittings, different everything..
Yet, certain people can take those different things and combine them together to create something beautiful.
That.Is.Not.Me.
I wear sweats 99.6% of my day..the other 4% is when I am in the shower.
My house looks like a preschool/messy restaurant kitchen/a messy cluttered teenage girl bedroom.
I'm really talking myself up here huh? My husband must be super lucky? What's that? You want to be my friend?
All joking aside, everything is true :)
But that's the life of a mom right?
Wrong!
You see there are SUPER cute stylish Mom's out there, who can pull themselves together, and manage to leave their amazingly decorated house looking adorable. Why can't I? I guess I am still in that phase..what's it called..Lazyness??
But I am gradually moving forward, and doing what I have to do to make my house, and myself presentable. I have gotten a lot of inspiration from blogs, (go figure lol), giving me that extra Ummph I need to get off my tushy and put effort into things.
For example, Recently I have really focused on my house. For some reason, I just FEEL better when it LOOKS better..although I cannot argue with the preschool look..
So this past weekend when Baby Boo was away, I finished a project that I had been meaning to do for a while but never had the time.
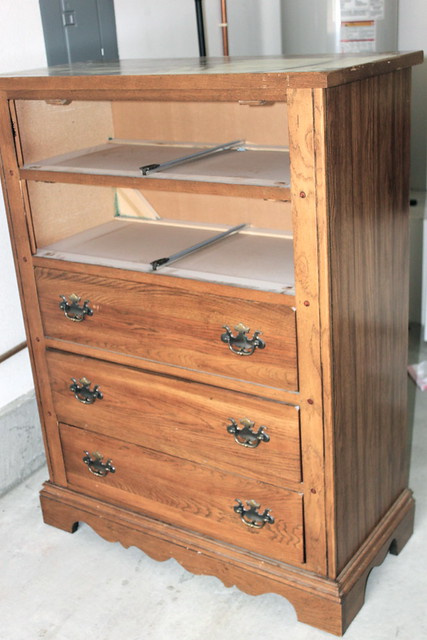
I turned this dresser that I got at a thrift store...
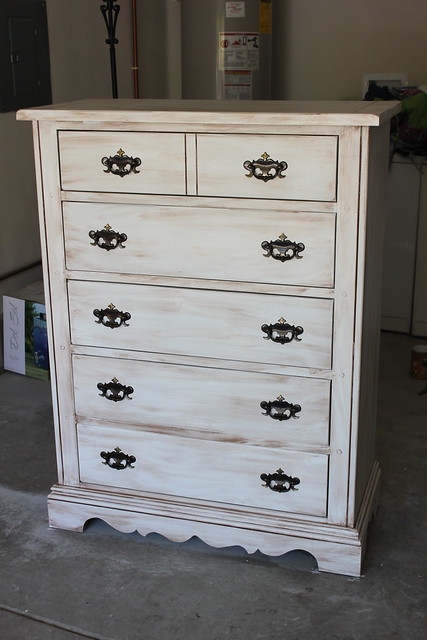
Into this:
For all I know this could be the fugliest dresser anyone has ever laid eyes on..
Work in progress folks.
Want to know how I did it?
It was actually super easy..So for those for those of you with crappy furniture lying around, don't be afraid to get creative. If I can do something like this...A caveman could do it :)
Dresser Re-Do: Drab to Diva
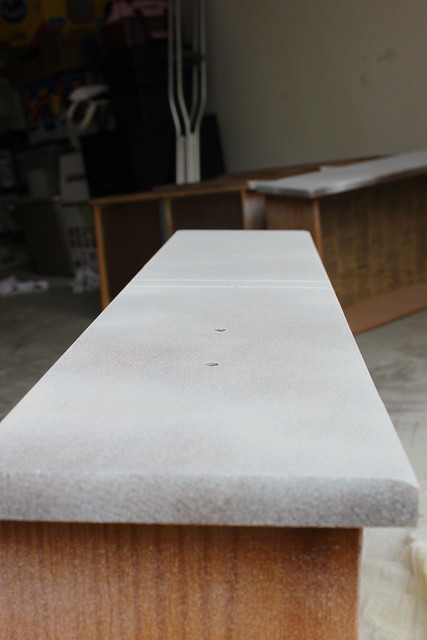
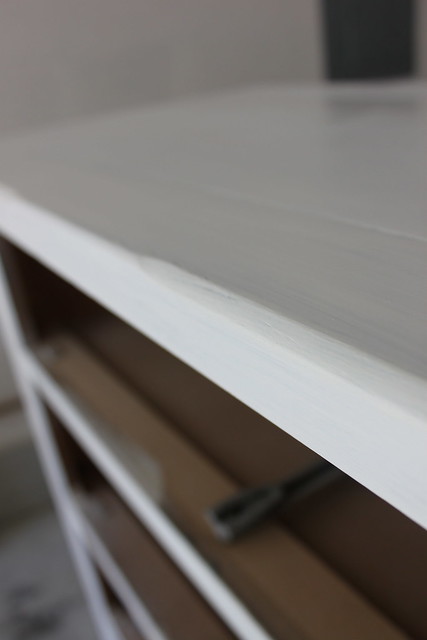
Start with a fugly dresser:
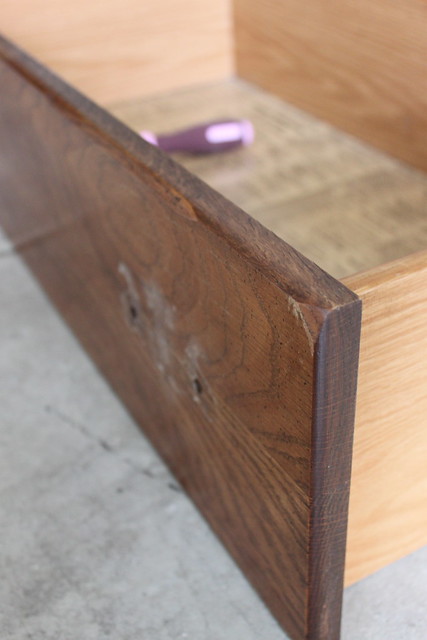
Remove all hard wear, and wipe down any dusty/dirty surfaces.
Then sand your dresser.
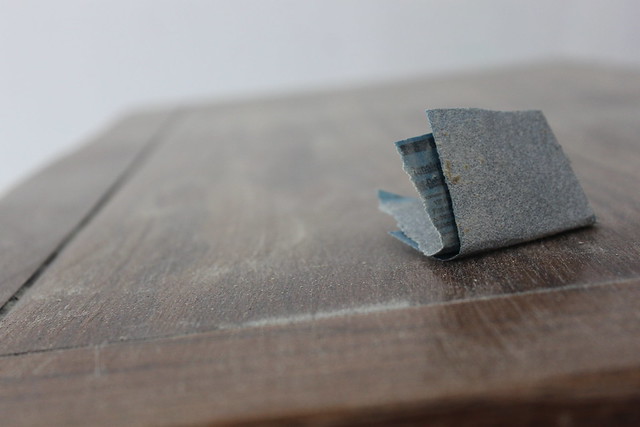
This may sound difficult, but I didn't go crazy with this step. I just sanded it down a little to give the paint something to stick too..
Next prime your furniture.
I use the brand KILZ primer Spray. It's fast and effective.
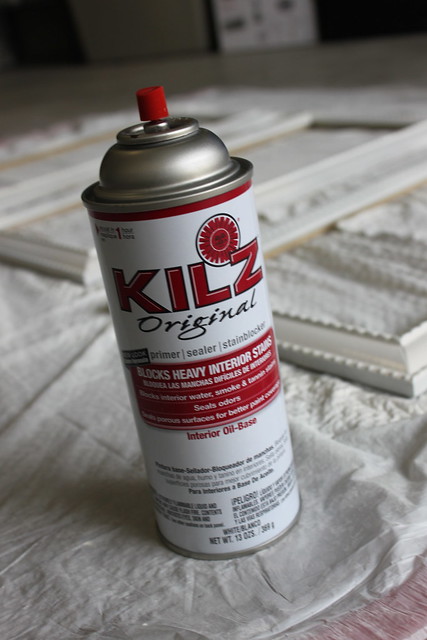
Once again I just primed the furniture lightly, (see below). Just so the paint would have something to stick to, since the look I was going for was a brownish white.
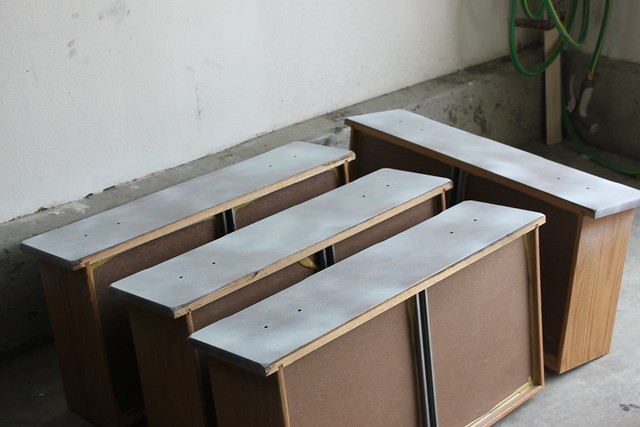
Next, paint your furniture.
I only did one coat of regular white paint. I didn't want it to be solid white, because of the look I was going for.
I love how I keep saying, "the look I was going for," like I know what I am talking about..

Next step, glaze your furniture.
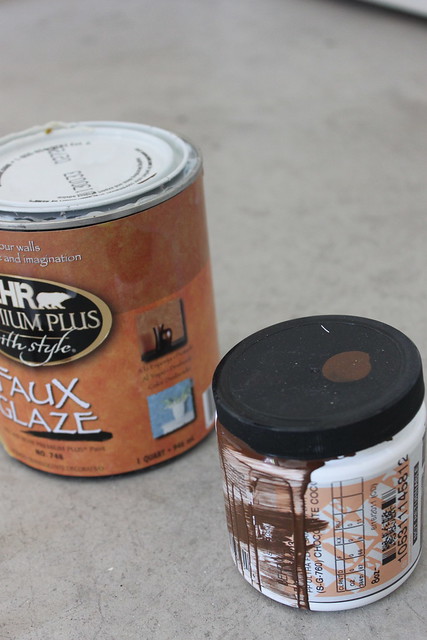
For this I used a Faux Glaze from BEHR, and a sample of brown paint.
I basically poured a little bit of glaze(which is white-ish in color) in a bowl, then added a little brown paint to it, until I got the color brown I wanted.
Then with that mixture I painted on my newly white dresser...
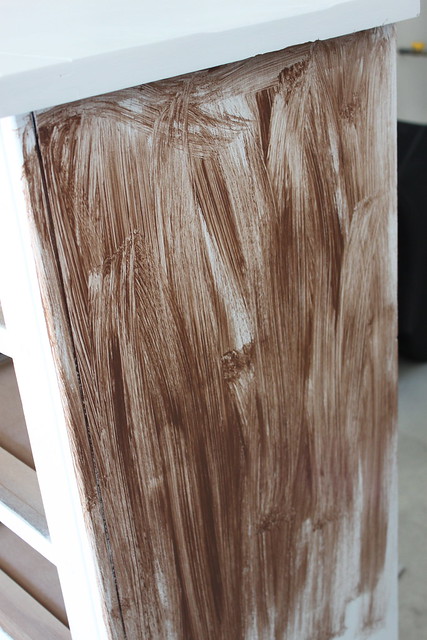
EEEEEEEKK don't worry!!
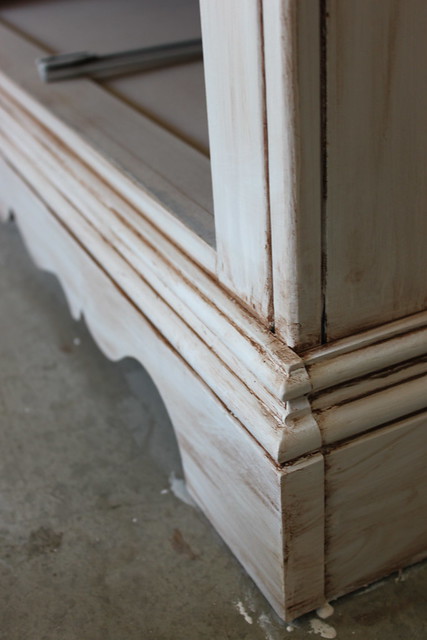
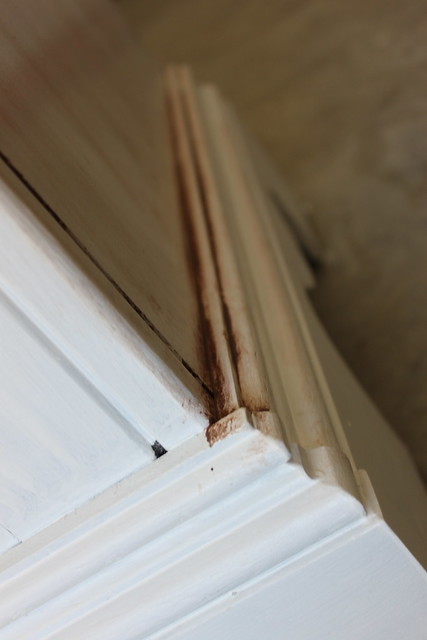
Then take a damp towel, and wipe away the brown,
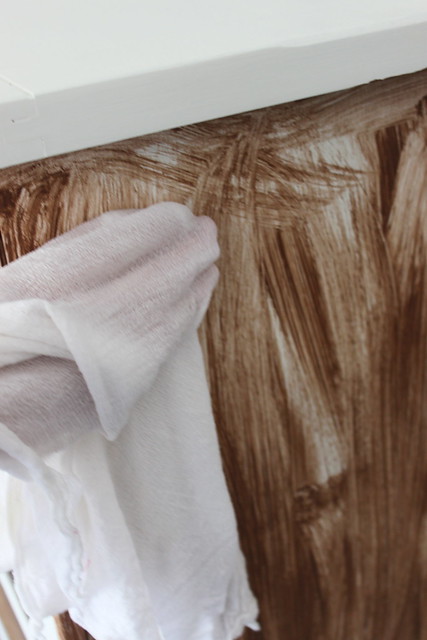
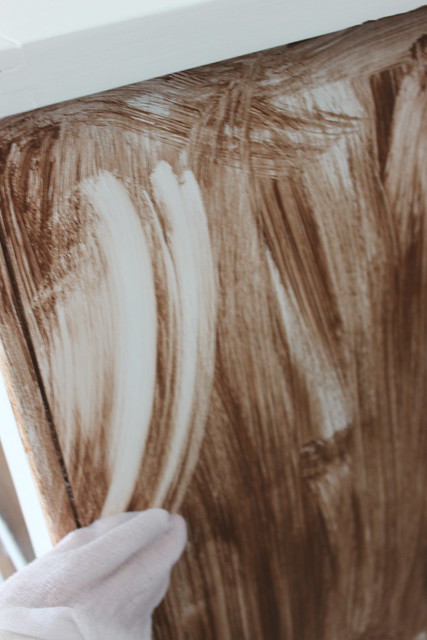
And leave a little bit behind so it's looks old.
The brown paint will also stick to the cracks, holes, and indents in the furniture making it look old and rustic...slightly dirty?
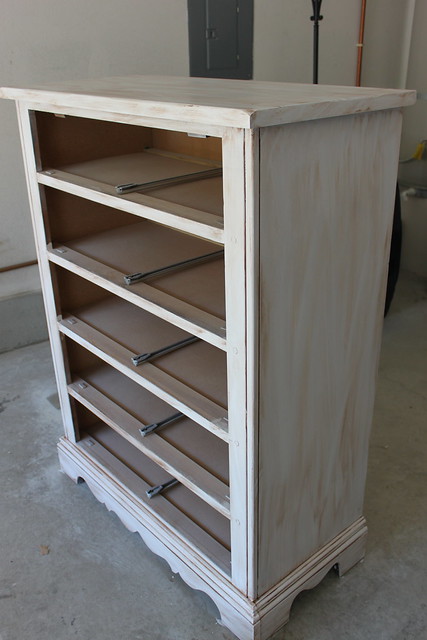
After you have finished glazing and everything is dry, put back all the hard wear on and assemble the dresser back together.
I was going to spray the handles, but I thought they went well with the rest of the dresser..
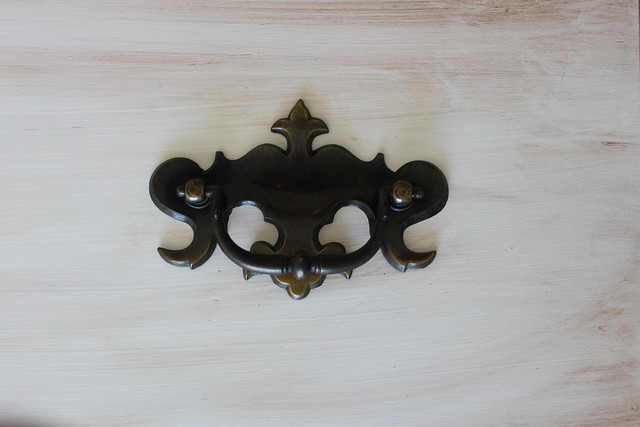
I was ALSO going to re-do the inside of the drawers, but the original lining seemed to go along too..

That, and I was too lazy..
Seems to be a re-occuring problem.
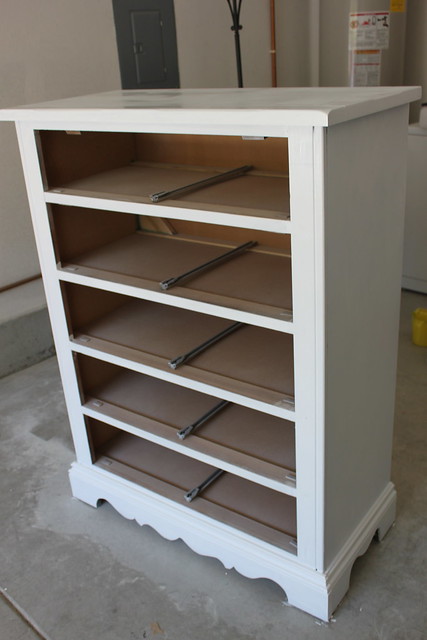
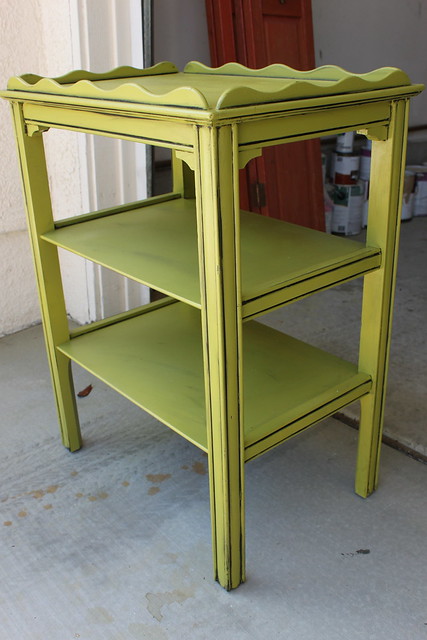
Here is the final project:

Pretty cool?
For now the plan is for this to be in Baby Boo's room. I just have to paint and redecorate in there, and then I, meaning Hubby, will bring it up.
SO at this rate, her room will be done by the time she is 45..
I seriously need to stop exaggerating.
Let's be real, maybe 14 years old?
Just a rough estimate though.
You may also remember THIS drawer from a previous post back:
I did the same thing that I did with the dresser, only using green spray paint, and I tinted the glaze black.
Oh, and I know your thinking that my smart lil brain came up with this all by my self..well, sadly no.
A MUCH MORE talented lady gave me inspiration.
Brooke from All Things Thrifty does AMAZING projects, and I am always OOing and AHHing over them. You should check her out FOR SURE :)
As for now, I am going to sit and watch Bachelorette, even though I have yet to unload the dish washer from yesterday.
Maybe because I am avoided the 67 dishes in the sink that need to go in it, or maybe because I am lazy.
I don't know..
I'm just a Diva.